I'm glad you liked the last post with the stencil tutorial...
this is quickly becoming a new addiction...
here's stencil art part 2...
there are not as many photos this time,
since the technique is the same...
but with a twist...
I had this little idea to make stenciled embellishments...
using my heart stencil, I laid it over heavy card stock...
then filled in the stencil with the embossing paste...
while it was still wet, I stamped my polka dots border stamp into the wet embossing paste...
I misted the stamp very lightly with water before stamping, to make sure it didn't stick to the paste...
make sure to clean the stamp & don't let the paste dry on the stencil or stamp...
I dried the heart, then cut it out...
because this is large, I used the distress stains to color the heart...
instead of the distress markers...
you'll see peeled paint on the top portion,
mustard seed on the center & faded jeans on the bottom...
I blotted the color to create a light wash...
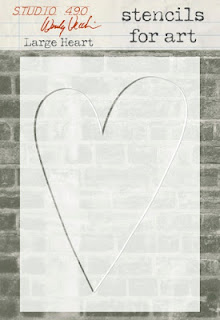
this is the heart stencil I started with...
after I dried the stains, I used french ultramarine archival to stamp this background stamp over the top & bottom portions...
and added a bit of walnut stain around the edges...
this creates a very flexible embellishment...
now the heart looks like this...
it's a 5am photo...forgive me!
here's another way to use the same flower stencil I showed in the last post...
I knew I wanted the flower to hang off the edge of the heart, so it needed to be unbreakable...
I covered a piece of my clearly for art
with vintage dictionary paper, using Glue N Seal...
(any paper will work, since it's covered completely by the paste...)
I didn't expect the embossing paste to stick to the CFA,
since it's a slippery non porous surface...
that explains covering the CFA...
then, same procedure...
apply the stencil over the CFA on the paper side...
add the paste...
dry & cut out...
then ink the petals with the distress markers...
this time my base color was mustard seed, then spiced marmalade, then rusty hinge, closest to the center...
next, I lightly painted the petals with Glue N Seal...
remember distress inks always react with water, so your brush will pick up a bit of color...
no problem...
just run it under the faucet to clean the brush,
before putting it back in the bottle...
now...
sprinkle this yummy sugary magic glitter over the flower...
any clear drying adhesive will work...
so if you have Glossy Accents or multi medium...
you'll get the same results...
now heat the flower on the CFA side & shape while it's warm......
to finish it off, I added some of tim's new paper string before I glued down the flower...
the flower is accented with
inside is a mini gear & some glaze pen dots...
here's the finished heart...
I hope you can see the awesome effect of
the new rock candy glitter...
it is so pretty....
now...I have lots of options...
I might use it on the front of a journal...
or it can be framed...
or added to a box...
or...since it's flexible...
I think I'll find a cool jar candle & glue it to the front...
hey...these would make great hostess gifts for the holidays...
and it's not too soon to get started...
they can easily be customized for any decor!
cutting the stencils out is another way to get more use from your stencils...
I can see me using this technique for lots of projects...
I bet you're wondering if this will work directly on art parts...
me too!
lol...
I HAD to try it...
and I'm happy to report...
it does!
here's the cover of a new journal,
created with my art parts small pages...
there are 6 pages in the package...
2 each of 3 style edges...
so enough to make 3 journals...
I also used the dots/stripes border stencil...
and a different flower from the flower stencil...
here's what I did, instead of making dinner...
hey...gotta help the local economy & eat out!
I used my new star knobs & bee...
these Blossom Bucket pieces will be here next month...
here's a few more tips...
this time I stamped this tiny text stamp over the flowers...
(I had the stencil in place...)
I found it easier to use the stamp unmounted...
it was easier to press & cover the petals & get a really good image...
to get a nice straight edge on the cover...
I use a strip of tim's tissue tape...
then run the black soot stain (or paint dabber) over the art part & partially over the tissue tape...
remove the tape & the edge is perfect...
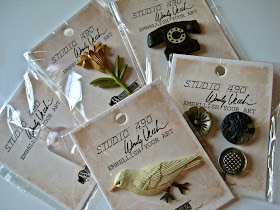
today I have some Blossom Bucket goodies to share with...
congrats to...
 Debby said...
Thank you for the tutorial! I want these new products!!! Hope they will be there in Bloomington when you teach. This looks like so much fun.

please email me with your address & we'll get these postal...
that's it for today...
talking about this stencil stuff makes me want to run to the studio to...
make art!
wendy


Wendy - another awesome idea and tutorial! thanks
ReplyDeleteCongrats! New products should be arriving in Bloomington very soon said the powers that be when I took the ATC class Saturday. Can't wait!!! Gotta have 'em!!!
ReplyDeleteI can't get over the texture and dimension the flower and heart.... LOVE em!
ReplyDeleteI played with the stencil paste yesterday ... so much fun! Can't wait to play again! http://stampwithstephanie.blogspot.com
ReplyDeleteLove that heart. . . when you said box you meant like in the mail kind of box right! LOL a girl can dream!
ReplyDeleteWendy -
ReplyDeleteBeautiful heart embellishment! Really turned out "AWESOME"! I love that flower with the yummy glitter, so sparkly. I really LOVE your journal cover. What an eye-catcher!
Elaine Allen
Congratulations Debby!
Ohhhh that heart is fantabulous!!! So this texture paste is flexible? how cool is that?! The texture paste I'm using isn't LOL
ReplyDeleteI really think the stencils are the best thing you've thought of for - well since last CHA... I love them. The flowers are fabulous and I love how you've used them.
ReplyDeleteFantastic DIY embellies! You always inspire me!
ReplyDeleteOooh, wow, hearts and flowers just my kind of things!!!!! Love it!!!
ReplyDeleteJust so need the stencils they look fantastic.
ReplyDeleteRachel
Love these tutorials.....I just have to get MORE stencils, and use them..lol...but you are giving me courage to jump in!!
ReplyDeleteLove your samples! The last one in particular took my breath away.
ReplyDeleteWow! Very cool projects and techniques here! Love everything, and now, I have to get the rock candy glitter! lol!
ReplyDeleteIs it Valentine yet?! That stuff looks yummie and interesting too. I have to give it a try. Thanks for showing how. Looks like a wedding anniversary project coming up!
ReplyDeleteFABULOUS!! I want that glitter too now.........
ReplyDeleteSo glad you created instead of making dinner!
ReplyDeleteAwesome!!!! Should have your stencils in hand in 1-2 days... yee-haw!!!!!!!!!!!!!!!!!!!!
ReplyDeleteGreat tutorial. I can't wait for all these stencils and art parts.
ReplyDeleteThanks for another tutorial. Need to send you an email! Need the new book!! Whoo Hoo!
ReplyDeleteThese stencils, (& what you do with them), look fabulous. Thanks for the tutorial.
ReplyDeleteSo many techniques! Can't keep up with them all but I can always try. Cute Blossem bucket goodies!!
ReplyDeleteYou never disappoint use. Thanks for the tutorial .
ReplyDeleteLOVE the heart and the way you used your stencil and stamps! I can't wait to try this.
ReplyDeleteThanks for the new addiction. Love your idea to use CFA what fun!
ReplyDeleteI love the texture and embellishments on the heart! Gorgeous!
ReplyDeleteSo much to learn from you and not enough hours in the day!! Love what you have done here with these two projects. Thanks for your continuing inspiration. Hugs, Buttons x
ReplyDeleteWhere and when are the stencils available my friend??
ReplyDeleteThanks Wendy for another awesome tutorial. I never thought of stamping into embossing paste!
ReplyDeleteYou make me want to play!I have to get some stencils I can tell-I've been afraid to use them-but you're making me brave!
ReplyDeleteOh what else can I possibly say that I already haven't? Fabulous!!! :-) love the tutorial and little extra tips, this will for sure come in handy. Gonna be a gorgeous journal!
ReplyDeleteCongrats to Debby!
ReplyDeleteGreat samples, all of them! I'm amazed how flexible the modeling paste is, and how nice the added texture is!
Using of different kinds of glitters and different stuff like pimply shading is really remarkable and Plastic Cards Printing
ReplyDeletea way to solve many printing problems.