here's how I got started...

here's how I got started...
a 20 minute podcast by Crazy BeYOUtiful
Showing posts with label Ranger Watermark Resist. Show all posts

Monday, October 21, 2013

one stamp...2 ways...

I like when a product can be used more than one way...

here's a fun example...

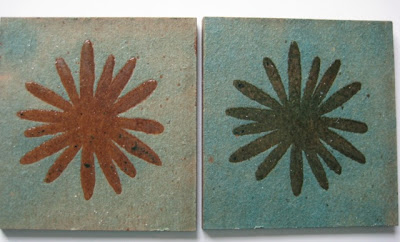
the stamp you see below is an oldie I designed about 4 years ago...

it's a flower  in set LCS019...the set name is "lower case art"...


I cut a #8 black tag down to 5 1/2 inches tall...

I used the watermark resist pad to stamp the spider (botanical art LCS 037) & the 2 large flourishes, and while the ink was wet, I sprinkled on some superfine detail embossing powder...

heat the powder to melt & create a tone on tone effect...

I added a strip of tim's new laboratorie tissue tape to the bottom of the tag...
it's perfect for the halloween theme I had in mind...


I wanted my archival ink colors to be good for everyday use...
and I wanted them to be a perfect fit for holidays...
SUCCESS! 

orange blossom makes a great pumpkin, fern green makes lovely leaves & red geranium is a great flower color & will be perfect for Christmas projects...

to make the pieces you see below...

cover a sheet of clearly for art with a vintage dictionary page...
spread a thin layer of Glue N Seal over the CFA...add the paper, brayer & dry...

you will see NO BUBBLES...
this is why I LOVE Glue N Seal for adhering paper to any surface...

now use the new (favorite) reverse dots background with fern green & stamp over a portion of the CFA...
***stamp on the paper side & dry...***

stamp over another section (paper side) with orange blossom & the reverse dots stamp...

use jet black archival to stamp the flower (just the top) over the orange area...stamp this 3 times...

ink the leaves portion of the stamp with jet black archival & stamp over the green paper...stamp 4 sets of leaves...

dry & cut out the leaves...

cut out one full flower & one with 4 sections & the last will be just the 2 middle sections...

stencil the flower with red geranium, using this flower stencil...
again on the paper side of the CFA & cut out...

heat each piece to soften the CFA...then shape each piece...

I used hot glue to assemble the pumpkin...add 3 leaves between the layers...

I also twisted a small piece of green floral wire to create the stem & stuck that between the layers...

the pieces will look like this...


ink an art parts tag topper with mustard seed distress stain & add shading to the edges with gathered twigs, on the blending tool...

I stamped the plaid background (LCS027 be inspired...make art)  with (MWAH) watering can archival...

dry...then add the cute birds rub, some glaze pen dots & an eyelet...


glue everything in place...and here's the finished tag...


the things I LOVE about this tag...

I used an old stamp in a new way...

the cool monochromatic background...

the dimension the CFA creates...

the (MWAH) archival colors...

and how quickly this came together...

hmmm...other ideas???

this same leaves/pumpkin design would make a fun TREAT BAG...

because the CFA makes sturdy pieces...the pumpkin can be added to a napkin ring for your halloween dinner/party...and used again next year...

I also like to add things like this to a jar candle for quickie hostess gift...

**************
today is a special day for us...
41 years ago I wed the love of my life...
yes...I was only 10...

a favorite memory from that day is when my parents drove me to the church...

my dad...(who was kind of emotional that day) turned around when we approached the street that the church was on & said "I don't have to turn here if you don't want me too"...

lucky lucky me! he turned!

YIKES...I NEED TO MAKE Rick A CARD...

I better go...

make art!
wendy


Thursday, December 8, 2011

stained watermark resist play...

yesterday while working on another book 6 project, I used embossing 2 different ways & I thought I'd share it here...

since I can't show the real deal yet...
I did some small sample pieces to show you the technique...

grab Ranger's Watermark Resist pad, some clear embossing powder & some of tim's distress stains...

you can also use the Perfect Medium Pad, in place of the watermark resist and achieve the same results...

and you can substitute the distress ink pads for the stains...

I chose to use UTEE for my embossing, since I was using a bold image...
but regular clear embossing powder will work too...

this is more dramatic with a bold image...
stamps will fine details won't show up as well...

but... that might be just what you need for certain projects...
so keep that in mind...

let's start...

BUT...first...

a ***WARNING***

let me just say
that once you use the distress stains on my art parts...

YOU. WILL. BE. ADDICTED...
it's a FACT! I am NOT responsible...
how did I ever live without them?

ok...NOW...let's go...

ink the stamp with the watermark resist & stamp onto a naked (UNINKED) art part...

sprinkle on the embossing powder...

use the heat tool to melt the embossing powder, until the image is completely shiny...

the photo below shows the result...


after the image cooled, I inked over the whole art part with broken china stain to get this end result...

you'll see that the embossing powder allows the natural (kraft) color of the art part to show thru...
for a 2 color effect...


for the next sample, I inked the art part with broken china stain FIRST & dried it...

make sure to dry it...
or the embossing powder will stick everywhere...

then I used the watermark resist on the stamp again, added embossing powder & blasted it with the heat tool, to melt the powder...

I added a second layer of stain over the whole art part...
and wiped the excess stain off the embossed area with a paper towel...

here's the result...
it's more of a tone on tone result...
and the background has more intense color...
because it has 2 layers of stain...


let's make this easier...
here's a side by side comparison of the 2...

same exact products, but quite different results...

this is why I LOVE INKS...
we have a million options...


and since embossing powder is basically ground up plastic...
I'm sure it's a little more technical than that!

the plastic will resist most things...
even archival ink...

I used olive archival to stamp the text stamp over the art part, then used a paper towel to remove the text from the embossed flower...


so now it looks like the text is behind the flower...
even though it was the last step...

here's a better look...

so think of the possibilities...

stamp with watermark resist over patterned paper...
that will allow the pattern to show thru under the embossed area...

stamp multiple times, using the resist pad, to create a custom background on any card stock color...

the images can be embossed or just left as a watermark, for a more subtle effect...

my favorite color combo???

for the book project I'm working on...
I clear embossed over the naked art part, then added black soot stain over the art part...

the result is an AWESOME kraft embossed (pattern) & black stained art part...

so stinkin' fun & it couldn't be easier...

ok... back to the studio...

gotta
make (MORE) art!
wendy

Thursday, January 13, 2011

a set a day...#4...

hey blog friends...
have you been shocked that there isn't a flower on every set?

here's today's offering...
set #4...

this one DOES have a flower, and it's titled...

ART COLORS LIFE...

this is another one of the large sets being released...
(11 large & 3 small sets)

and this one DOES have a flower!

OH...I already said that!
but I'm excited so I said it again...


here's MY thoughts on this set...

oh, before we start...
I got several emails about adding a section to the blog which contains these ideas...

feel free to just copy these posts & save them in a file on your computer...
or print them out for a mini hints book...
to refer to later...

OK...

the saying @ the top is a favorite...
and it fits perfectly on the large 5 1/2 inch scallop art parts trim...

I thought we needed some longer sayings for larger projects...

this coordinates with all the flower stamps...

I wanted a saying that would be good in an art journal...

or for any project involving the word...
ART...

and...this is fun...
the words SUN, ART & LIFE all fit in the memo pin opening...

so...the saying can be made into some fun custom epoxy embellishments, by using just some of the words...

I think I'll be using those 3 words...
LOTS...

THE FLOWER...
yippee!
is large...almost 4 inches tall...
I LOVE IT...

because it's solid, it can be "kissed" to any unlinked background stamp to add a subtle pattern...

Since it's bold, I like it stamped over a lighter color background stamp...

it's great for watercolor stamping...
just ink, mist and stamp on watercolor paper...

the unlinked flower can be "kissed" to an INKED background stamp for a totally different look...
and each background stamp will completely change the look of the flower...

it's different...every time you use a different background stamp...
trust me...
this is FUN!

the flower can be masked off (post it note) & the stem can be inked & used with several flowers from current sets...

it can be stamped on grunge & cut out to create dimension...

my smallest butterfly can sit on the "scroll " leaves...

I really like the "simplify" font...
it starts out kind of "fancy"...
but then gets simple...

I see it used with little stamped/cut out images (a mini house) over it...

or with leaves around...
or a flower or a butterfly sitting on the line...

I will also use it on the back of my projects, and I'll sign my name right on the line...

the LOVE saying...
is large...about 4 inches long...

I wanted a LOVE saying that was not too specific so it could be used for multiple occasions...
Valentine's day, engagements, weddings...

I see scrapbookers using this one with family photos...

it could be the title of a page with a child kissing a pet...

finally...
the giant background...
I LOVE this one too...
(go figure!)...

when stamped, it looks like vintage wallpaper...

it's nice & subtle, so it's a versatile background for lots of projects...

since it's large...
it's a good card base too...

this is one that I want to clear emboss & then ink over...

and I plan to stamp it with

I like this one inked randomly for a really vintage effect...

tada...

that's set #4...
10 more to go...

now it's time for YOUR thoughts...
talk to me...

while I...

make art
wendy