here's how I got started...

here's how I got started...
a 20 minute podcast by Crazy BeYOUtiful
Showing posts with label tim holtz remnant rubs. Show all posts

Monday, October 27, 2014

we have a new family member...


welcome to 
THE ADORABLE...
wait 'til you see...

Will Wamhoff...

Will's parents are Jackie & Steve Wamhoff...
if you're familiar with Inky Antics stamps, 
Jackie is the creative director...

stampers anonymous, inky antics, darcie's & art gone wild are all sister stamp companies...
(owned by Ted & Michelle)
so that makes Will our family!

Rick & I have been cheering for Will since we saw the first ultrasound...

after about 10 weeks of bedrest, 
yikes...
(I can't even  imagine, Jackie is AMAZING)
Jackie delivered Will last 
week on October 19th...

he was 3 pounds & 11 ounces, and he's already gaining weight & making huge progress...

if you'd like to follow Will's progress or send a note of encouragement or 
CONGRATS 
to Jackie & Steve, 
you can visit 
sometimes Jackie does the updates & sometimes...
if he's not busy playing video games, 
Will does the updates...

look how cute he is...
what a sweet face!
I love his hair!


I thought it would be fun to send them a 
"first Christmas" ornament frame...
with a place to put Will's photo...

below is another Hobby Lobby find...
it's about 3 ½  inches across...


to color the frame I inked it with red geranium archival ink & sprinkled it with red geranium embossing powder while the ink was wet...
& heated it to melt the embossing powder...

I wanted a smooth/enamel finish this time, so I added 2 more layers of embossing powder...

next, after shaking the tarnished brass distress paint, I dispensed some onto the craft sheet & used my finger to randomly add it to the frame edge...


normally at this point I would have added potting soil to age the frame...

but...
Jackie's style is not vintage & since this is for a baby, I skipped the potting soil ink...

that kept the frame bright red...

I used snow cap white pigment ink with my spatter background stamp & stamped over the frame, then dried it...

it looks like snow...


to customize the frame, I decided to add the year with remnant rubs...
they are on the front of the glass...


I used the white remnant rub to add the sentiment to the removable back portion...
this will eventually be covered by the photo,
 but it makes a better presentation to have something on the back...


next comes my FAV glue n seal...
I painted a thin layer over a sheet of (clear) clearly for art,
added the vintage dictionary page, brayered it, then gave it a quick dry...

glue n seal is THE BEST paper adhesive EVER...
there is no bubbling of the paper...
it's THE BEST 
for adhering paper to any surface...
trust me...

I used jet black archival to stamp the holly on the paper side...
(stamp & stencil in the same package)...


the coordinating stencil fits over the stamped image...
this allows inking of just the holly leaves with the mini blending tool...
I used fern green on the leaves...

you can see that the stencil masks off & protects the berry portion...


so far, it looks like this...


next, I repositioned the stencil so that the leaves are protected & the berries are ready for some ink...
I used red geranium...


I cut out the holly, then heated the CFA to soften it & then shaped the leaves...
now I have a strong embellishment that won't bend or break...

archival ink is permanent & won't fade...


 I wanted to add something over the screw eye that came on the ornament...

I found this in my stash...
it looks like some sort of hook closure button?

I used red embroidery floss to tie in onto the screw eye...
and a tiny bit of hot glue on the back to make it extra secure...


Ranger's new BLACK foam tape is ideal for adding CFA to multiple surfaces...
it adds just the perfect height & the foam has a great adhesive...
and...
it comes in BLACK
making it much less noticeable from the side...
I used it to add the holly to the frame...

here's Will's super simple finished frame...


this is a super quick project & it can be created many ways...

 I want to make a few more...
maybe without the glass?
and maybe with some dimension
 inside the frame?

I think this will make 
a cute package decoration...
for a box or a gift bag...
and it would be fun to send these instead of Christmas cards...

that's it for today!
lots to do...

enjoy your day & take time to...

make art!
wendy


Friday, September 5, 2014

make it merry...

it may be 88 outside with 95% humidity...
but I'm thinking CHRISTMAS!

here's some photos & the steps if you want to get an early start on your cards...

grab a sheet of tim's  watercolor card stock...
I cut it to 4 x 5 inches...
and a 3 x 4 gridblock...

work on the laser etched side...
you will feel the lines/grooves...

swipe the mini tumbled glass pad on the gridblock & swipe the evergreen bough just on the edges...
mist with water...


and press onto the center of the watercolor cardstock...
I like the smooth side for this...

the top is the first generation inking & the one I'll use today...

there was still enough ink leftover to create a lighter second generation for later play...


stamp the tree using leaf green, fern green & tree branch...
I added the fern green to the tips of the branches...


next, stamp the sentiment with jet black archival in the lower right corner...


stencil the small tree using fern green archival & the mini blending tool...


and now it looks like this...


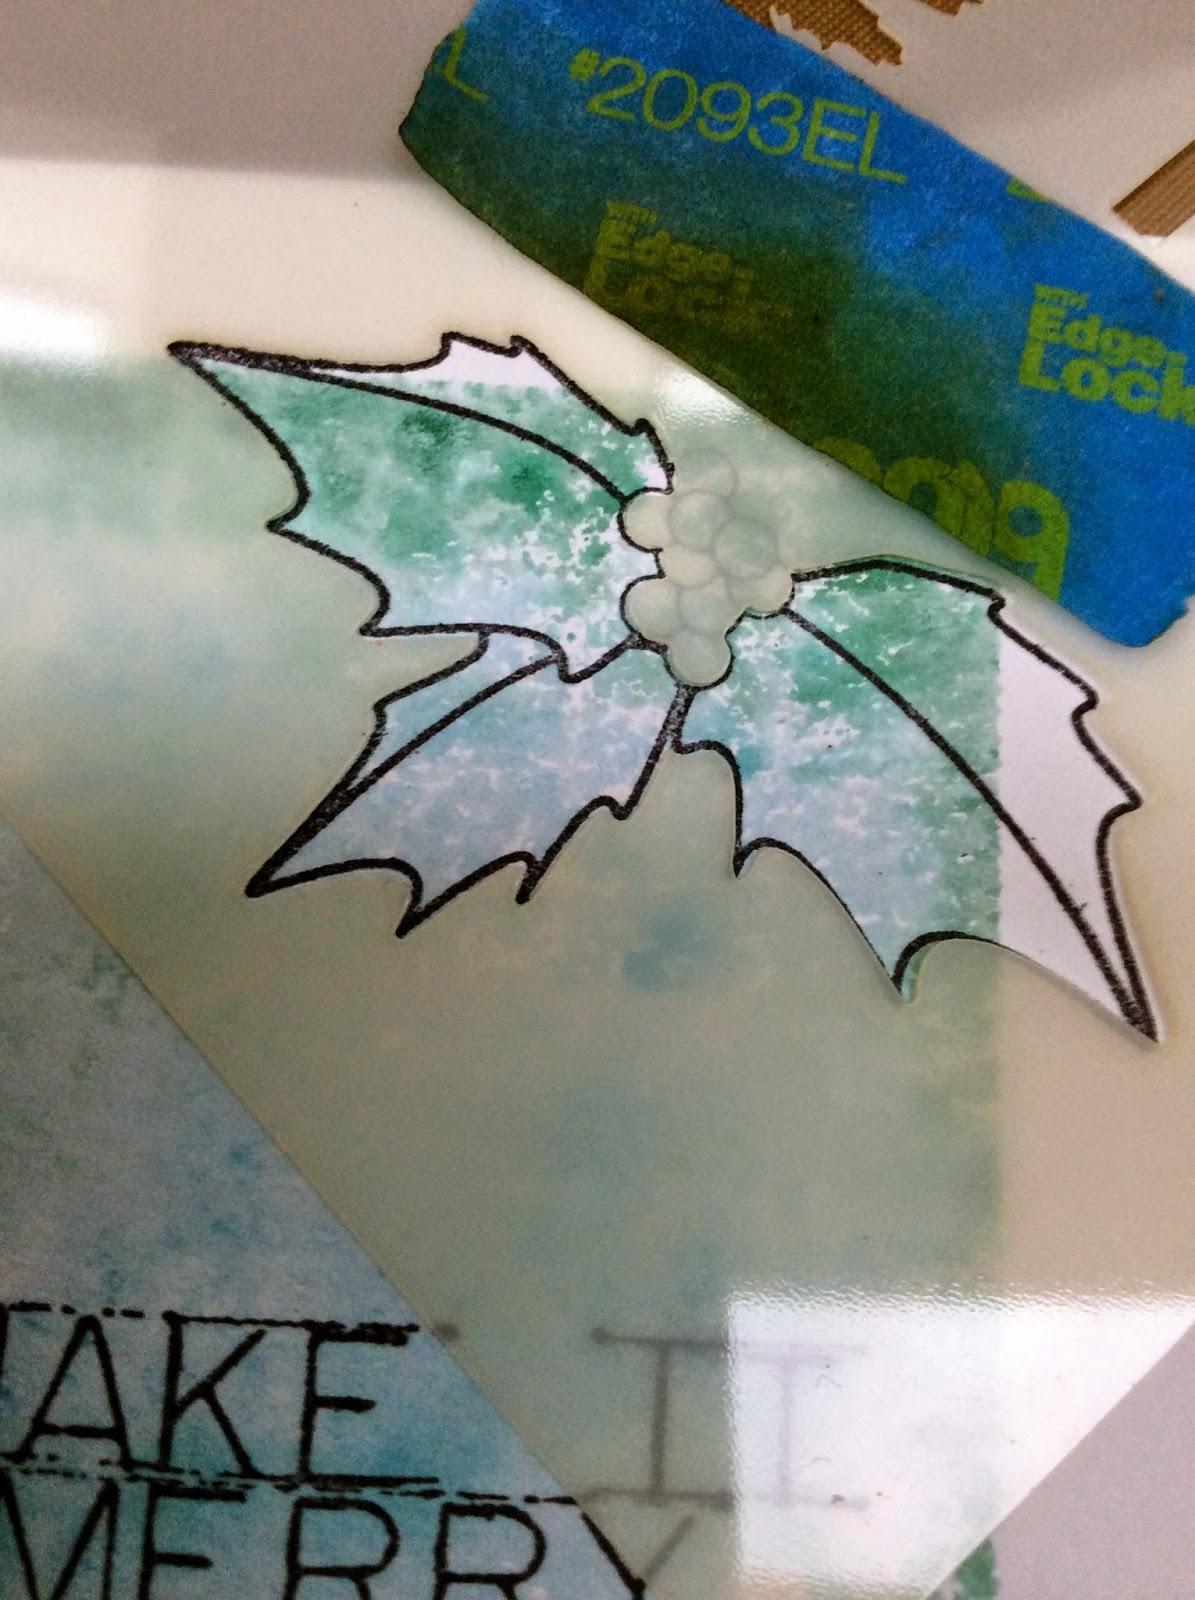
use jet black to stamp the holly in the top right corner...


place the coordinating SiSi stencil over the leaves and ink with leaf green & fern green...


now the holly leaves look like this...


replace the stencil over the berries & ink with carnation red...


so far we have this...


swipe the iced spruce marker onto the craft sheet & use the detailer water brush to add a shadow under the holly...


grab a black fude ball pen & doodle around the inked background to add definition & create a frame...


replace the stencil over the holly leaves & use the mini mesh stamp with watering can archival to add the pattern to the leaves...
the mini mesh is one of the 9 squares from the large collage background stamp...


the leaves look like this after being stamped...

use tumbled glass to add shading to the edge...


use watering can to stencil the yikes stripes inside the frame...


to add some tiny inky dots, swipe the iced spruce marker on the craft sheet, pick up the color with the detailer water brush & tap over the card...
you can also use the marker spritzer to add the little dots of color...
 

the dots are a very small detail...but they do add interest & they help to unify the card...

 add more doodling...


use jet black to stencil the large star...


 add 3 x's with the tiny attacher...
 the photo shows test driving the card to see if I want to add it to a green card or black...
99% of the time black wins...
shocking!


I added Ranger's new adhesive foam tape to the back before adding it to the black card...
super convenient & it sticks very well...
and it's BLACK!


now replace the stencil & add translucent embossing paste over just the berries & set it aside to dry...

the paste goes on cloudy...


and dries to create nice clear raised shiny berries...


to finish off the big tree, I added a remnant rub and also a DEC25 remnant rub on top of my sentiment...

here's the finished card...
ahhh...that was FUN!


did you notice that no brown was used?

as a side note...

NOTE TO SELF...

always double check before posting...

autocorrect changes FUDE BALL to

RUDE BALL...

that made me laugh...

have a great weekend...

I hope you have some time to...

make art!
wendy


Tuesday, May 27, 2014

repurposing remnant rub inserts...

if you're a frequent blog reader, you'll know that I hate to waste stuff...

especially art supplies...

yesterday was a "full on" kit making day for upcoming classes in Illinois, Texas and North Carolina...

while making the kits, we opened 300 of tim's remnant rubs...
and ended up with LOTS of the inserts that come inside the package...

when you look at them, they're BROWN & have a great graphic design on them...

the card stock-ish material is very sturdy...with a slick surface...

I had saved the inserts in the past, thinking I'd use them for small art journal pages...
and I plan to die cut tags from them...

that hasn't happened...YET......

so with this giant stack looking at me...

I had an idea...


I used them with a #2 circles die from Sizzix ...
I've had it for quite a while...

and I just spotted this size set of circles...

and this set looks great too!
note to self...place order...

I cut the #2 for each student in class...

the slick surface makes them re-usable many times...
they're not actually waterproof...but more like water/ink resistant...

they'll give you plenty of uses & still be durable...

repurposing makes me happy...


the other thing that I LOVE to do, is to find different  ways to use/combine products...

and this explains why I chose to die cut circles...

this next photo shows how to change my large sunburst stencil...
into...


a smaller funky sun...

lay the stencil in place, then place the die cut insert over the stencil & add ink (dandelion archival) with the new mini blending tool...
super simple...


here's the result...a smaller *off center* sun...
with a stenciled (carnation red) star center...


using the same process, you can create any size flower with the sunburst stencil...

just change the size of the circle you overlay...

you can also position the die cut insert so that the center of the stencil is actually in the center of the flower...

this flower was stenciled with cornflower blue archival...

I think off set makes it unique...& really changes the look of the original stencil...


I'll be using this circle die cut to stamp thru...

and I'll use it with other stencils...

like the checkmate, yikes stripes and add a stencil to create cool patterned polka dots on backgrounds...

this same idea will work well with the layered flower stencil to create smaller striped flowers or dots & totally transform the layered flower stencil...

you can also spread embossing paste thru the die cut inserts...

so think about all the dies you have...
many of them can be made into stencils at NO COST, by repurposing the inserts from tim's idea-ology products!

now I have all those circles that fell out of the insert after cutting...

hmmm...they make great masks, or can be glued to a surface to create a polka dot textured base for any art journal page...card, or layout...

or I can cut them in half to create a scallop border...

LOTS of fun possibilities to think about, when you

make art!
wendy

ps...If you'd like to leave a comment with YOUR idea, that would be great...
sharing ideas is wonderful...

ps again...who knows...there may even be a random giveaway, since I haven't done one in a bit...
just saying'...


Tuesday, November 26, 2013

a quick art journal share and THE WINNER...

I wanted to pop in for a quickie hello…

I am TOTALLY flipping ADDICTED 
to this larger art journal size…

OMG…seriously…
I'm up at 4:30am…too excited to sleep…

I LOVE new stuff…don't we all?

hello new shoes…
(I couldn't pass them up, sorry Rick)…
onlineshoes.com is EVIL...

but…since I started this journal I am hooking up with tons of my favorite older stamps
I'm using them in new ways &  refreshing them with new stamps, inks, stencils, tim's remnant rubs & tissue tapes

I'm keeping these pages pretty flat, so that's been a challenge, but I'm loving it…it blows the cobwebs out & it makes me think about options & possibilities...
all the products listed above are perfect for adding detail, but not bulk...

I'm going back to some basics too…
lots of masking
so simple, yet so effective…
and perfect for art journals...

SHE is stamped on CFA that's covered with vintage text…
same with the flowers…

I do believe that orange blossom archival coordinates with everything...

the clearly for art (CFA) adds just a bit of dimension & I like that it's simple to cut out the stamped image or die cut whatever you need…

I have completed 10 LARGE pages since my last post…

I told you…ADDICTED!

I have always really LOVED mini, but this large size
has stolen my heart...

here's one of the 10...


this page was really fun & is another mixed media page…

and speaking of FUN…

my friend Paula Cheney has a GREAT tutorial up on her blog…

she shows how to make fabulous gift tags, using my translucent embossing paste, tim's stencil & dry stickles platinum glitter

these could easily be mass produced, to make your gifts extra special...

leave her some LOVE & tell her HI from me!

time for the drumroll...

CONGRATS!

I have a new stamp set headed to…


Blogger Claudine Criner said...
It was so fun learning all those random facts a about you Wendy, my husband has no sense of direction either, we lived in Virginia for four years and he still didn't know how to get to the mall. Lol
Thanks again for the chance to win some stamps, I absolutely love your journal page.
November 22, 2013 at 3:34 PM
 Delete


Claudine, please email me with your shipping info…

if I don't see you before Thursday…

have a very happy Thanksgiving!
it's my understanding that desserts have no calories on holidays…
I THINK that's what I was told...

now...guess where I'm headed…

yes…back to the studio 

to…

make (large page) art!
wendy
ps...the BEARS suck…BIG TIME!
uggg...