here's how I got started...

here's how I got started...
a 20 minute podcast by Crazy BeYOUtiful
Showing posts with label Fiskars. Show all posts

Monday, August 18, 2008

This TOTALLY blew me away!!


You HAVE to watch this...


Patti Behan, Ranger's Marketing Co-ordinator, made a wonderful You-Tube video using studio 490 stamps & a new fun technique. The technique combines Ranger's new Snow Cap White pigment ink and my favorite distress inks. These 2 inks can be used together to create a very fun pastel effect. Use the white pigment & any color of distress ink...They all work. Even the Black Soot!! And...Vintage Photo is SOOOOO cool for backgrounds.
Stamp in the white, dry with a heat tool, apply the distress ink & watch the magic happen. TRY IT!!


Patti also had some GREAT tips to share. I had no clue why I would need the Fiskars Stamp press. She explains that. She also has a GREAT idea for the project sheet that comes with each studio 490 stamp set.


And...I was REALLY impressed that Patti used the poinsettia stamp...NOT as a poinsettia...but as an every day flower. I was wondering if anyone would SEE the possibility there. PATTI DID!! You can use any color and it works for any occassion.
That's Patti's card @ the top of the post.


OK...get going...check it out on Patti's blog. Let us know what you think!
THANKS again PATTI!!!
GREAT JOB!
wendy


Thursday, May 15, 2008

THANK YOU SOOOOOO MUCH...

for all the sweet comments, emails, calls, good wishes & prayers. He's not allowed to read...so I read each & every message to him. From both of us...THANKS!!!!!

So far...so good. He seems to be doing well, but we should know more tomorrow after his MD visit. The results are not known immediately, but his surgeon did say that he was pleased with how the procedure went.

So for now...he's only allowed to lay on his right side or sit with his head tilted to the right, to keep the air bubble in place. That keeps pressure on the retina which in turn helps to keep pressure on the repair site. So...nothing but TV is allowed. No walking...no Dyson pushing...

On a funny note...(we always have to laugh, to ease the stress)...when we got home he just knew that he'd be much better if I went & got him 3...yes 3...creme horns. So believe me...that's exactly what I did!

On to the art stuff...

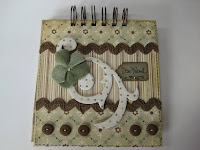
This is another Maya Road card for the stationary show.
The base is 2 pages from the Dinner Break Book & it's put together with the Bind It All. The corners are not round...I think I made a mistake & just cut off the ugly part~! TRUE confession time...

The scroll, ribbon, buttons & yummy velvet sparkle blossom are all Maya Road.


The inside. There's that Fiskar's punch again. I'm loving it!


Here's a closer look @ the ribbon slide detail. A thin strip of coordinating cardstock was just what I needed. A button on top added some more dimension.


And the back. The chipboard circle is from the foundations tin and the stamp is from the Signed Sealed & Delivered stamp set.

OOPS...one more thing. The paper is Paper Loft.

Ok...time to go check him again...

Thanks again!
wendy


Friday, May 2, 2008

Leave it to WEAVER and...read all about it...


Remember that scallop Fiskars punch from a few weeks ago?? Here's another one that I love. I got this guy @ Absolutely Everything, in Boston. Fiskars named this one...Leave it to weaver. Makes me laugh!

You can easily thread ribbon or cardstock thru the perfect holes to create a custom border. Another option is to weave thin strips of coordinating colors, instead of just using one larger strip.

The card below is an example of how I used it and added it to the scallop punched edge. Once again, just what I like...easy & FUN.


Read all about it...

Today @ 10am I am doing an interview with a newspaper (Ottawa Times) to talk about my art. It should be fun introducing someone to this art form. I better run & make sure that my studio is in tip top shape.

Thanks for visiting.
Hope your weekend is the best ever.
wendy

Monday, April 28, 2008

Up & running .........plus a few fragment tips...

WOOHOO!

Maya Road's new web site is up & running.

Here's a summary of what you can find there. I stole this info from Deb's blog...

1) Store Locator - If you need to find a LSS who carry Maya Road goods, checkout our new store locator. You can also see all of the online stores who stock Maya Road goodies.

2) Order Maya Road Goodies from the Site - If you cannot find our products are your LSS, you can buy it from our network of LSSs and online stores straight from our site. That's right! Just place an order from our site. Your closest local store will fill the order for you! And then you know just where to go to pick up more goodies.

3) Creative Corner - Our Design Team has outdone themselves with the Creative Corner! You will see great new ideas each week from our awesome team.

4) Templates and Images - Get templates and images for all of our products. We have updated it all for you on our new site. Just print out the outlines from our site and use them for your next project!

Make sure to check out the templates Deb has there for us to download. It's a great service for all to enjoy.

And in other news...

Maya Road is exhibiting @ the New York Stationary show in May, so I've been working on my assignments for them. I've been playing more with fragments & want to pass along these tips. Sorry...can't show photos of the Maya Road/fragments project yet...top secret stuff. I'd be in BIG trouble...

Anyway...a few fragment tips...

1. Fragments can be stamped on with Staz-On. If the image isn't perfect, if can be removed with Ranger's blending solution or rubbing alcohol. Then, just start over...

2. Rub-ons are perfect for fragments. Put some under the fragment & some ON the fragment to create dimension.

3. Glaze pens (Sakura) and Ranger's Inkssentials new opaque white pen are great for adding dots/doodles to the fragments.

4. Glossy Accents is the adhesive of choice for adhering paper, metal, buttons & for adhering the fragment to your project.

5. If you're messy like me and get some of the Glossy Accents on the top of your fragments, it can be removed with blending solution or rubbing alcohol. A Q-Tip works great on the small area.

6. If you aren't happy with the paper you adhered to the fragment, just soak it in some water & dishsoap...they come out like brand new. Guess how I know that...

7. You can stamp on the paper before adhering the fragment.

8. The Crop-a dile does not work. Tim recommends a drill press or the Fiskars hand drill.

9. FRAGMENTS ARE FUN!!

It's actually SNOWING here on our nice green grass.

WHAT??? April 28th? What gives??? Will we ever see spring in Illinois?????

Enjoy your day! I'll be here, with the FURNACE ON........geez....
wendy
ps...one more thing. We are NOT receiving email AGAIN. HUGHESNET, our satellite service did an upgrade over the weekend, which was supposed to be finished @ 7am on April 27th. Yep...YESTERDAY & STILL no email 27 hours later... I called & they SUGGESTED that I be PATIENT. Interesting...I hope they are PATIENT if I don't send them a check.

Please hurry HUGHESNET...I NEED to talk to my friends!

Wednesday, April 9, 2008

Small scallops, large scallops & a stamp...

Sometimes I'm a CHEAP date...sometimes...NOT!

Yesterday (drawers)...NOT, but today I am!

***ENABLER ALERT***

Here's what I got for $20.00... (no association with these folks..yada, yada, yada)...just passing on some cool finds.


I LOVE this punch. It makes PERFECT small scallop borders. The guide makes it simple. Well done FISKARS!

And for larger scallops...these cuties from Bazzill. These are great...no more cutting up their 12 x 12 sheets, just for the edge! THANKS BAZZILL!


And I HAD to get this the moment I saw it...


This is from Hampton Art. It makes me laugh.

Don't forget about the giveaway on Friday! One simple comment is all it will take to win...the...oops...can't say!
wendy

Thursday, October 11, 2007

Ready to roll...


Good morning!!!...You saw the door prize for Saturdays class a few days ago. Here's the actual class I'm teaching for the holiday event. The LSS owner asked for a simple holiday project, on a canvas, that would take 2 hours or less. Sign-ups are great, so I think they liked it!!

I spent yesterday getting the kits all cut & assembled. Todays ingredients are...
Paper from Bo Bunny
Heart punch from Fiskars...sure saves the hands when you're cutting a bunch!
Chipboard heart from Hero Arts
I cut the letters with the Cricut
The tree punch is from Carl...sorry can't find the link. I must need more coffee!

So...when Saturday gets here...I'm READY TO ROLL!!

Have a good one!!
Wendy