
here's how I got started...

here's how I got started...
a 20 minute podcast by Crazy BeYOUtiful
Showing posts with label clicker cutts. Show all posts

Monday, July 29, 2013

CHA was a blast!

I had so much fun at CHA...

after MONTHS of planning...

it's GREAT to finally share new products & new art samples...

it's GREAT to visit with friends...

it's GREAT to spend time with people who "GET" it...
and want to know every juicy detail on how something was created...

A MILLION thanks to everyone who came to watch demos, ask questions, film videos & share the excitement...

this CHA was really extra special for me...
Ranger signature designer...
I'm still pinching myself...

like the title says...it was a BLAST!

I demoed my new archivals in the Ranger booth and at the Stampers Anonymous booth I showed new stamps, stencils, embossing pastes & art parts...
it's a thrill that everything works well together, exactly as planned...

I always wonder which stamp set or art parts package will be THE favorite...

the individual background stamps definitely generated lots of excitement...
I heard loud & clear that you have been waiting for them!  cool!
makes me happy!

******************
I've had so many people ask how my new archival inks got designed...

here's a quickie funny story...

I told the Ranger chemist what colors I wanted, then patiently waited for them to arrive here for approval...

I lied...
(patient is NOT a word in my vocabulary)...

the day the box was delivered, Rick was grinning from ear to ear when he brought it in...

he grabbed a knife & said...

"I can not wait to see your name on the label"...

when he pulled them out, I saw a huge look of disappointment on his face...

as I was walking over to have a look, I was thinking...
OMG...are they ugly?

but here's what I saw...
lol...


and a closer look...

he now calls me...

EXPERIMENTAL!


the inks turned out FABULOUS and I'm 110% pleased with the colors...

we still laugh about the first label...
and I'll keep the "experimental" pads forever...

************

I have a TO*DO list that's a mile long & it needs to be finished before I head off to INK ABOUT IT in Westford, Mass...

but I HAD to take some time yesterday to make a quickie tag, using tim's new distress glitter...

I was wondering how my clearly for art clicker cutts flowers would look covered with the glitter...

I used the clear flowers for this sample, but I want to try the black flowers with just a random sprinkling of vintage photo glitter...or tarnished brass...I NEED more hours in the day!

anyway...

the tag background was created with wild honey, faded jeans & scattered straw distress inks...

I used my new A to Z background stamp with cornflower blue archival...

then stamped over the whole background with water, using my vintage mesh background... 

you'll see that the water reacts with the distress, but the archival is permanent, crisp & clear & unaffected by the water...

I used fern green archival with my new reverse polkadot background to add borders at the top & bottom of the tag...

I like jet black archival for my sentiment...it pops...

the bird was stenciled with cornflower blue archival...

I covered my new art parts stem/leaves with Glossy Accents, then shabby shutters & peeled paint distress glitter...

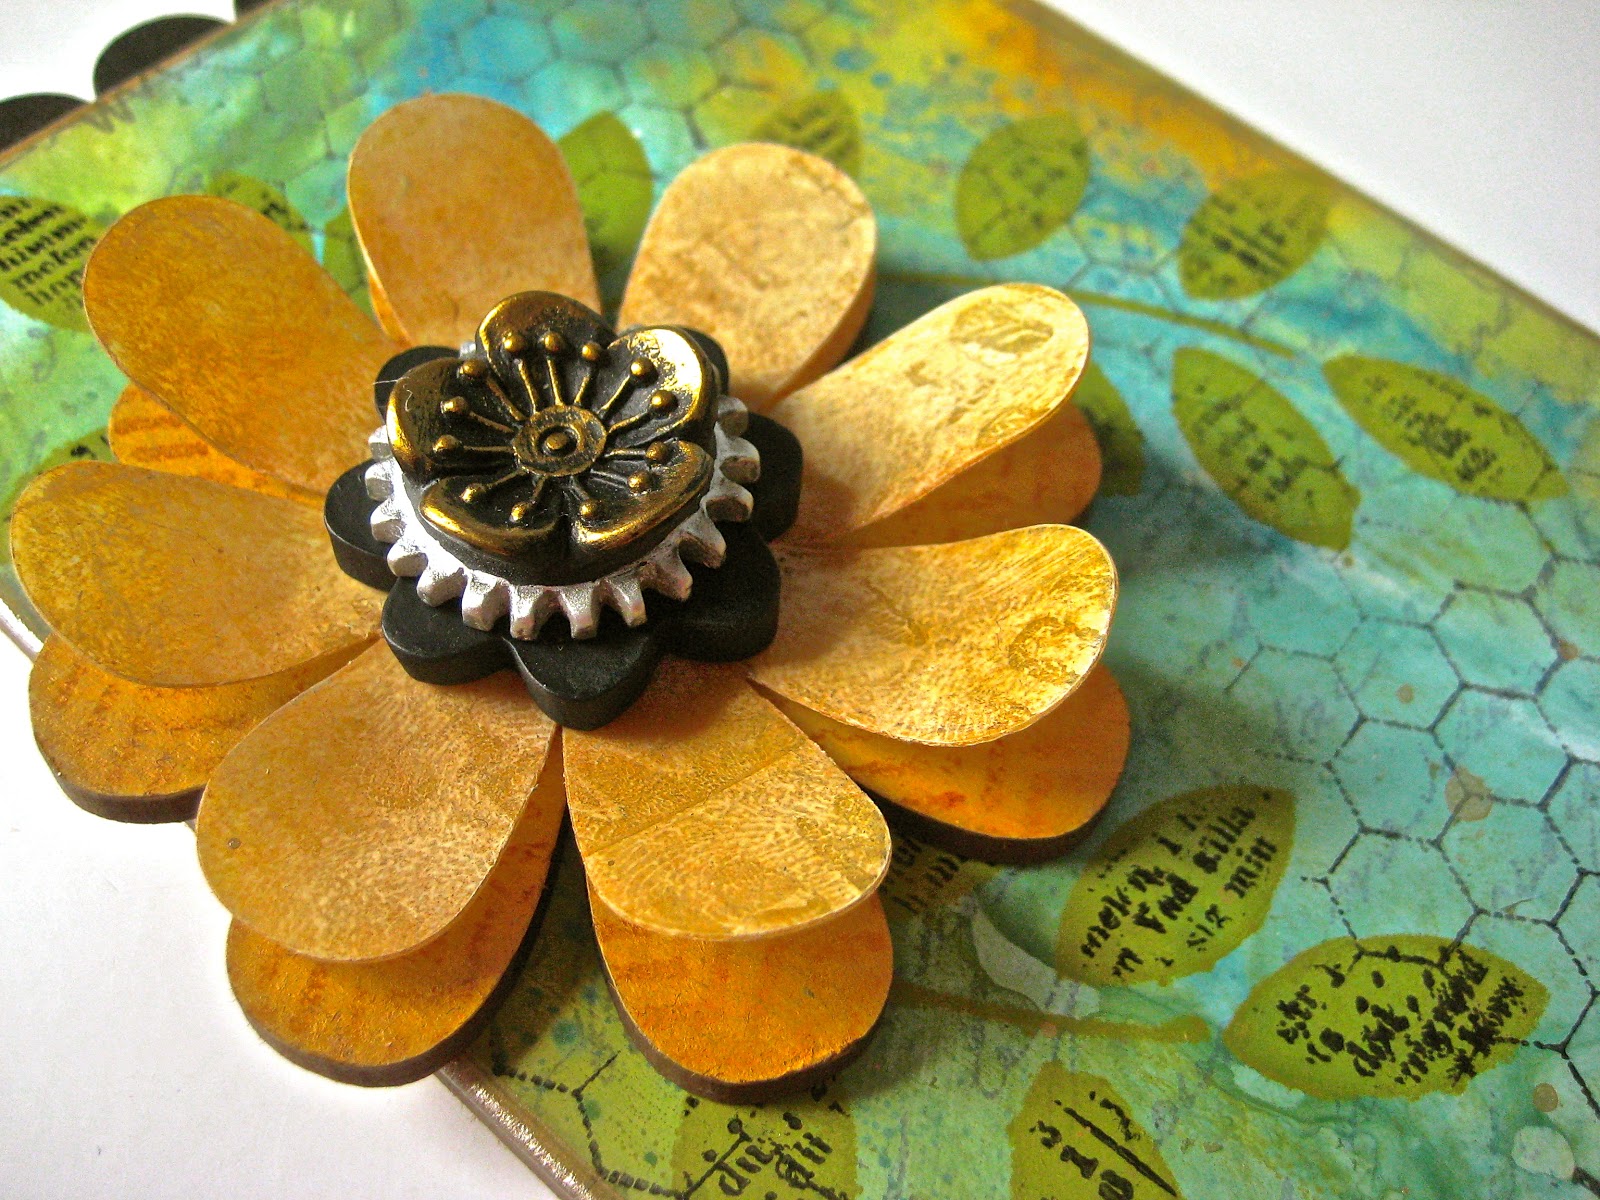
I tapped Glossy Accents onto the CFA clicker cutts flowers and sprinkled the smaller flower with vintage photo & the larger with rusty hinge distress glitter...

when the Glossy Accents was dry, I heated the flowers to soften the CFA, then shaped them...

I'm LOVING this...

a very strong/sturdy...sugary glittery vintage pretty flower...
and...
another way to alter clearly for art...


this was fun...
I sewed some coordinating embroidery floss thru the holes
 in the mini gear, to accent the flower center...

the photos don't show how pretty the glitter really is...


its...
GIVEAWAY time!

I SCORED some new archival pads to share...


if you would like a chance to win a set of all 6...

just leave a comment ...

simple!

we'll draw the random winner at 7am Chicago time tomorrow...

remember...
archivals are AWESOME when you...

make art!
wendy


Monday, April 15, 2013

CLEARLY...it's an art journal page...

I recently got tim's new remnant rubs...
this is my first time using them & let me say...
I'm "clearly" in LOVE!

here's a tiny peek at a recently completed assignment...

and added the remnant rubs to customize it...

HOLY COW...
QUICK, SIMPLE & FUN...


I had a few ideas for the rubs brewing...
but this one made me run to the studio...

how would the rubs look on
 a CLEAR art journal page?

here's what I made...
I'll show you how...

it's the same clearly for art material as the sheets, 
but die cut & ready to use...
(you'll see the holes on the left)

I designed the pages to use for clear cards...

and they are also a fun small-ish size art journal page...
they fit the art parts small creative covers perfectly...

there are 6 pages in the package...
so...enough for 3 clear cards...
6 journal pages or 
you can create a whole 6 page CLEAR art journal...
I just *might* have to do that...

you can also cut your journal pages to any size you need 

 I applied tim's text remnant rub 
across the center of the page...
I had no clue where this was headed...
I *might* add borders later???

 this page was an experiment...
but since I liked the end result...

I turned it into a blog post...

the rubs are AWESOME!

they are easy to apply & they stick really well...

here's the art journal page so far...
I like it already!


next I decided to use the new distress paints 
to stencil OVER the rubs...

with a piece of Cut N Dry foam, 

after the paint dried, I added another section of leaves...

the photo below shows how to use post-its to block off any areas that you don't want to paint...
I used one under the stencil to protect my page & one 
over the stencil to block off the leaves I had just done...


after the leaves dried, I decided the text looked too even...
so I added more text rubs & a few small image rubs to the bare areas...

***this is cool...
 because you are working with a clear surface, 
you can test drive the clear page over the rubs 
before committing...***

sitting on my desk, all ready to go...

this was a reject left over from a project...

 I had salty ocean, broken china, wild honey & rusty hinge distress paints left over on my craft sheet & I laid the flower in the left over paint & picked up the little paint dots...


and I did the back too...


now I just needed to heat the flower to soften the CFA material & shape it...

to edge the page...
and let that air dry...

before I started this page,
I had done a small CFA test strip, 
to make sure the rubs worked on clearly for art...

didn't want to waste that...

so I stenciled a few more leaves, 
let them air dry, then cut them out...
heated them to create dimension...
and they were ready to add to my page...


here's the finished page again...
NOT the easiest thing to photograph...
since it's clear...

I added a small Blossom Bucket bottle cap to the flower center...
and a waterproof pen to add the vein in each leaf...


 the cool thing about creating a journal from scratch,
is that you can make the page from any surface...

and make the pages any size...

it's fun to mix them up & create a surprise element for viewers...

here's what the page looks like from the back...


NEXT...

a couple 
***tips***

use a small amount of paint...
not a saturated foam for stenciling on CFA...

hold the stencil tight against the surface...

if you want more coverage, apply a second coat, 
after the first is dry...

allow the distress paint to air dry...
it only takes two minutes or so...

the distress paints work well on plastic!

clean the paint from the stencil before it dries...

when using the distress paints to edge the page, 
use a barely moist dabber top...
and let it air dry...

this page was plan A...
and since this was so much fun...

in the works are plan B & C...
with some twists...

try it...
create a CLEAR art journal page...
I think you'll like it!

well today is the 15th of April...
a sad day for my USA friends...
TAX DAY...

ugg...
lol...

I have an idea to make it better...

how about a 
prize package 
for a random commenter?

I'll send someone a stamp set...
and some other fun art supplies...

CLEARLY I love comments...
so a comment is your entry ticket...

simple...

CLEARLY, 
I'll be waiting to hear your thoughts...

while I...

make art!
wendy
ps...when does the giveaway end?
hmmm...not sure...
I'll have Rick choose a winner when I post again... 
later this week...

THANKS for popping by!


Monday, April 1, 2013

distress paints tutorial...

there's NO fooling here...
today I have a fun distress paint tutorial to share...

you'll notice that there are 2 step out photos missing...

once again...
I was having so much fun 
that I simply lost my mind...
hey...
it happens...
and the MORE fun I have...
the more it happens...

***note to self...PAY ATTENTION!***

to create the background, 
I applied these distress paints onto my craft sheet...


and a tiny bit of salty ocean...
then misted them with water...

I swiped my specialty stamping paper thru the paints until the paper was covered...
then misted on more water & dried it...

the project base is the art parts rectangle 
from the rectangle frame set...
save the other pieces for another project...

I used Glue N Seal to adhere the 
specialty stamping paper to the art part base...

& used the sanding grip to sand & distress the edges, 
then added a bit of walnut stain distress ink,
 with the blending tool to cover the white paper edges...

it looks like this...
with beautiful blending of the colors, 
in true distress style...


next I inked my script background stamp with 
stamped over the base & dried it...

***by choosing a lighter archival color, 
I'll be able to add more layers 
without creating a jumbled mess...***


I painted my
with wild honey distress paint & dried it...

***I like to dab the paint on...
then tap it with my fingers to spread it around***

when the first paint layer was dry, 
I added a second layer of wild honey...
but this time I let it partially dry...

and then press the UNINKED stamp 
onto the flower to remove some of the paint...

this created a REALLY cool tone on tone effect...

***clean the paint off your stamp before it dries***

here's the flower...


I darkened the photo a bit to better show the detail...

I WILL be doing this again...
it's subtle...but very cool...


now some stenciling with the paints...

I like to use Cut & Dry foam to stencil...

I cut some pieces about 1 inch x 2 inches...

this is a good size to work with...
it's small enough that you can work in small areas...
you can also use both ends for a color...

***this is cool...the paint does not dry stiff or crunchy...
I've been using the same Cut & Dry pieces since we got the paints...***

 I stenciled the first set of leaves 
with peeled paint distress paint  & dried it...
then added more leaves, 
again with the peeled paint distress paint & dried it...

***I used stencil tape to block off part of the leaves, since I only wanted to stencil over the bottom 5 leaves...

***I like the Cut & Dry to be fairly dry...
after I pick up the paint, I like to dab some off, 
so it's not super saturated***


***clean your stencil before the paint dries...***

I placed the stencil back over the leaves...
inked my text stamp with jet black archival & 
pressed the tiny text stamp over the stencil...

I did this over all the leaves...

***to remove the archival ink from the stencil, 
I use cheap Dollar Store rubbing alcohol...
it's quick & easy...
I got a quart size bottle for under $2.00***

***another tip...
when stenciling, make sure not to go over the edge of the stencil***

***and another tip...
I find it easiest to use an UNMOUNTED stamp, when stamping over a stencil...it makes it easier to press in the chosen areas***


you can see below,
 that the stencil also acts as a mask 
to protect the background from the text stamp...
now only the leaves have text on them...

***you'll also see that because the paint is OPAQUE...
 the stenciled leaves cover up the script stamping from the first step...
this really puts the script in the background & 
the leaves out in front***


I used french ultramarine archival on my UNMOUNTED honeycomb background
& pressed it on to random areas of the background...

and then stamped my saying in jet black archival...


one on my MOST FAVORITE uses 
is for creating tiny dots with any of the distress stains...

***the distress stains work especially well, because they are very fluid...***

to create the gold dots you see below,
 I applied some tarnished brass distress stain to my craft sheet...
picked it up with the detail water brush & tapped the brush 
sharply against my index finger...
this creates AWESOME tiny dots every time...

that tiny bit of shimmer really adds another nice layer to the background...

***I also use the metallic stains to add an edge to my art...
you'll notice that in the last photo***


next I wanted to jazz up the art parts base, 
so I used black soot paint

I like to tap some paint onto the tag toppers, 
then spread the paint with my fingers, 
when painting art parts...

the result is a beautiful MATTE ...
LOVE IT!


now here's where I lost it...& forgot a photo...

I painted an art parts flower with wild honey distress paint, 
I did 2 layers...

when the paint was dry, I stamped my herringbone background over the flower with rusty hinge distress ink & dried it...

below is the assembled flower...
with the art parts flower as the base...

I heated the clicker cutts flower to soften the CFA material 
& shaped the flower...
then glued it to the coordinating art parts flower...

to create the center, I glued this
to this Blossom Bucket...
OOPS...can't find that link...


the next photo shows all the layers in the background...

it looks very dimensional, but it's completely flat...

so...
this would be a GREAT background technique
for art journal pages...


and here's the finished piece...
with the tag toppers glued to the back of the art parts base...


if you haven't played with these paints yet...
prepare to be amazed...
they are totally UNLIKE any other paints I have used...

a bit of business before I go...

I had several questions/comments about the last post & where to find the stamp I used...
if you click on the blue links in each post,
 you'll be magically transported right to the highlighted product...

that stamp is from the heirloom art set...

I hope this tutorial has inspired YOU to...
grab your distress paints to

make art!

wendy

Wednesday, January 2, 2013

more new studio 490 day #2...

welcome!!!

thanks so much for the comments about yesterday's new products...

thanks for the funny emails about THE CURE...
you made me laugh...
I can't wait to see how others use them...

let's jump right in to todays reveals...

my black & white embossing pastes have been a HUGE hit...
so I'm happy to share that we have 

2 more AWESOME colors...
to play work with
& they are ready to ship immediately after CHA...
yippee!

here's 
METALLIC GOLD...


and...

METALLIC SILVER...
with just these 4 colors...
we can do ANYTHING!


with new embossing pastes...
we'll need more 

STENCILS FOR ART...

there are 8 new stencils in this release...
they all work well on cards, 
altered art/mixed media projects and 
art journal pages too...

you can even cut some of them them out,
 to make dimensional embellishments...
I have been having so much fun with these guys...

you can use them with inks or embossing pastes...
or mist over them...

first up...

LOVELY LEAVES...


NEVER NOUGH HEARTS...
a good one for cutting out...


WILDFLOWERS AND A BIRD...


we all know that...
DIAMONDS ARE A GIRLS BEST FRIEND...
a fun background...
or just use mini sections...


I've used this one lots too on journal pages & cards...
it's called...

EVERYDAY WORDS...


this next one is a really fun background...
and a whole lot more...
use it twice to make multi colored stripes...
or...
use it twice to make a plaid...

this one is...

YIKES... STRIPES...


here's
POLKA DOTTY...


I LOVE LOVE LOVE the...

LAYERED FLOWER...


this stencil allows us to make a multi colored flower...
it can be completely flat on a card or art journal page...
or it can be made dimensional with embossing paste...

it works like this...

stencil one color...
place the other stencil over the inked stripes...
it covers the inked stripes & allows the addition of a second color in the open areas...

you can use 2 coordinating colors or 
2 shades of the same color for a monochromatic effect...
it's easy & FUN...

 my favorite way to use this stencil is to add embossing paste to just one stencil...

that's how this was created...
it's on Clearly for Art...
that has been covered with vintage dictionary paper...

 I cut it out & made it dimensional...


I always try to add & size products so that they will work 
with products we already have...

the new LAYERED FLOWER stencil fits over the 
large CLICKER CUTTS flower...

the example below is the 

and I used the GOLD METALLIC embossing paste 
over just one of the stencils...

it totally changes the look of the CFA and gives us lots of fun options...

it looks like this...
with awesome texture...
and YES...
the paste is well adhered to the CFA!
LOVE IT...


I also want to use the black embossing paste 
with the layered flower stencil over 
I think that will look cool...

next up we have more of my new
Blossom Bucket resin pieces...

we had TONS of requests to make the sewing machine smaller...

so here it is...


SMALL SEWING MACHINE...


I placed it next to the original...
I ADORE mini...
look how cute...
perfectly sized for an ATC...


continuing on with the sewing theme...


 here's the 

SPOOL with THREAD...

it's sized to work with either sewing machine...
it's flat on the back, for easy gluing...


and for sure we needed 

SCISSORS...
these guys are mini & REALLY stinkin adorable...


be still my heart...

my grandfather was a carpenter &
 I was always fascinated with his folding ruler...
so now I collect vintage folding rulers...

I LOVE this
 RULER...
I have used up every sample I got...


I can't leave without showing you another new stamp set...

this is called...
FUN WITH ART...


the flowers & plant are fun to stamp & emboss, 
then color with tim's distress markers...
I want to try a watercolor technique with them too...
when I have a few seconds to spare...

there are 3 new sayings on this set...
2 sweet ones...
not as sassy as the ones I shared yesterday...

I wanted a new saying to use with the vintage car, the truck, 
that we already have...

and I admit...
I'm ADDICTED to this background stamp...
I had to hide it so I wouldn't use it on every project...

it's fun for journal pages...
use it as shown, or turn it a quarter of a turn, so that the smaller rectangles are at the bottom...
or top...

I also like to press small art parts onto the section on the left...
and you can make a simple plaid by using the section on the right...
it's very versatile...

so that's it for today...

I'll be waiting to hear your thoughts...

now it's time for me to...

make art!
wendy
ps...see you tomorrow!