I've got a cool technique tutorial to share...
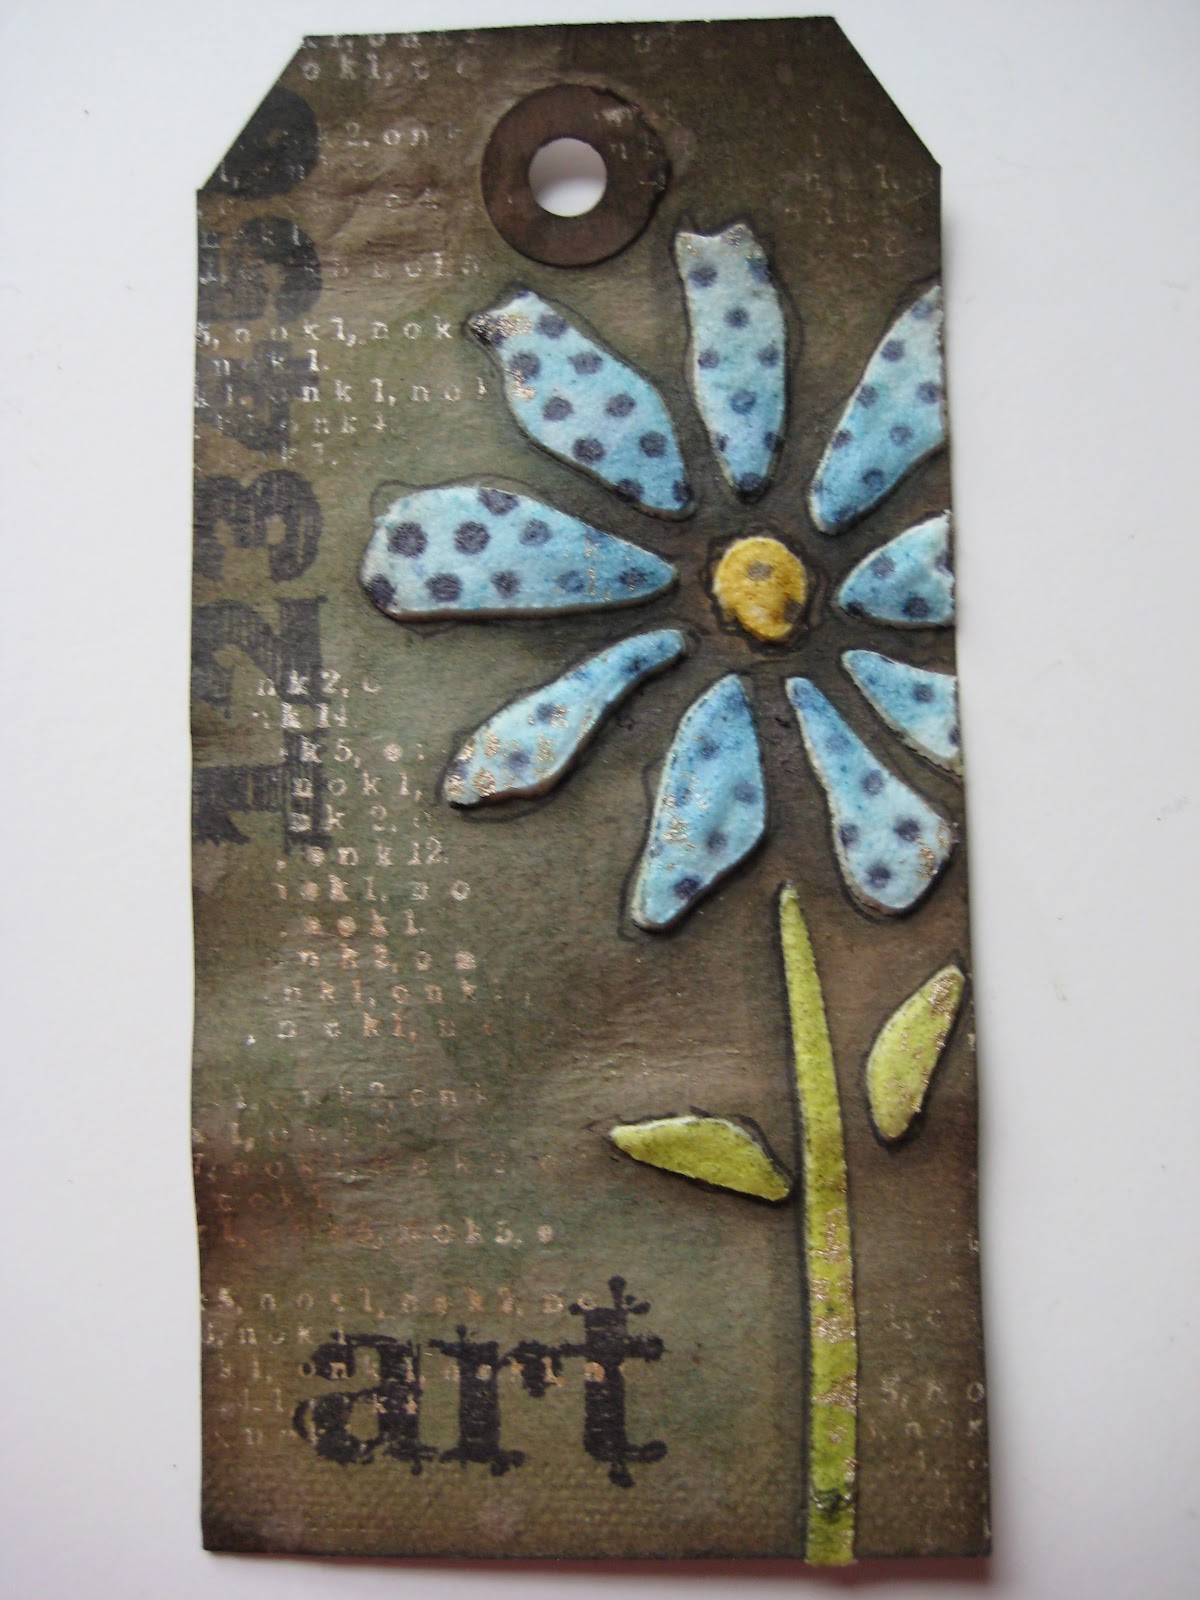
today, I'll show you how to create this
distressed, dimensional stencil art tag,
using my new
studio 490 stencils for art...
distress inks, distress stains & distress markers...
a little archival ink
and of course some studio 490 stamps...
just a reminder...
to protect your work surface...
apply these with the blending tool...
then add some shading to the tag edges, using walnut stain on the blending tool...
your tag will look like this...
allow the water to sit on the tag for a few seconds...
remove the stencil...
STENCILS DO NOT LIKE THE HEAT TOOL!
then dry...
the water will lighten the ink & create a subtle polka dot pattern...
your tag will now look like this...
choose your favorite flower from the
use post-it notes to block off the area around the flower...
this will protect those areas from the next step & the post-its also hold the stencil in place over the tag...
using a palette knife with embossing paste...
it's the secret ingredient...
spread the embossing paste over the stencil...
use the palette knife to scrape away the excess paste
(put it back in the jar)
the paste should be as thick as the stencil...
for this sample, I kept the texture smooth...
lift & remove the stencil...
***clean your stencil & palette knife with water***
DO NOT let the paste dry on the stencil or palette knife...
dry the paste with your heat-it tool...
I dry it from the top & from the bottom...
this helps prevent warping of the tag...
from the moisture in the paste
sitting on the tag too long...
if you just let it sit & dry...
it takes about 45 minutes (depending on the humidity in your area)
& the warping under the paste is much more significant...
your tag will look like this...
it will look like this...
working from the flower center out...
use the broken china marker to add shading to the petals...
color right on the petals, then
use your finger to spread the ink outward from the center...
now your flower looks like this...
with very cool shading...
staying closer to the center of the flower...
spread the ink with your finger...
your flower should now look like this...
with another layer of shading...
and your blending finger will now look like this!
oopsie!
better get used to it
if you're going to hang out here!
place the stencil back over the flower &
mask off the surrounding area with post-its again...
using jet black archival, stamp any background stamp over the flower...
but any small patterned background would be fine...
the stencil/post-its protect the background from the stamp...
the background remains clean & unstamped...
REMOVE the stencil...
stencils will distort & melt if heated!
you won't be happy...
trust me!
dry the ink with a heat-it tool...
AFTER you have removed the stencil...
using a waterproof pen...doodle around the petals...
the stem & leaves...
make it irregular & artsy!
it should look like this...
this adds shading under the petals...
it will look like this...
it's kind of stark...
but the next step will fix that!
lightly mist the flower with water,
to blend the flower colors & the shading under the petals & dry...
keep in mind that if you use too much water, it will lighten the distress inks on the petals...
remember...
distress inks always react with water!
BUT, if that happens...
just go over the petals again with the markers...
it's an easy fix!
for more controlled blending...
instead of the mister...
after misting...
you'll see the blending & softening of the colors around the petals...
use jet black archival to add some stamping...
I used my new numbers stamp & the word ART...
to add more water spots,
mist a bit of water into your hands & drip onto the tag...
let sit a few seconds, then dry, to add more texture/depth to the background...
it now looks like this...
with a barely moist dabber top,
randomly ink over portions of the stamp...
the text is really tiny & it can easily be combined with other backgrounds)
press the unmounted, randomly inked stamp
over a few areas of the tag & dry...
the tag now looks like this...
for the finishing touches, add some doodling around the perimeter of the tag...
add more walnut stain shading to the edges if needed...
I added a tiny bit of brushed corduroy (on the blending tool) over the flower to tone it down a bit...
it's a great finishing touch...
with the barely moist dabber top...
just run it along the tag edges...
and when in doubt...
put a bird on it!
that little blackbird is a new piece from Blossom Bucket!
he's arriving next month!
I LOVE this look...
it's very dimensional...
very vintage...
very lightweight...
and very easy to create!
PLUS...
there are LOTS of options...
look closely...
below is the same stencil...
same technique,
same distress marker colors...
but done on a lighter background...
and the background is created with the distress stains...
I'm finding the stencils to be very versatile...
here's another variation...
this is the original test drive tag I made...
instead of smoothing the embossing paste, I tapped the palette knife over the wet paste to create peaks...
these petals have a REALLY lumpy texture...
same stencil again...
no embossing paste this time...
just trace around the stencil to create the basic shape...
doodle a bit...
ink with the distress markers...
for a quick journal page...
do you see the possibilities?
what are YOU thinking?
got some fun ideas?
shoppers alert!
they are ON SALE for 20% off
with this code at checkout...
BSPM
it's good today FRIDAY & SATURDAY only!
clicking on any link will take you to the product I used...
this post is getting really LONG...
so I'll save the other options for another post...
just wait to see what I did with
it was so FUN!
and TOTALLY different
than the samples I showed today...
it's coming soon...
to a blog near you!
one more thing before I go...
I didn't hear from the winner...
so I have a prize package for...
Helen said...
Loving all the art - and well done Susan! My list of must haves is growing every time you share more art!

please send me your shipping info...
wbv1213@me.com
CONGRATS if you've read the whole post!
some lucky commenter may win a prize...
just sayin!
I still have new stamps & art parts ready to ship...
I hope I've sparked your imagination just a bit & that you'll be inspired to...
make (stencil) art!
wendy
ps...have a wonderful weekend...
GO BEARS!
I always have high hopes...
sad but true...