here's how I got started...

here's how I got started...
a 20 minute podcast by Crazy BeYOUtiful

Friday, August 17, 2012

distressed, dimensional stencil art...

I've got a cool technique tutorial to share...

today, I'll show you how to create this
distressed, dimensional stencil art tag, 
using my new 
studio 490 stencils for art...
distress inks, distress stains & distress markers...
a little archival ink
and of course some studio 490 stamps...


just a reminder...

always work on your non stick craft sheet, 
to protect your work surface...

ink a small #5 kraft tag with broken china & brushed corduroy distress inks...
apply these with the blending tool...
then add some shading to the tag edges, using walnut stain on the blending tool...
your tag will look like this...


lay the polka dot/striped stencil over the tag as shown, then lightly mist with water...
allow the water to sit on the tag for a few seconds...

remove the stencil...
STENCILS DO NOT LIKE THE HEAT TOOL!

then dry...


the water will lighten the ink & create a subtle polka dot pattern...
your tag will now look like this...

choose your favorite flower from the
3 fresh flowers stencil & place it over the tag...
use post-it notes to block off the area around the flower...
this will protect those areas from the next step & the post-its also hold the stencil in place over the tag...


using a palette knife with embossing paste...
it's the secret ingredient...


spread the embossing paste over the stencil...
use the palette knife to scrape away the excess paste
(put it back in the jar)
the paste should be as thick as the stencil...
for this sample, I kept the texture smooth...


lift & remove the stencil...

***clean your stencil & palette knife with water***
DO NOT let the paste dry on the stencil or palette knife...

 dry the paste with your heat-it tool...
I dry it from the top & from the bottom...
this helps prevent warping of the tag...
from the moisture in the paste 
sitting on the tag too long...


if you just let it sit & dry...
it takes about 45 minutes (depending on the humidity in your area)
& the warping under the paste is much more significant...

 your tag will look like this...


when the paste is dry, use the peeled paint distress marker to ink the stem & leaves...
use the tumbled glass marker to ink the flower petals...
use the wild honey marker to ink the flower center...
it will look like this...


working from the flower center out...
use the broken china marker to add shading to the petals...
color right on the petals, then
use your finger to spread the ink outward from the center...
now your flower looks like this...
with very cool shading...


next, use the faded jeans marker to ink the petals...
staying closer to the center of the flower...
spread the ink with your finger...

your flower should now look like this...
with another layer of shading...


and your blending finger will now look like this!
oopsie!
better get used to it 
if you're going to hang out here!


 place the stencil back over the flower &
 mask off the surrounding area with post-its again...
using jet black archival, stamp any background stamp over the flower...
I used my polka dots...
but any small patterned background would be fine...
I like this text...
the stencil/post-its protect the background from the stamp...
the background remains clean & unstamped...

REMOVE the stencil...
stencils will distort & melt if heated!
you won't be happy...
trust me!

dry the ink with a heat-it tool...
AFTER you have removed the stencil...


using a waterproof pen...doodle around the petals...
the stem & leaves...
make it irregular & artsy!
it should look like this...


trace around the petals with the old paper marker...
this adds shading under the petals...
then use the pumice stone marker to add darker shading around  the flower center...
it will look like this...
it's kind of stark...
but the next step will fix that!


lightly mist the flower with water, 
to blend the flower colors & the shading under the petals & dry...
keep in mind that if you use too much water, it will lighten the distress inks on the petals...
remember...
distress inks always react with water!
BUT, if that happens...
just go over the petals again with the markers...
it's an easy fix!

for more controlled blending...
use the detail water brush to blend the colors...
instead of the mister...


after misting...
you'll see the blending & softening of the colors around the petals...

use jet black archival to add some stamping...
I used my new numbers stamp & the word ART...

to add more water spots,
mist a bit of water into your hands & drip onto the tag...
let sit a few seconds, then dry, to add more texture/depth to the background...

it now looks like this...


shake the tarnished brass distress metallic stain to mix it completely...
with a barely moist dabber top, 
randomly ink over portions of the stamp...
do not cover the whole stamp...
(this is an excellent stamp for random stamping & art journals...
the text is really tiny & it can easily be combined with other backgrounds)


press the unmounted, randomly inked stamp
 over a few areas of the tag & dry...
the tag now looks like this...
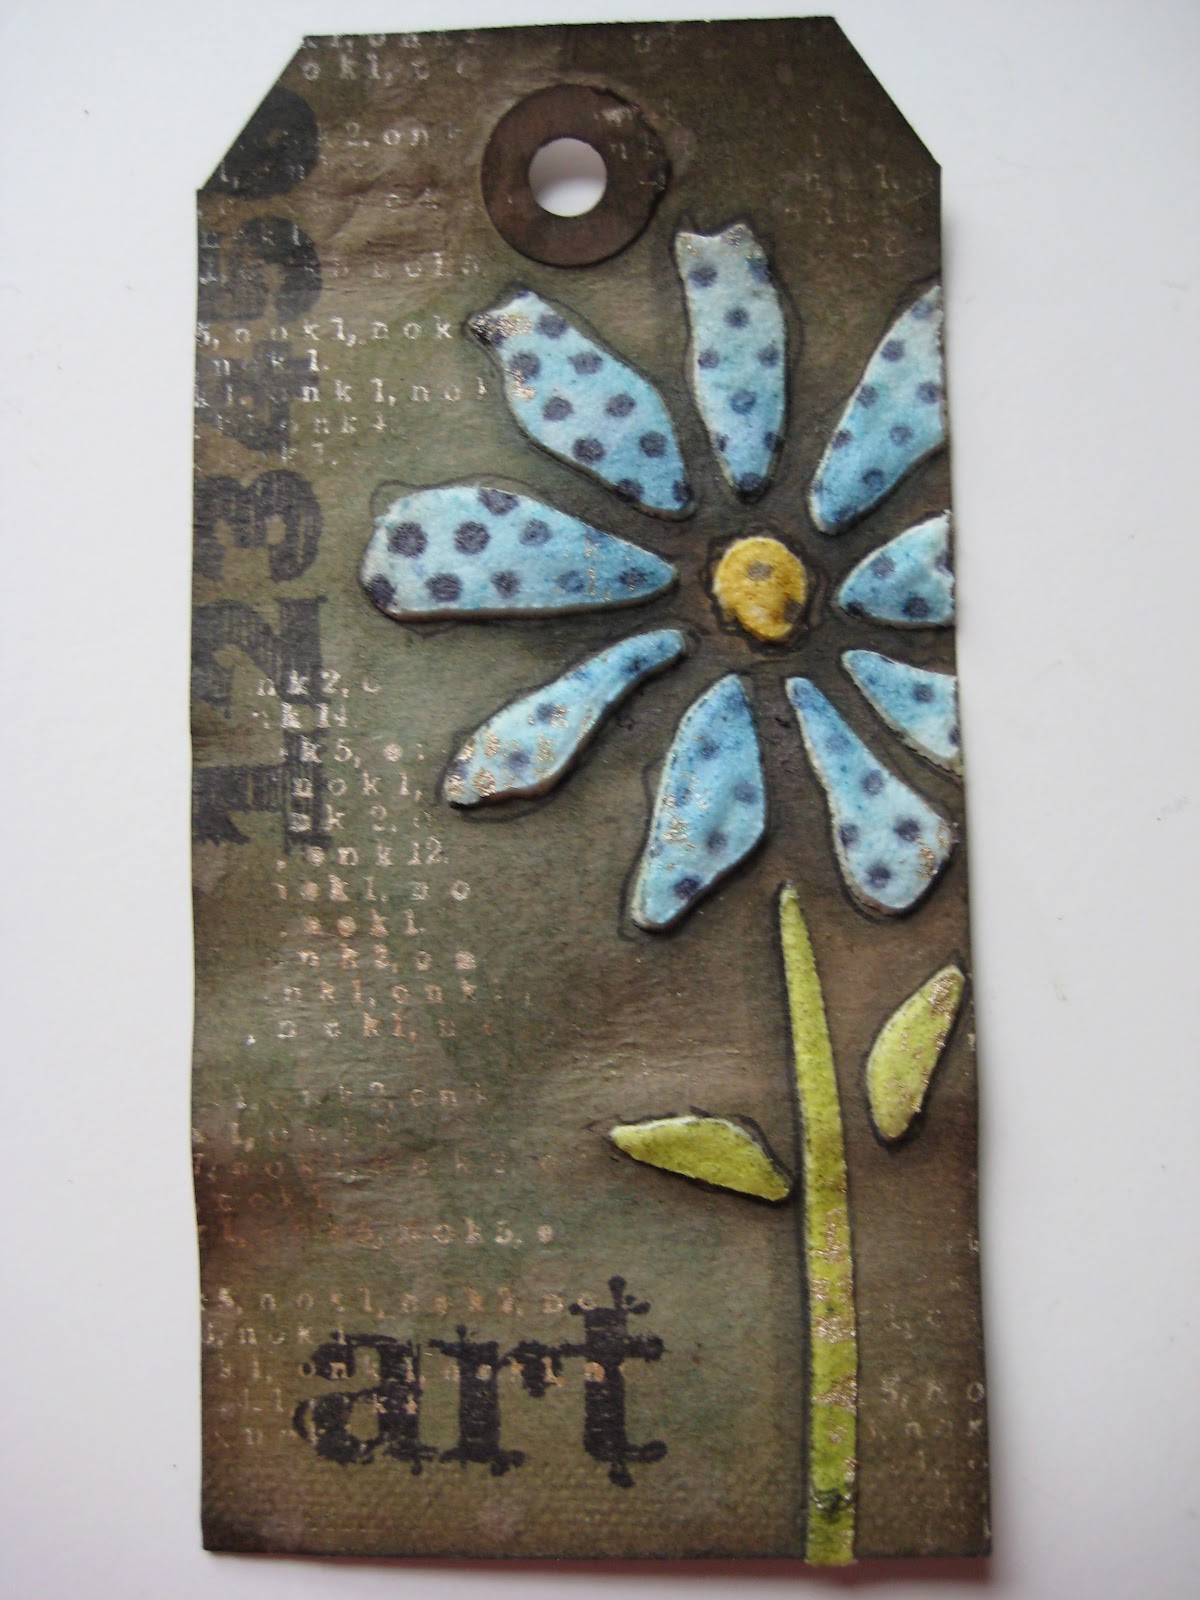

for the finishing touches, add some doodling around the perimeter of the tag...
add more walnut stain shading to the edges if needed...
add some glaze pen dots to accent the flower center...
I added a tiny bit of brushed corduroy (on the blending tool) over the flower to tone it down a bit...
use the tarnished brass stain to edge the tag...
it's a great finishing touch...
with the barely moist dabber top...
just run it along the tag edges...

and when in doubt...
put a bird on it!

that little blackbird is a new piece from Blossom Bucket!
he's arriving next month!


I LOVE this look...
it's very dimensional...
very vintage...
very lightweight...
and very easy to create!

PLUS...
there are LOTS of options...

look closely...
below is the same stencil...
same technique,
same distress marker colors...
 but done on a lighter background...
and the background is created with the distress stains...

I'm finding the stencils to be very versatile...


here's another variation...
this is the original test drive tag I made...

instead of smoothing the embossing paste, I tapped the palette knife over the wet paste to create peaks...
these petals have a REALLY lumpy texture...


same stencil again...
no embossing paste this time...
just trace around the stencil to create the basic shape...
doodle a bit...
ink with the distress markers...
for a quick journal page...


do you see the possibilities?
what are YOU thinking?
got some fun ideas?

shoppers alert!
if you don't have the distress markers...
they are ON SALE for 20% off 
with this code at checkout...

 BSPM 
it's good today FRIDAY & SATURDAY only!
clicking on any link will take you to the product I used...

this post is getting really LONG...
so I'll save the other options for another post...

just wait to see what I did with 
it was so FUN!
and TOTALLY different 
than the samples I showed today...

 it's coming soon...
 to a blog near you!

one more thing before I go...
I didn't hear from the winner...
so I have a prize package for...


Blogger Helen said...
Loving all the art - and well done Susan! My list of must haves is growing every time you share more art!
August 15, 2012 10:15 AM
 Delete


please send me your shipping info...
wbv1213@me.com


CONGRATS if you've read the whole post!

some lucky commenter may win a prize...
just sayin!
I still have new stamps & art parts ready to ship...

I hope I've sparked your imagination just a bit & that you'll be inspired to...

make (stencil) art!
wendy
ps...have a wonderful weekend...
GO BEARS!
 I always have high hopes...
sad but true...


Wednesday, August 15, 2012

stained, stamped & stenciled art journal pages...

studio 490 style...

phew...that's a mouthful...

I thought the title should include the main ingredients we use in this class...

stained, stamped, stenciled & markered...??
no...leave the markers off the title...

stained, stamped, stenciled...
now that sounds much better...


I've been busy working on new techniques for an art journalling class I'll be teaching in the fall...

here's a look at my first test piece...
and uses tim's distress stains, distress inks, my stamps & new stencils...
oh...and the 
wonderfully awesome 
magnificent 
magical 
can't live without them...
I LOVE them...can you tell?


ok...that idea that worked...
I was happy with the result...

so I moved on to a larger art journal page, 
it's 5 1/4 x 5 1/4 inches...

TRUST ME...
specialty stamping paper is pure magic...
it takes every Ranger product very well & I find the surface to be VERY forgiving...
non warping...
another can't live without it product!

you'll see I used my 3 fresh flowers stencil along with the polka dot & stripes border stencil...


that was so much fun...
I HAD to start another page...
it's not finished yet...
but I'll show you that I started with my heart stencil...
on the specialty stamping paper...

that yummy flourish is stamped with 
LOVE this blue!
again you'll see the border stencil & 


I like that the stencil can be used vertically or horizontally...


the numbers you see on the heart page are on this stencil...


my goal is to have a post for you on Friday,
 showing a few ways to play with these stencils...

so I'll keep this short for today...
and get working on my TO*DO list & on Friday's post...

oh wait...
we have a WINNER...

HUGE CONGRATS to...

Blogger SusanK said...
Some great ideas for these new products! I WILL have that stencil and stamp set in my inky hands asap!!! One way or another! lol
August 13, 2012 3:45 PM
 Delete


I hope you'll enjoy your prize...
send me an email with your shipping info & we'll get your package off...

I'm headed to the studio to play with my stencils
and I WILL...

make  art!
wendy
ps...I haven't heard from you...HANDGATHERED...
you won a prize! please contact me...if I don't hear from you by Friday, I'll redraw from today's comments...

Monday, August 13, 2012

let's start the week with a GIVEAWAY...

A MILLION thanks 
for all the blog comments & emails...
we sincerely appreciate your kindness & healing thoughts...
we have passed them on...

now it's back to business...

Mondays are better if you start with a giveaway...

here's today's prize package...
compliments of Ted & Michelle...

it includes a favorite brand new stamp set called...
GRAFFITI ART...
and a lucky someone will also receive the brand new

and some art parts called...


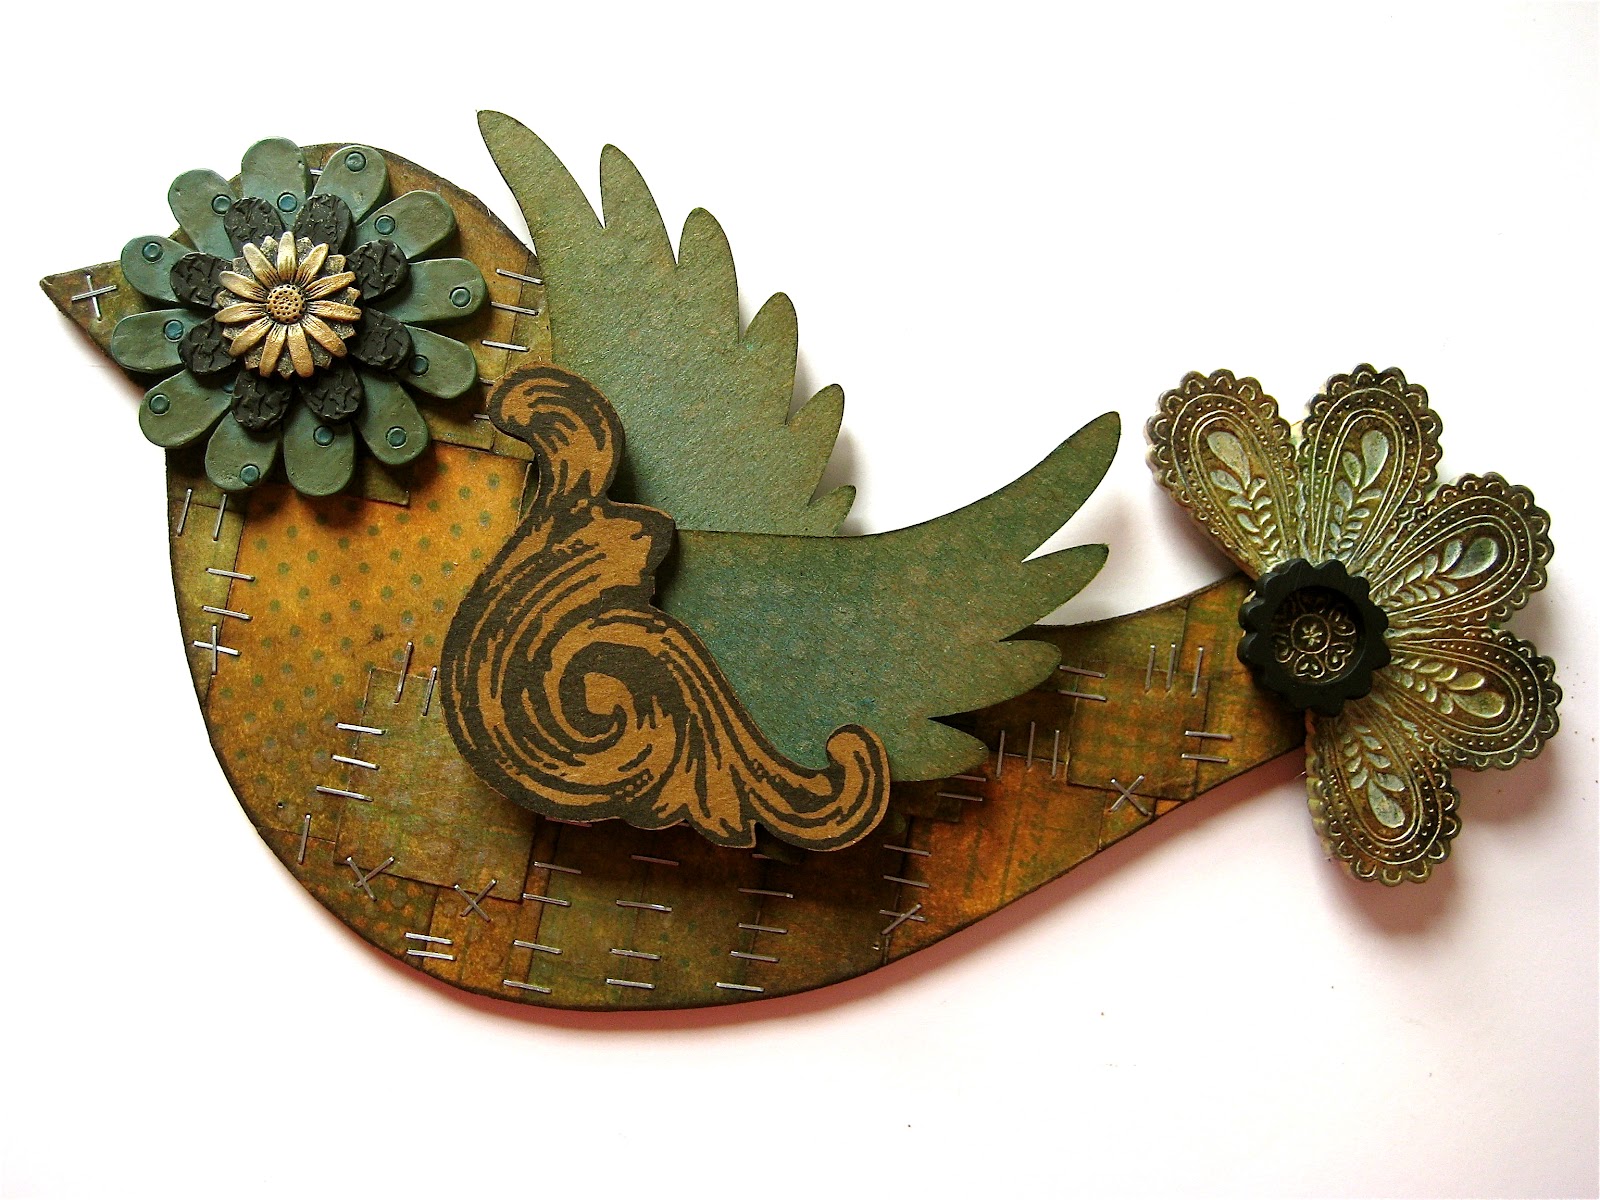
the art parts bird is large & it's a great way to use up your scraps, instead of tossing them in the trash...

was a good fit over the wings...


the tail is made from this Blossom Bucket piece...
it's altered with alcohol inks...
then I rubbed the coffee archival pad over the raised areas...
then lightly misted it with heirloom gold Perfect Pearls mist

and dried it to create this transformation...


I had so much fun with this bird...
that I made another...
similar style...
but different accent pieces...


after I had all the scraps glued on, I decided to add a FEW staples from tim's tiny attacher...
even though art parts are really thick & strong, 
the tiny attacher works like magic...
what started with a FEW...
ended up being over 120 staples... 

that my motto...
if one is good...
120 is better...
poor Rick!

my Blossom Bucket top hat looks good on her.....


this next sample is my twist on tim's riveted patchwork technique, from Compendium of Curiosities...book #2...

I changed it up by using the black paint dabber over 
and I sanded off very little of the color...

because this would be shipped frequently, 
I wanted to make sure the paint wouldn't be scratched...
so, Glue N Seal to the rescue...
I used the matte finish & brushed it over the entire piece...
I LOVE that the paint is protected & there is NO shine now from the metal...

the mini gears are a perfect fit in
and made a quick steampunk accent piece...


to add interest to the tail area, I covered my 
Clearly for Art BLACKOUT with the metal foil tape, which allowed me to create dimensional sturdy tail feathers ...

sandwiched between the art parts & the CFA 
is a foliage leaves piece...
painted lightly with the silver dabber & accented with a bit of rock candy stickles...


the landing gear (aka legs) is made with
my favorite mini gears...


next up...

here's Lucy on the brick wall...
I used both the brick stamp & the coordinating stencil..

LOVE LOVE LOVE all the new Blossom Bucket pieces...
coming...
NEXT MONTH! 
CAN. NOT. WAIT!

the word ART is colored with the picket fence distress marker...
it's a really brilliant white & perfect for graffiti...
or for accenting Lucy's pearls...

the black shelf you see on the brick wall is 


my next stop on the art adventure...

I'll be teaching this FULL DAY workshop at both of 
The Scrapbooking Studio stores...

it you're in the Bloomington, Illinois or Moline, Illinois areas, come join the fun...

we'll create a dimensional crayon box & this funky art angel...

in addition to the  2 projects...
lunch is FREE...
compliments of Amy...
gotta have energy to
MAKE ART!

and get this...

Amy is also giving students a 25% off...
SHOPPING SPREE for attending...
a perfect way to end the day!


here's a better look @ the angel...

she's over 13 inches tall...


finally we have a winner...

congrats to...

Blogger Handgathered said...
I'm Crazy in Love with the Cheers bottle, stem glasses and the sweet Heart hanging in the bottom piece.
August 2, 2012 1:00 PM
 Delete


please contact me at
wbv1213@me.com with your shipping info...


BREAKING NEWS!
ALL my BRAND NEW
STENCILS FOR ART and my new
ART PARTS have ARRIVED!

got my fingers crossed that stamp sets arrive very soon...
I'll keep you posted...


there are 2 birds/4 wings in each package...
so...double your fun!

oh and these art parts...


if you'd like to MAKE ART 
with some new stamps, a stencil & new art parts...

just leave a comment for your chance to win today's giveaway...
I'll draw the random winner on Wednesday @ 7am...

until then...
make art!
wendy


Friday, August 10, 2012

sorry to be AWOL...

this has been an UGLY week...

on Monday we found out that Rick's brother got a BAD pet scan report...

he has had chemo, with not good results...

followed by radiation...with not good results...

Monday he starts a very aggressive chemo which will prepare him for a stem cell transplant...

we are dealing with this...
helping where we can...

we are just out of sync here...

art & blogging have been on the back burner for this week...

I hope to be back on Monday with our regularly scheduled programming...

thanks for understanding...

have a good weekend...

make art!
wendy


Wednesday, August 1, 2012

another fun GIVEAWAY...

today,
let's start with the art...

here's Betty, all decked out in her Blossom Bucket glasses,
 roof hat & gold flower...

I LOVE the new cheers bottle & the clear resin glasses LOTS...

the saying is on a new
ART PARTS SENTIMENT SPOT...

the saying is totally ME!


the details are really nice on these new Blossom Bucket pieces...

it was simple to stamp the saying, 
then color in LOVE with tim's marker...
the lacy background paper is from my friend Finn...
she designed it for 7 dots studio...


 below is Lucy...
to change up the cream colored BB heart, 
I added a bit of pale ochre archival ink,
 then stamped on it with jet black archival...

Lucy's pearls were colored in with the picket fence marker...

as you can see,
even on my kraft colored art parts, 
the white is very bright...
the saying & the border are both stamped on
 ART PARTS SENTIMENT SPOTS...


here's the stamps & art parts I used for these little arts...

the stamp set is titled...
TALES of ART...
and the new ART PARTS package is called...
THE GALS...

 they will both be sent to a random commenter...
I'm sure you know the drill...

you'll have until 7am on Monday
 to leave a comment...
I've gotten lots of emails about Blogger not allowing you to leave comments...
I'm sorry...
I have no clue what's going on...


at CHA I did a video for Christine & Mark from ScrapTime...
it's all about Ranger products, stamping, embossing & using tim's markers on my art parts...

THANKS CHRISTINE & MARK!

here's the link...

check it out...they did a nice job!

now announcing another WINNER...
3 CHEERS FOR ART and
THE GUYS are going to...

Blogger Wilma said...

Congrats to the two lucky winners!!!
I'm totally in love with the hearts and 
star!!!
July 31, 2012 11:18 AM
 Delete


please send an email with your shipping info...
wbv1213@me.com

next stop on the art adventure is taking me to 
Twin Falls, Idaho

I'm expecting this event to be really fun...
here's the adorable invite 
Michele made & sent out to their customers...


with this much attention to the details, 
I KNOW this event will be a blast!

so that's where I'll be this weekend...

I hope YOU can

make art!
wendy
ps...I see that my Blossom Bucket organizer 
is back in stock again...
yippee!