here's how I got started...

here's how I got started...
a 20 minute podcast by Crazy BeYOUtiful
Showing posts with label home decor. Show all posts

Monday, March 30, 2015

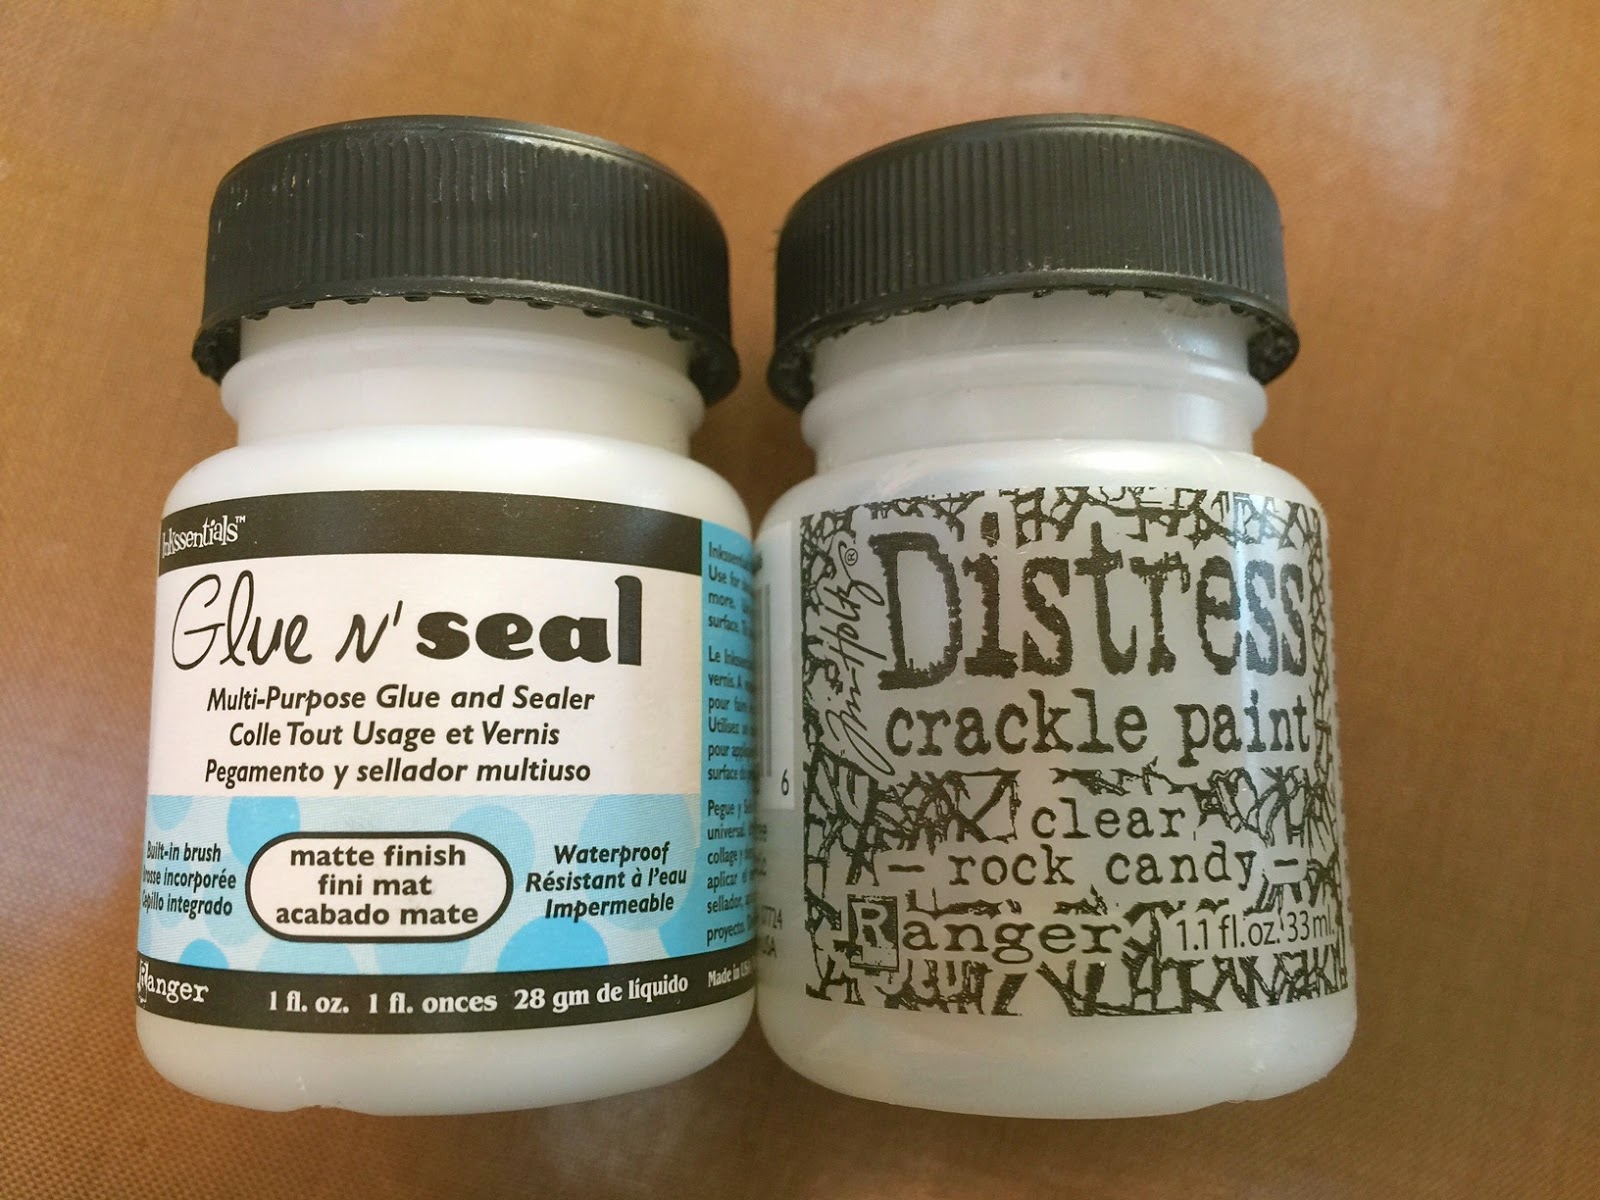
I LOVE Glue N Seal...


way back in 2011 I found a way to use distress rock candy crackle paint on glass...
you'll find the original post HERE...

this technique must be surfacing again, 
because I had 2 questions about it just last week...

so...
here's the updated version and another reason 
why 

first the basic info...

rock candy crackle paint was designed for porous surfaces...
NOT slippery surfaces...
it needs tooth to stay put...

if you read the original post, 
I REALLY wanted to be able to use it on glass...

since glass is NOT porous, it will NOT stay permanently adhered to the glass...
believe me...I tried...

but I found a way...

enter the MAGIC of Glue N Seal...

it goes like this...

choose any glass vase or jar...
it can be new or a recycled jar...
doesn't matter...


the best bang for your $$$ is to get the small jar...
it's super convenient, because it has a built in brush...

and the large jar to refill the small jar...
this is what I do for classes...

you can also use the large jar with a foam brush if you're working on a really large project...

oopsie...
I just checked...
looks like the small jar is discontinued...
so if you have it, 
KEEP IT...
just use the large jar to refill it...


paint a thin layer of Glue N Seal onto the glass...
no other prep is necessary...


it will dry & look just like this...


next, paint on a medium heavy coat of 
 set it aside to air dry...

drying time will depend
on your humidity & the thickness of the layer of rock candy paint you apply...

I would say mine dried in an hour...
I put it in a sunny window to help speed it up...
make sure to let it air dry...
do not use the heat tool...


when it is dry it looks like this...
you'll see
MAGIC awesome crackles
 that are firmly attached to the glass...

without the Glue N Seal base coat, 
the paint falls right off...

one other thing...
when I did the original post, I got several emails saying the technique didn't work...
after investigating, 
I discovered that they tried to use Multi-Medium as the base coat...
and it did not work...

Glue N Seal is the key ingredient...
and works every time...
look how cute...


in the original post, I added distress stain to add color...

since our kitchen is red, blue, green & off white, I wanted a simple blue vase...

I used my sky blue archival ink...

I tapped the blending tool over the vase & gave it a quick dry...
now it's permanently blue & adorable...

since this is a vase I will use for fresh flowers, I wanted to add an embellishment that would not be damaged if it got wet...

to pull in the red, I decided to use 

I tapped on some red geranium archival ink...


sprinkled it with 


& heated it to melt the powder...
 I like to use a hemostat to protect my fingers from the heat...


I added a remnant rub, using the new remnant rub tool...

then added a little ball chain...


and hung it on the vase...


a project like this is awesome because...

1. it's inexpensive

2. it can easily be customized to any color, using archival inks or alcohol inks...

3. it's 100% waterproof, 
so it can actually be used for fresh flowers...

4. it makes a great hostess gift, 
or a little gift for any occasion...

5. it's another way to use products you already own...

6. it's quick & E A S Y & so FUN...

7. it's a great way to upcycle...
look around & I bet you'll find something you can rescue from the trash...

8. I think these would be adorable, done in several pastel colors & used at each place setting for your Easter feast...

so, in addition to adhering your paper to surfaces with NO BUBBLES...

this is reason #112  

it's a great supply to have when you...

make art!
wendy


Thursday, February 19, 2015

altering with archival reinkers...


here's a fun 10 minute project...

the metal candleholder shown below
 was a Hobby Lobby find...
it caught my eye because of 
the chipped surface...

I also liked it because it was white, making it simple to alter with archival reinkers...

archivals are transparent when diluted, so they look great over light colored surfaces...


here it is looking down on it...
obviously it's a candleholder...

but is it really?


turned upside down, now it's an ADORABLE little display stand...
and it looks like a flower on a base...


from the top is looks like this...
for sure...
I see a flower!


start the timer...
this is a 10 minute or less project...

as always, I'm working on my craft sheet...

I added 2 drops of carnation red reinker...
that brown bottle behind it
 is rubbing (isopropyl) alcohol...


I diluted the reinker with the alcohol and mixed the reinker into the alcohol with a palette knife,
to make this inky solution...

then I took a cheapo paint brush and painted the flower portion of my little find...


oopsie...
having too much fun...
forgot to take the next photo...

diluted with alcohol to paint the base...

when the inks were dry, I swiped 
 over the raised areas to define the flower better...

and here's the result...


this next photo shows that I allowed the ink to pool on the base for extra interest...

but, you could paint it 
to be perfectly smooth, 
if you'd like...


hmmm...
now what to put on the stand?


the moral of the story today is to...
always keep your eyes open...

look for simple (light colored) things to alter...
check Good Will...
or flea markets...
or antique stores...

remember...
it doesn't need to be pricy...

and remember that archival inks
 and archival reinkers are...
AWESOME 
when you want to alter your finds...

this technique will work on resin pieces too...

*coming soon to a blog near you!*

there are lots of archival reinker colors, 
so you can customize your find 
and choose any color that fits your decor...

I'm thinking that the new tea rose 
would be so pretty...
and for sure the new buttercup & 
sky blue would be cool too...

I like when products 
can be used more than one way...

use your archival reinkers 
or use them to...

make (altered home decor) art!
wendy


Wednesday, December 3, 2014

a holiday tutorial...

it's over on the Ranger blog & includes the supply list & step out photos to create this fun little home decor piece...


it's a great way to use up old packaging material, cardstock scraps, small pieces of tinsel twine,  Clearly for Art & idea-ology trimmings...

it's also fun to alter some things we've had for a bit & make them fresh & perfectly color coordinated with embossing powders...

 the technique I shared is
 how to create a faux graniteware effect 

you'll find the scoop here...

running back to the studio now...
I'm in full blown


make (CHA) art mode!
wendy
ps...just you wait to see ALL the CHA goodies coming...
I'm having a blast...

Wednesday, November 26, 2014

altering with archival inks...

episode 2...

I went back to Hobby Lobby to get more of these candleholders...

I showed you how they went from this...

to this...

but they were all sold out...
boohoo...

so...
on to plan B...

this one is close to the same thing,
 but has a metallic finish...

for those who like bling...
you might prefer this style instead...

keep in mind that archival inks are translucent, so the base color affects the end result...

I added leaf green archival to the leaves...


I used carnation red archival on a mini blending tool & tapped on the color & dried it...


then swiped the red geranium pad over the petal edges to accent them...
and dried it again...


remember this background stamp that I chopped up to make 9 little stamps?

I used jet black with this polka dot stamp to stamp over the petals...


and used a tiny text stamp to add text to the 
leaves...it's not essential to do that...
it's barely visible, but I KNOW it's there!
yes...I do realize that I'm NUTS!


here's the quick & easy transformation...

one thing to note...
the finish on these is different than the white version...
the inks felt a little tacky when dry, but this was completely gone by the next morning...

if this is a last minute gift, 
you can paint a thin layer of Glue N Seal over it, let it dry & it would be ready to gift in 10 minutes flat!

but the Glue N Seal is not necessary...
the inks will dry & NOT be tacky...


now...
use your imagination...
it's kind of poinsettia-ish...

to take it a step further...
you could add little bits of Glossy Accents to the petal edges & then sprinkle on some rock candy glitter for even more holiday bling...


I bought 2 so here we go again...

I wanted to change this one to gold, so I put a tiny bit of my gold metallic embossing paste 
on my finger & finger painted it on...
I made sure to keep the layer thin & not to cover up the recessed detail on the petals...


a little leaf green on the leaves & some potting soil archival ink swiped onto the petal edges...
I LOVE IT!


this time I used the plaid mini stamp with jet black to stamp over the petals...


random stamping, but I like the extra detail...


and here they are again...
from this...


to these...


next...

for those of you thinking of joining us on the England tour next July, 
Jim said we have just 6 openings left...
think about it...
grab a friend &
come join the fun...
we'll make art in England...

now a SHOPPING ALERT from Linda at
The Funkie Junkie...

The Funkie Junkie Boutique will slash our already-low prices by 15% accross the board* beginning at 12:01 a.m. on Friday, November 28th. We already sell at 20% below MSRP and with the extra 15% off you will enjoy a 35% discount on your entire purchase!  The sale will run through midnight on Cyber Monday, December 1st.  

this is a great time to stock up on supplies, or try some new products or let Santa know what you might like & save him some $$$!

a 35% discount is H U G E!

I have linked the products I used to 
so clicking on the links will magically transport you to them...

in closing...
just want you to know that
I'm so THANKFUL for YOU, my art friends...
you guys ROCK!

from Rick & I...
have a very
HAPPY THANKSGIVING!

I find it comforting to know that pumpkin pie has NO calories on Thanksgiving...
I *think* that's what I read on the net...
and if it's on the net...it MUST be true!

take care...
make (holiday) art!
wendy


Friday, November 21, 2014

altering with archival inks...

Houston...
we have a problem...

this is not the post I planned for today...

while writing the other post,
  I realized that I had used a "NEW" stamp, so I had to delay that post...
yikes...I almost got in trouble...

my reason for mentioning this?

I've been using LOTS of clearly for art with "NEW" stamps to make layered flowers...
(I know...flowers...shocking!)

I have been using Ranger's new adhesive foam tape & I love it...


 I've discovered it is THE PERFECT double sided adhesive for layering clearly for art...

it comes in both black & white...

I LOVE the BLACK, because it disappears between the layers when viewed from the side...

it adds the PERFECT depth & the adhesive is awesome with the clearly for art...
it sticks really REALLY well...

I also use it to add the CFA flower to the surface...

I'm letting you know so you'll be ready for when the NEW (flower) release comes out in January...
things like this also make great stocking stuffers or inexpensive gifts for friends...

glue n seal is my MOST favorite for adding paper to clearly for art...

and the foam tape is awesome for layering CFA...

ok...

remember this guy I showed the other day?

it's a resin candle holder from Hobby Lobby......

time to alter it...


for this one I used dandelion archival ink, with a blending tool...
just tap it on....
couldn't be easier...

so far...


 after giving it a quick dry, I added orange blossom to the center to add shading...
and a little to the edges of the bottom petals...


I dried it again...

and then used watering can archival to randomly stamp the subtle little polka dots...


that little bit of stamping adds so much detail...


ok...
to finish off the bottom...


I added a drop of the potting soil reinker onto the craft sheet, added a little rubbing alcohol & used a cheapo paintbrush to finish it off...
hmmm...wonder why I put the potting soil pad in the photo?
I DID use the reinker...

I considered using fern green...
or continuing with the dandelion...

so I really think any of these would work for the bottom...

next I added a felt circle to the bottom & it's finished...

so...from this...


to this... 

all in 10 minutes...


other things to think about...

the bottom layer of petals could actually be leaves & they could have been inked with fern green or leaf green...

you could also die cut some leaves to add under the flower...

obviously it holds a candle...

BUT...

it can sit on a dresser to hold your rings...
that little recessed area is perfect!
that's how I'm using this one...

and...

since this can be coordinated to any decor, this makes a super quick...
inexpensive custom gift!

keep your eyes open when shopping...

there are lots of really nice, inexpensive resin pieces that can be altered with archival inks...

resin frames & vases make awesome custom gifts...

 remember...
archival inks are awesome when you...

make art!
wendy
ps...this was so much fun, I'm off to buy more...
I can not wait to make another, using cornflower on the flower, then accented with potting soil...