here's how I got started...

here's how I got started...
a 20 minute podcast by Crazy BeYOUtiful

Friday, March 30, 2012

a match made in heaven...

THANKS to ALL who shared their ideas for repurposing "items" into stencils that we can use for our art...

there are lots of great ideas...
lots of fun things to try!

sharing is good & benefits all of us!
A MILLION...THANKS!

here's one idea that I didn't see mentioned...

brass stencils...
many moons ago I did dry embossing...
with the light box deal...
if you did too...
you may have some brass stencils left...

and another I shared many moons ago...


I like to tap it onto my jeans to remove a bit of the stickiness,
then apply it in stripes... or plaid patterns...whatever appeals to you...
ink or stain right over the tape...
the tape acts as a mask & keeps the area under it un-inked...

this makes a very fun background too...

and speaking of backgrounds...
I needed to make a few samples for my Beyond Basic Backgrounds class...

I *might* sound like a broken record...

the KEY to these backgrounds is Ranger's Specialty Stamping Paper...

you will be amazed @ how much water/liquid you can use for techniques & not affect the surface of the paper...

the 2 pieces I'm showing today have been blasted with a big dose of water...
probably 10 times each!

here's another match made in heaven...

art parts covered with the Specialty Stamping Paper...
seriously...
be still my heart...
I LOVE LOVE LOVE this stuff...

for the piece below, I covered a small art parts creative cover with the specialty stamping paper...
using Ranger's Glue N Seal...the matte finish...

now I have a nice solid base with an awesome surface...

the background is all distress inks & stains, a Lady Dy stencil, some sequin waste, lots of water & archival inks for stamping...

I like pale ochre archival for really "in the background" stamping, then some jet black for some main "in the front" stamping...

the flower is my stamp...
stamped lightly with pale ochre & accented with a Stabilo pencil...

the stem, leaf & heart were free handed...
I RARELY do this...
that's why I have STAMPS...lol...

but I felt BRAVE...

tim's new water brush is awesome for adding specks/dots of color...

load the brush with your distress stain...
then tap it against your finger to create the spots...

here's a tip...this is cool...

keep tapping without reloading more distress stain...
you'll see that as you use up the ink, the dots get lighter...

keep tapping & you get plain water drops...

this is my new fav way to add colored dots & water spots...


here's another...
this background started out with these distress stains...

stenciling with a Dy stencil & sequin waste...

really "in the background" stamping with french ultramarine archival with this new background stamp...

and again...
the main stamping is almost always done with jet black archival...

the art parts flower is inked with faded jeans stain...
stamped with polka dots and misted with sunflower sparkle Perfect Pearls mist...
it's the ULTIMATE bling in a bottle!

oops...
the heart was traced & then accented with the pencil again...
and the flower center is one of my "embellish your art" pieces from Blossom Bucket...

so, what I wanted you to see is that if you like backgrounds, inks, stains, stamps, stencils & PLAYING...
give the Specialty Stamping Paper a try...

you WILL love it...

these 2 pieces also show that you can play with journaling type backgrounds, but use them for "out of the journal" art...

these backgrounds are also a great start for card makers...

hmmm...what else do I have to say?

here's something I discovered with the new distress markers...

keep in mind that they are a water based ink...
just like the distress inks & stains...

and the Blossom Bucket pieces don't appear to be a porous resin...
so I didn't really expect a good result...
but this is one of those things I HAD to try...

I used the walnut stain distress marker on one of my Blossom Bucket post marks...

on the left, you'll see the original...

on the right, after I inked it with the marker & blasted it for about 20 seconds with the heat tool...

the marker actually did change the color of the postmark...
YIPPEE... another option!


now if you go back to the photo @ the top of the post...
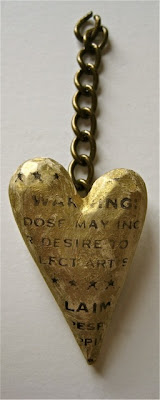
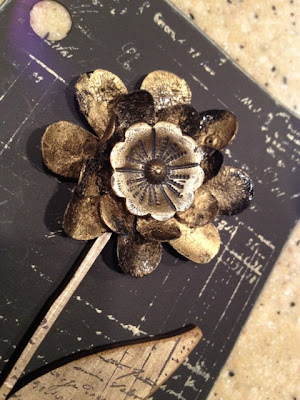
you'll see the same post mark, altered with butterscotch alcohol ink & a little coffee archival...

I LIKE options...
LOTS of options...
and the choice of LOTS of different effects...

which explains why lots of the Blossom Bucket cuties are a natural color...

now we can alter them to fit any project we're working on...

now I bet you're wondering about the random winner...

congrats to...

Blogger stampinfranni said...

Wendy, I am really, really, really enjoying reading your blog these days. Everything you do is so inspiring that I just want to play hookie from work and get messy with you. I'm really looking forward to taking your Beyond Backgrounds class at the Paper Niche. While I love Dyan's bright, bold colors, I'm also loving the softer look you achieve.

So, to answer your question, two old-time faves I use as stencils are bubble wrap and sequin waste. I also have some card-size stencils which I purchased about 14 yrs ago to create a checkerboard pattern, and another one to create a frame design around a card, that I've dug out and am using again.

See you again soon!
Fran

March 29, 2012 9:37 AM

Delete

and since Rick is going to the PO...
how about a second winner?

Julie S. said...

Sometimes I use those red net bags that fruit comes in or cut-apart plastic fruit baskets (my husband claims I'm a pack rat-hoarder. What does he know?!) :)

March 26, 2012 9:30 AM

Delete

please email me with your shipping info...
wbv1213@me.com

one more thing before go...
yesterday I got a look @ several of the finished dimensional Blossom Bucket pieces that I designed for the gift industry...

I did a happy dance...
I'm thrilled with how they look & I can't wait to show them here...

I only saw about 8 or 10...
so I'm still waiting NOT TOO PATIENTLY to see the other 40 or so...

ok...
all this talk about inks, my fav paper & stamps has me ready to...

make art!
wendy

Monday, March 26, 2012

some days I'm a cheap date...

and some days not so much...

but today I AM!

I'll show you exactly what this stamp says...

how to...


this post idea came after I shared the following journal page...

the email said...

I had no interest in this art journaling stuff, until I saw this. I love it.
I'm not a fan of bright colors, doodeling & handwritten words, so this appeals to me. I know I can do your style. However, I must tell you that you are evil. Now I have to run out and buy stencils and sprays etc. My hubster will need a 3rd job.
ps. I REALLY do love you!


so...the moral of today's post is that I'm sure you already have ITEMS in your home & studio that you can use as stencils...

you'll still want the thinner stencils...
alphabets, numbers, patterns etc...
because they're arty...

but in the mean time...
you already have ITEMS you can use with great success...
I KNOW you do!

keep in mind, the ITEMS I'm showing today are a thicker material, so you can't easily use the distress stains over them, but spraying them with Dy's inks, tim's Adirondack color washes, perfect pearls mists or WATER is a breeze...

because they're thick, you can't stamp over them like you can with stencils made from a thin material....

so thin stencils have some very important advantages...

in addition to misting over these ITEMS...
you can also outline with them...
and use the new distress markers with them...

if you don't have sprays or the distress stains, that I used...

use your distress pads to create the background & use these ITEMS with water in a mister to create really easy backgrounds...

let's get started with some fun finds...

when tim came out with his alpha parts,
I told everyone I met to buy 2...
one to actually use the letters & one to keep whole, to use as a stencil...

since the letters are plastic...
just a quick rinse under the facet & it's all clean & ready for the next time...
AWESOME!

they are large...perfect for large projects...
but use just a portion of it, if you are working on a smaller art...


here's something else I bet lots of you have or HAD...
I HOPE you didn't trash the leftover...

grungeboard makes an awesome stencil,
especially since liquid doesn't bother it....

mist over it, or trace around it to make a pattern...

yep...another perfect leftover...

here's the circles & the pack has several different sizes...
remember to check your stash...

next up, some plastic needlepoint/cross stitch material...

VERY inexpensive & indestructible!
mist over it... for an awesome background...

rub a distress pad over it...
then mist...
AMAZING results!


next is a rug backing (the stuff so a rug won't slip on hardwood floors)...
again...kind of a rubbery material...
run it under the faucet for a quick clean, after it's been misted...

this is a small piece of gutter guard...

found it @ my brother's home & dug it out of the trash...
he thought I was NUTS...
again...

but it's another plastic that works perfectly...
and creates a very cool pattern...

you can also randomly trace some of the diamonds...
distress markers work great...

and shelf liner...
buy a roll...split it with a friend...

this is fun to die cut into different shapes...

it's perfect for adding paint to your art...

I've seen all kind of patterns in this shelf liner stuff...


this next thing is a Home Depot find...
from the paint section...

I have no clue what it's for, but it too is perfect for misting over...
for this one...
make sure to mist lightly, since it doesn't sit flat on a surface...

and to get even more use from your favorite dies,

you get a mask (the piece that falls out) & a stencil...
which is the left over...
lol...double dipping...

don't have the masking material?

it's fun to look @ ITEMS & repurpose them for something entirely different than their intended use...

am I getting into art journaling?
not exactly...

I like making these backgrounds out of the book, because if it's UGLY...
I can trash it & don't have to rip it out of a book & destroy it...

plus my handwriting sucks & I'm not a doodler...

plus I like to use the backgrounds for home decor type stuff...

plus I want to use Ranger's specialty stamping paper...

ok...
here's your mission, should you choose to accept it...

leave a comment & SHARE your idea of any found object that can be used as an art stencil...

I'll be back on Friday & I'll have a prize package for a random commenter...

open your eyes...
look around & SHARE your idea...

of something cool we can stencil with to...

make art!
wendy

Friday, March 23, 2012

since we last visited...

YIKES...I KNOW it's been a long time...
SORRY!!!

yesterday I got the funniest email asking if she needed to call the search & rescue dogs...lol...

NO...I'm just fine...& VERY BUSY...

since our last visit about 10 days ago,
here's what got checked off the TO*DO list...
  1. new stamp sets designed, sized, proofed & completely DONE! YIPPEE! I CAN. NOT. WAIT. TO. GET. THEM. HERE.
  2. art parts are about 80% designed...still need a bit of tweaking
  3. 6 new ITEMS submitted & awaiting the finals from my friends @ Stampers Anonymous...I'm super duper excited about this...it's been in the works & we didn't have time to get it done for the CHA winter show...the waiting is killing me...
  4. started new Clicker Cutts designs
  5. created 12 new "ARTS" for Blossom Bucket...these are home decor type gift items. SO VERY EXCITED to see them in person
  6. designed quite a few (lost count!) new Blossom Bucket "embellish your art pieces"
  7. completed a "secret" assignment...you'll see that the first week of April...WARNING...I used PINK...WHAT? seriously...and the weird part? I LIKED it...oh boy...that is scary!
  8. booked flights to Colorado & Florida...see the sidebar for the stores I'll be visiting. I'm very excited to meet new art friends & visit new to me stores
  9. designed an extended Ranger class...stores have the choice of a 6 hour or 7 hour class...but that wasn't long enough for the art chicks in Florida & they requested an advanced artsy background class...it's almost done. It's called Beyond Basic Backgrounds & it focuses on Rangers new Specialty Stamping Paper...it's THE BOMB, stencils, water brushes, distress stains, distress markers, a special pencil, my stamps & more...I'm really looking forward to the first one
  10. I actually cooked...hard boiled eggs, baked potatoes in the crock pot & simple syrup for my mojitos...hey... in this house it's a big deal...and it COUNTS as cooking! Rick said the hard boiled eggs were THE BEST EVER...poor guy is quite easily impressed
  11. signed up for tim's on line class...I gave up my Pinterest time to take the class...as expected...it's AWESOME!
  12. got stamps & supplies ordered, inventoried & organized for upcoming classes
  13. redid our family room...before studio 490, I vacuumed every day...sometimes twice...and rearranged the house about every 2 months...Rick would come home & wonder where he'd be sitting that night...since studio 490...no time for that...but we took a day & changed it up & it felt good

Ok...I've been saving up a few questions...
here's the first...

#1. I think your studio looks divine and so very organized. I saw it in the creative studio book. can you divulge some tips for us who are not organizationally inclined?

I think the biggest thing I can tell you is to toss the packaging from your purchases & start buying containers that fit your needs.

by tossing the packaging, I'd say you can triple your storage space.

here's a shot I took a few weeks ago...
it's the packaging from 20 packages...


and here's the actual amount of space these items need...

there are 600 gears in a 4 inch container & about 500 of the new eye screws in an even smaller one...

HUGE difference...
#2...does that new Ranger paper work with Watermark resist? I have it, but can't bare to waste the paper if it doesn't...

YES it does...
here I stamped my mini weeds on the Specialty Stamping Paper with Watermark Resist & used the distress stains over it...

it's not complete...
but you can see that it does work just fine...
ALL Ranger products are perfect with this AWESOME paper...
so use anything you have!

#3 how do you do it all? I have no husband thankfully, no kids left at home, work 38 hours a week & can't squeeze out more than an hour a week to make art. HELP.

hey...I DON'T do it all...
don't think I can...
I can't!

I haven't grocery shopped for probably 2 years...and as you see above...I don't cook anymore...
and it also explains the missing blog posts...

but seriously, I think the key is priorities...
do what you REALLY want to do...
and what really NEEDS to be done...

like I said above, I wanted to take tim's class...
but didn't feel like I had an hour a day to spare...

so, I thought about it & gave up Pinterest for the 2 weeks...

I absolutely LOVE Pinterest, but it is a HUGE time sucker & my guilty pleasure...
but I decided & I made the class my priority...

it's kind of simple...
but it's what works here...

I leave you with this little CHA art...

you'll see my art parts telephone...LOVE that thing...
it's sitting on the Blossom Bucket black metal shelf...they are arriving in April!

art parts gears...these are wildly popular!

and another light bulb...I TOLD you before...
addicted to them...


LOVE the mini license plates as a background...

thanks for not giving up on me...

I hope you have a wonderful weekend...

make art!
wendy

Monday, March 12, 2012

creative foundations blog hop

today we're celebrating my friend Vicki Boutin and her new book called...


when Vicki asked me to contribute some art to her book, I was happy to, since this book is all about techniques...

something I dearly LOVE...

techniques...

Vicki is giving away 4 copies of her book on Wednesday...
here's the beautiful cover...

for your chance to win, you need to visit
each blog, pick up a special word & then leave the phrase in a comment on Vicki's blog...

my word is at the end of the post...

you should have arrived here from...


Vicki asked that we make a piece of art for the hop,
based on a technique or 2 from her book...

I chose
MAGAZINE COLLAGE...

and HEAT EMBOSSED CHIPBOARD...

but I twisted them a bit...

let's get started...

with Ranger's Wonder Tape...

and instead of using a magazine for my collage pieces,
I decided to use paper scraps instead...

this is a great way to USE your scraps...
instead of tossing them...

below you'll see random widths of left over paper strips
on the creative cover...


trim the strips to fit the base...
sand the edges with the sanding grip...
then go over all the papers with
this unifies all the papers...

add some brushed corduroy around the edges, with the blending tool...

then broken china distress stain thru a circle stencil in random areas...

next use aquamarine archival to randomly stamp portions of the background stamp...

and stamp the saying in the lower right corner, with jet black archival...

the base now looks like this...

stamp the saying again...
stamp the photo artist @ the top left...
using jet black archival for both...

then randomly stamp the NEW
lace pattern directions stamp, using jet black...

it will now look like this...

I LOVE the mini letters from the background stamp...
tiny & not overpowering...
but they add interest & depth...

Vicki's technique is heat embossed chipboard,
which to me means heat embossed art parts...

ink the large art parts scallop with black soot stain , dry & then clear heat emboss the polka dots...

glue the small Blossom Bucket black metal corner to the scallop as shown...

next, using tim's Adirondack gold metallic mixative,
alter the Blossom Bucket cream colored heart...
dry, then stamp with jet black archival & dry...

hot glue a swivel clasp chain to the back...
the altered heart now looks like this...

now stamp the small art chick onto
the coordinating art part with jet black...
add a bit of blush, with barn door...

use Glossy Accents to fill the Blossom Bucket glasses...
darken the Blossom Bucket mini lips with vermillion archival...

make the flower with clearly for art blackout & add a Blossom Bucket flower center...

ink the small art parts wings with peeled paint stain & stamp the polka dots with jet black...

paint the art parts handle with the gold paint dabber, dry, add some coffee archival to age the gold paint...
& jet black archival...

partially glue the handle under the art chick to make her look like a TROPHY WIFE!


glue the art parts base to the Blossom Bucket black metal corner to create a stand alone art piece...

add the pieces as shown...

the chain is held in place with one of tim's new screw eyes...
they are a VERY useful new item...

and the finished art...

back to the hopping info...

my word is...

CREATIVE...

and your next stop is over to visit...


HUGE congrats to you VICKI, on a job well done...
the book is so awesome & colorful...
just like YOU!


ok...time to get going...
while you hop...
I'll ...

make art!
wendy

Friday, March 9, 2012

jumping all over the place...

happy Friday!

like the title says...
just lots of randomness today...

I've spent the week designing new "things" for CHA Summer...
it's only 4 months and a week away...
a HUGE...YIKES!

I've been working on new stamps, new art parts & new Blossom Bucket trinkets...
plus a few "things" for the gift market...

and scheduling more teaching weekends...
the scoop is on the right sidebar...

see?...I'm jumping all over the place...

next I want to share a small portion of an email I got earlier this week...
I've answered emails similar to this in the past...
so I thought I'd share it here...
maybe it will help others...

OMG...I just found you by accident. You are exactly what I've been searching for. I want to jump into your world, but I need guidance. I would appreciate any help with these questions. Where do I start? What supplies do I need? Can you explain the process you used to develop your style? How long did it take?Can I do this stamping?

here are my thoughts for people just finding the stamping, inking, mixed media world...

before you make any purchases,
do some research to help you find your style...
find what appeals to you...

this will help you avoid impulse purchases...
things you may not really need...
or want in a few months...

there is TONS of free info on the internet...
visit blogs, searching for key words to help you find them...

YouTube is also an excellent source of free info...
again, search for key words...
or names of artists you find on the net...

check out Pinterest...but beware...
it's a HUGE time sucker...
it's amazing...
I LOVE it...
but time can quickly get away...
don't ask me how I know this!

I think you'll quickly see what style you like,
be it cute, simple or grungy...

then purchase just the basic supplies you need...
don't buy everything you see...
make sure you really enjoy "making art" first...

here's my list of essentials...

to protect your work space & it's great for inky techniques...

quite simply...THE BEST!

a multi-surface black ink...
Ranger's Archival works on paper, chipboard, grungeboard, grungepaper, fabric, metal, Clearly for Art, art parts and more...

quiet, hot & it has a built in diffuser, so your embossing powder isn't blown all over the place...
lol...that fit right in with the title!

some card stock...
to get you started with small card projects...

an adhesive...try Claudine's MultiMedium (matte)...
the mini size is a great trial size...

a few colors of ink...start with the basic colors...
choose a green, blue, red, yellow & brown that you like...
I LOVE the distress ink colors...

a stamp set or 2...

when choosing the stamps, try to have several ideas on how you would use them, before you make a purchase...

now about style...
several years ago I probably didn't know this...

but because of teaching I do,
I have the answer...

the style is already IN YOU...
seriously...
IT IS...

here's my observations...
in my Ranger techniques class, each student has access to the exact same products (tags, inks, mists, stamps etc)...

and what I see is that each person has their own style, whether they know it or not...
and I point this out @ the end of the workshop...
it's very obvious...

some people use more inks,
some use the same inks as their table mates, but apply it lighter...
even their "way" of applying inks is unique...

each person chooses the ink colors that SPEAK to them...

no 2 tags turn out exactly the same...
and that's the fun part...

get the technique down, then put your UNIQUE twist on it...

and the last part...
CAN I DO THIS?

YOU BET...if you want to...
YOU CAN...
NO DOUBT...

take some time...
just play & practice....
and don't expect a masterpiece the first time...

like the old adage says...
practice makes perfect...

and eventually YOUR STYLE will naturally evolve!

and in the future,
when you are addicted & want every ink & rubber stamp you see...
remember...
it's NOT MY FAULT!
YOU ASKED!

now jumping to inspiration...

our new laundry room ART...

was inspired by the photo below...

there doesn't seem to be much of a connection...
but in my little mind I guess there was...

keep your eyes & your mind open...
inspiration is all around us...

and speaking of SEEING...Lori GETS it!!!

Lori saw these $1.00 generic wood pieces...

and magically transformed one into this BEAUTY...
I think it's pretty spectacular & she started with a $1.00 find...

wouldn't this make a great gift?
and she'll give you the scoop on how she created this ART!

THANKS Lori for sharing with us!

and here's a few pieces from CHA...
don't think I shared these before...

this first is a piece for tim's idea-ology booth...
it's small...done on the small square art parts frame...

I wanted to highlight his new destinations papers...
YUM!

the clocks are sitting on a little shelf, that's made with my new Blossom Bucket black metal shelf...
I LOVE THESE ...MILLIONS!
and they ship in APRIL...NEXT MONTH!

and the dimension on the clocks was fun...
I used Glue N Seal to add the destinations paper to my Clearly for Art...
cut out the clocks & heated them to make them rounded...

the clearly for art didn't add a lot of bulk, which was important, since this is such a small piece...
and it allowed me to have 3 clocks layered & they still fit on the shelf...


and this was a fun one to create...

sporting an art parts gear halo & wings...
and some Blossom Bucket trinkets...
the large flower, the mini lips & those cool glasses...
these ship next month too!

they are fun to ink with the distress stains...
and then embellish...

the optical label was stamped on grungeboard to add some texture...
a little vintage lace...
& she was complete...
I'll be back on Monday @ 9am Chicago time...

I'm participating in a blog hop for an "author" friend...

I'll have a tutorial all ready to talk about the techniques I used to create my art...

until then, I wish you a bright bright sunshiny day
with plenty of time to...

make art!
wendy

Monday, March 5, 2012

answers, inspiration & a winner...

I wanted to start off today & answer the questions about using tim's distress stains with stencils...

yes...it DOES work...
you can see the Lady Dy alphabet stencil below...

for those of you who tried it & didn't have a good result...

here's the tip...
the stain dabber top should be fairly dry...

I actually swipe it on a paper towel to remove the excess ink...

then just lightly swipe the distress stain right over portions of the stencil...

if there is too much ink on the applicator, the ink will seep under the stencil & make a blob...

with just a bit of ink on the applicator,
you have very good control & can ink the exact area you choose...

it's that simple...

and for control freaks like me...

remember that if you put a bit of the distress stain on your craft sheet, you can ink tiny areas of the stencil with the detailer water brush, like MAGIC!

the next question was about stamping over stencils...
does it work & what ink should you use...

here's what I've found...
stencils made of thin material work the best, if you want to stamp over them...

thicker stencil materials hold the stamp off the surface, which gives you a more uneven random stamping...
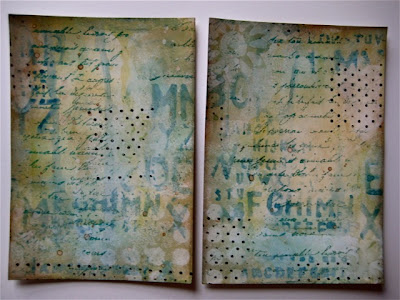
usually with a large shadow...
which might be OK sometimes & sometimes you might want a better image, depending on your project...

as for the ink to use...

keep this in mind...
archival is waterproof when it's dry...
distress inks react with water...

so you can use either, depending on the look you are trying to achieve...

if you stamp with an archival & dry it...
it's permanent & you can add any water based product (misted water, Perfect Pearls Mists, color washes, distress stains, distress inks) over the archival & the image remains crisp & won't bleed...

if you stamp with distress & add a water based product over it...
it does what it's supposed to do...
bleed...

HOWEVER...if you want to use a distress ink color for your stamping & want it to stay crisp...
just stamp with the distress inks as a last step & don't add any water based product over it...
then it's perfect!

I hope this makes sense...
you have LOTS of inking options...

anyway...
here's where you can see the readable stenciled alphabet letters...
done with the distress stains...

now for the INSPIRATION part of this post...

the simon says design team has lots of awesome art this week...
their weekly challenge is called "bottle it"...

they have used lots of studio 490 products...
yippee!

it's a thrill for me to see how others create with things I designed...
and today blew me away...

they have made TONS of awesome ART...

a while ago I discovered a fun technique I called faux crazed glass...

here's the link to that post...

and here's the original bottle, using that technique...


and here it again, on a CHA project...
this time I used one of tim's corked vials...

the technique works on both vintage & new glass...

you'll see fun beautiful variations of this technique @ simon says...

and here's the metallic clearly for art original art & post...
and here's the Scrapttime video link,
if you missed it...

over @ simon, you'll see another entirely different look...

this is soooo cool...
take the technique & put your twist on it!


pop over & then you can pop to the individual blogs,
to get more info on how each person created their art...

I'm sure they'd love comments too...
if you have a second...

and speaking of comments...

comments win prizes...

I'll be sending some of

40 items??? Hot Dog!! Can't wait to see them! I believe my favorite part of your description of the Ranger paper is "it takes a lot of abuse!"..that's what I need LOL I love watercoloring stamped images but haven't found the right paper yet. Love love love your sunflower and journal pages!

March 4, 2012 7:27 AM

congrats Ms plum?...
please send your shipping info to me @ wbv1213@me.com
and we'll get that off to you...

HUGE THANKS to the gals & GENTLEMAN over @ simon says stamp for sharing your wonderful art...

you've inspired me to...

make art!
wendy
ps...random comments win ...
just saying...still have LOTS of the specialty stamping paper...

Saturday, March 3, 2012

Ranger's specialty stamping paper...

is the BOMB!!!!!!!
I told you I LOVE it...

here's why...

  1. it takes a lot of abuse
  2. all Tim's products work perfectly on it
  3. it takes a lot of abuse
  4. all Ranger products work well on it
  5. it takes a lot of abuse
  6. the surface is AWESOME for stamping..nice CRISP images
  7. it takes a lot of abuse
  8. it does not warp
  9. it takes a lot of abuse
  10. it doesn't get those ugly little pills
  11. it takes a lot of abuse...
  12. it's an awesome matte finish...
  13. in addition to great pages, it's perfect for other stuff...
  14. see below!

I have plenty to use myself...
plenty for classes & some to SHARE...

300 lovely sheets...

and how did you guess?

I LOVE LOVE LOVE tim's new water brushes...

A LOT!
a few weeks ago, I posted my technique for using tim's stains, inspired by Lady Dy...

here's that link...

so I did exactly the same process to make these 2 journal pages,

what I LOVE most about this paper...

no warping...I flooded these pages with water,
until I had "poodles"...
and I did this about 6 times...

still NO WARPING...
the surface is still perfectly smooth...
and you can see...the pages are 98% flat...

I used these distress stain colors...
faded jeans, mustard seed, scattered straw & brushed corduroy...

aquamarine archival is my new "go to" favorite for background stamping...

the polka dots are a portion of my border stamp...

the random alphabet is a stencil from Lady Dy...
so are the bleached out dots...

the little brushed corduroy specks were done with the water brush...
I talked about that a few days ago...

here's how the 2 pages started...


but they both didn't end up as pages...
I used the one on the left to cover

then added 2 of my Blossom Bucket pieces for the center...
and a stem...
to make this...


and the right hand page ended up like this...

tim's new chit chat stickers helped make the saying...
they are FUN!

the pencil stamp made a border...

Mr Tophat is an art part...

the journey stencil is an oldie but a goodie from Stampers Anonymous...

so the moral of the story...
is that Ranger's specialty stamping paper really is the bomb...

and if you read this far...

you deserve a chance to win some...
just leave a comment...

we'll choose a random winner @ 7AM on Monday...

and I'll share some with my blog friends...

one more thing before I head back to work on new stamps...
I KNOW...CHA is only 4 1/2 months away & my travel schedule is hectic...
so I gotta get going...
YIKES!

anyway...
do you remember that I have gift/home decor "items" coming out with Blossom Bucket in July?

OMG!!!!!!!! yes RED & ALL CAPS!

I got to see the "prototypes" the other day & I about fell off my chair...

I. CAN. NOT. WAIT. TO SHARE. THEM. WITH. YOU.

PHEW...we originally planned on 12...

but I've been busy & I *think* there are about 40 different "items" coming...
I'm over the moon EXCITED...

I hope YOU have a wonderful weekend...

get out your supplies &...

make art!
wendy