here's how I got started...

here's how I got started...
a 20 minute podcast by Crazy BeYOUtiful

Monday, January 25, 2016

mat mini video by Scrap Time...

my friends
Mark & Christine from Scrap Time 
filmed several videos at CHA...

the video I'm sharing today explains how to use this new "put a bird on it" stamp-it stencil-it 


I like the mat minis for several reasons...

#1...they have a great price point...
#2...they are easily customizable to coordinate with any project...
#3...they are very light weight,
 but very strong
#4...they are easy to store
and...
#5...they are super cute!

psst...read to the end...
I'm giving them away today!


here's a few ways I've used them...

oh...
first...
I had several questions about that 
hanging chain stamp at CHA...
it's the same straight chain stamp
just stamped on an angle 2 times...
I'm always thinking...
how else can I use this?

looks totally different, doesn't it?
and it makes a great sign hanger...

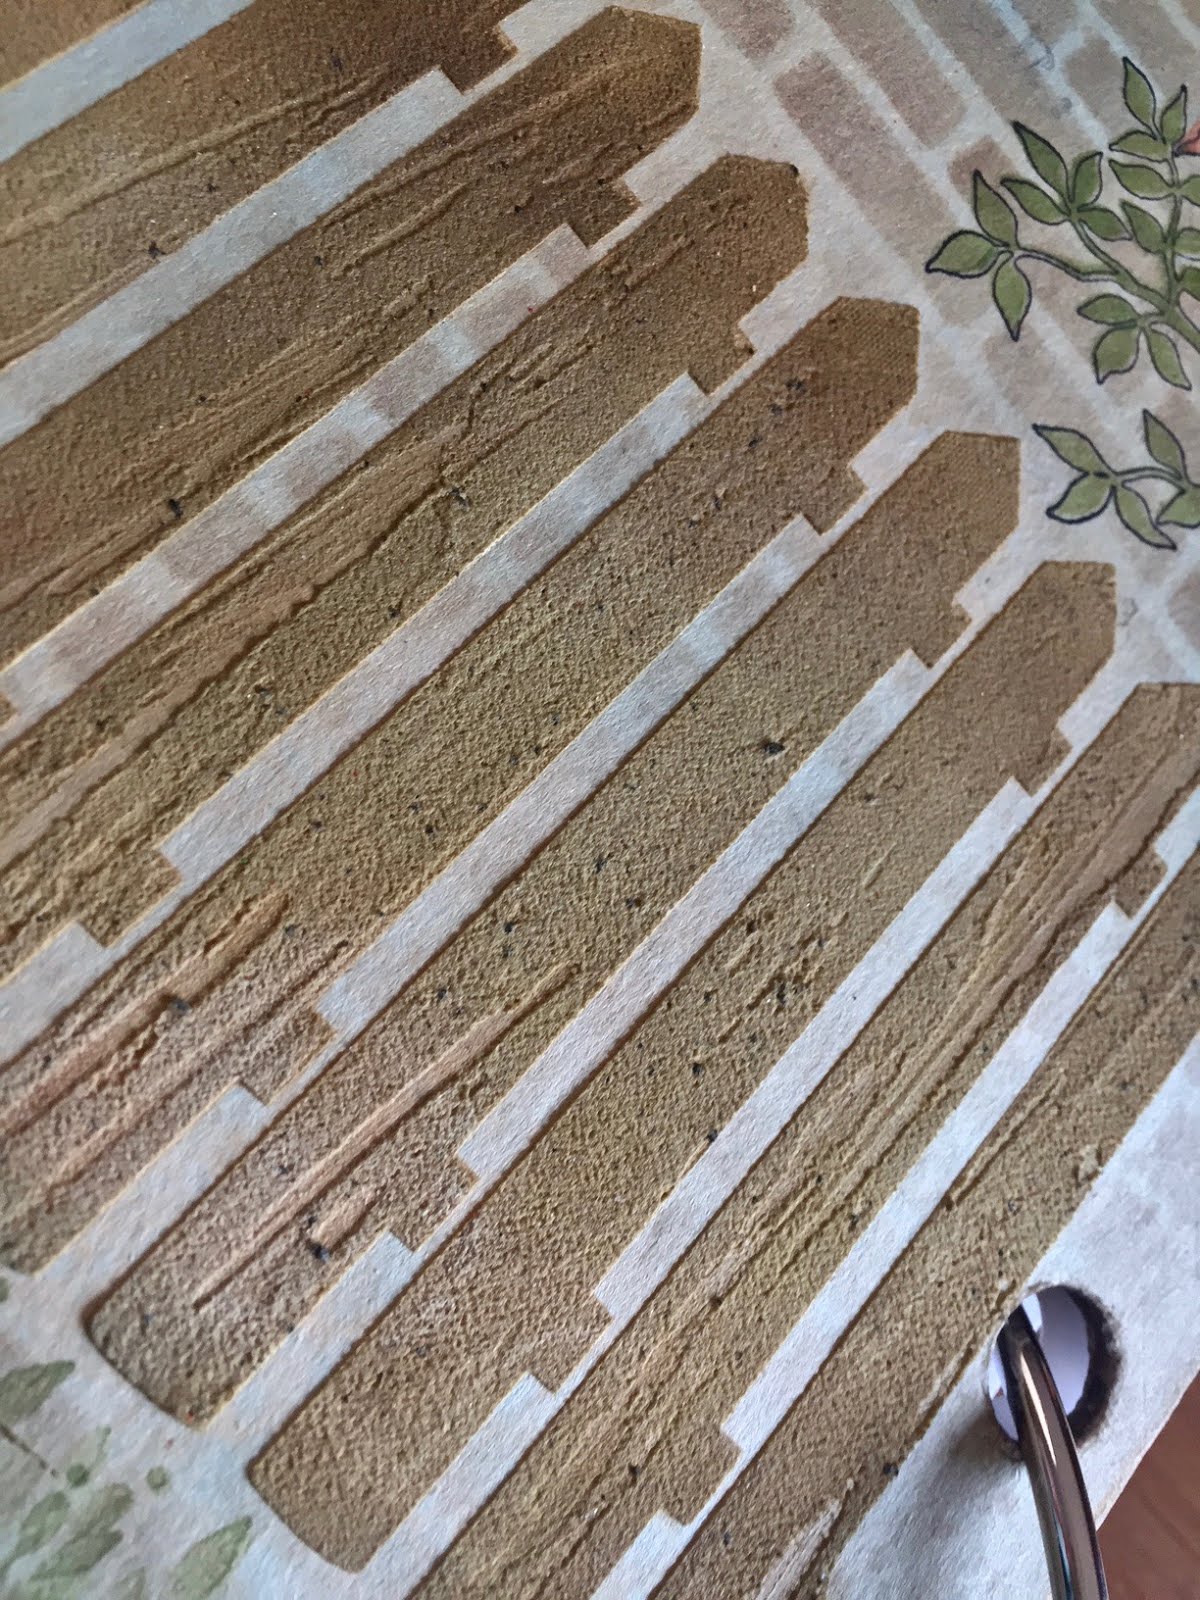
for this sample, I inked thru 
I kept it uneven to give the idea 
of it being a worn out fence...


hmmm...
I can't find the whole photo for this next one...
but here's some things to note...

this time, 
the picket fence stencil was used with 
I stenciled with
 then sprinkled on the
melted the powder...
the weathered white is PERFECT 
for this stencil, because of both the color & the texture...
you can also dirty up the white by going over it with archival ink...
look at the top of the pickets...
I accented them lightly with 

I hope you have this powder...
I demoed it at CHA with my archival on black for a really fun technique...
that's coming soon!

I hot glued a memo pin behind the birdhouse on the right...
that makes it easy to stick into an arrangement...

the flower is my violet embossing powder mixed in equal proportions 
with tim's rock candy glitter...
it is so pretty, but hard to show in photos...

the glitter gives the embossing powder a really cool rough texture and it adds the perfect amount of subtle vintage bling...
and the embossing powder holds the glitter securely in place...
a match made in heaven!

I like that it's another way to use products
 I bet you already have...

I just mix the glittered embossing powder
I like the jars because they're
small & easy to store...
and
it's easy to see thru the clear lid...

I also use them to store lots of 
tim's tiny idea-ology trinkets...
you'll see the new hex fastener combined with the base of the fluted fastener to create this flower center...


THANKS again to MARK & CHRISTINE 
for the very professional video...
it's always great to see you both!

you'll find the video HERE...

next...
 we have another winner!

this prize package was won by...


CONGRATS to...

Blogger jezebel said...

NOOOOOOOO! I need to buy a Gallon of glue n seal! The archival ink, well, the new colors will always be wonderful and tree branch...I will just get another reinker. But NO MORE GLUE N SEAL? Say it ain't so! Ugh!

I love this set, but then I love every set you have. They're like Lays Potato Chips - you can't have just one!
January 23, 2016 at 11:58 AM
 Delete

jezebel,
please email me your shipping info...

and compliments of Ted...
I have another giveaway for you...

a comment is your entry to win these guys
 that I talked about today...


good luck my friends!

I hope you enjoy the video & that it inspires 
you to grab your supplies and

make art!
wendy


Friday, January 22, 2016

fat little book page with distress crayons...

since I had so many questions about
 I'll postpone the Q & A post 
to show you how I used them...

this is a mat mini page from the new
it's 4 ½ inches square...

 I applied a thin layer of collage medium (matte) to the page,
 with the new collage brush & dried it...

this creates a waterproof base...
I LOVE THIS...
here's why...

I didn't like my first 2 backgrounds,
 so the collage medium allowed me to
 wipe them off & start all over...
like M A G I C...

the collage medium also makes it easier & extends the open time for blending with your fingers...
they dry very quickly to a permanent background...
if you touch them they DO NOT SMUDGE...
BUT...
they are ALWAYS water reactive...
the crayons are a very unique product!

so for this background...

I scribbled on 3 colors of the distress crayons and  blended them with my fingers...
I placed my polka dotty stencil over the page & wiped thru the stencil to remove
 with a baby wipe...
 the polka dots are the spots where the crayon was removed...

did you notice that the dots each have an outline around them?

here's a little trick...

when you remove the nozzle from 
 (to add the new fine tip applicator)...
SAVE IT...
wash it out and use it as a stamp...


I tapped the larger end of the nozzle onto the
& stamped it over each dot to accent & define the dots better...

I know...
sounds like a pain, 
but it only took 2 minutes...

you'll barely see that I randomly overstamped the the background with the script background stamp, using watering can archival...

I LOVE the tarnished brass distress paint dabber for adding a finishing touch to the page edges...
I add that to most cards, tags & journal pages that I create...

I stamped the bird/branch using 
and dried it...

I had intended to leave the bird black...
but...
changed my mind &
decided to emboss him with 

to emboss ONLY the bird,
 I used the bird portion of
this outline stamp-it stencil-it was designed to work perfectly with the solid image stamp...

so, with the bird stencil over the stamped bird, I added orange blossom archival ink & then sprinkled on the coordinating embossing powder...
you can see that only the bird is embossed & he really becomes the focal point now...

I used a saying from 
 that I talked about in the last post...
it's stamped at the bottom in jet black...

the little heart is a new mat mini "have a heart", inked with orange blossom & stamped with the ticking background, using watering can archival...

the little bow was stamped with jet black & inked with the new sunflower archival ink & stamped with the ticking background to make a plaid...


the tiny line of dots is from the 

a super fine detail that I LOVE!

a little pen stitching around the edges & this page is done...


here's a closer look at the embossed bird...
this is a really fun background, using the crayons...
those "linen lines" in the background are created with the collage brush...they add an extra bonus element & some subtle texture too...
but it's interesting...
it feels completely flat...


in the next photo you can see what the 
looks like when used alone...

this is the outline stamp,
 filled in with the stencil...
so fun & E A S Y!

with the stencil in place, you can see that I added shading & stamping to just the bird...

the detail gets added 
called...

did you notice the ticking background used horizontally to create  a border at the top & bottom of the card?

background stamps do so much more that just backgrounds...

I've been reaching for the new lots of dots stencil over & over...
mini polka dots...
always in style!


so...
do you need the distress crayons?

I say...
FOR SURE!

they really are unlike anything I've ever played with...
I'll be sharing more in future posts...

wait 'til you see them on clearly for art...


now about the winner of 2 new hot off the press background stamps...

congrats to...


Blogger Deb~Paxton Valley Folk Art said...

Love all your new background stamps Wendy but the Just Say It stamp was a brilliant idea, look at all those words and phrases you can get from just one stamp! Thanks so much for the opportunity to win! Deb xo

January 21, 2016 at 11:29 AM
 Delete


Rick said you are the winner & he'll be shipping them off to you...
Deb, just email me your shipping info...

be watching instagram...
I'll have a flash giveaway there this weekend...
I *think* it might be the repeating quilt stencil...

do YOU want to win 
some of the stamps I used today?

here's the GIVEAWAY for today...
thanks again to Ted, for the great prizes!


the random commenter will receive
and

a comment is your entry...

have a good weekend...

and to my east coast friends...

stay in...
stay warm and

make art!
wendy


ps...
yes...
boohoo...
it's true...

tree branch archival is discontinued...
I LOVE this color & I use it daily...

hydrangea is also going away...
poop...

and so is dandelion...
so sad...

if you didn't snag them...
be quick!

and this really sucks...
glue n seal is going away too...

off to find kleenex...


Thursday, January 21, 2016

just say it GIVEAWAY...

here's a fun background stamp
 from this new release...


this guy is a great value, because it contains 21 sentiments, some mini hearts & dotted lines...
all for the single background stamp price...

because I worked in surgery for many years...
I have NO FEAR of chopping things up!

in the photo below you can see that I cut mine into individual sentiments...

it's simple with tim's tonic scissors...

I have them stored on our blank storage sheet...
these sheets have no graphics, so both sides can be used...
any cling or clear stamps work well on these sheets & that's how I store my backgrounds & the stamps from the stamp-it stencil-its...


here's the stamp alone, so that you can see the sentiments better...


and here's how I used it on a page from my new mat mini

you can leave the stamp whole & cut out each sentiment...
this is a good way to use up scraps...
or stamp it once on a larger cardstock & then cut out the individual sentiments...

the black hearts are the 

the plaid heart was made by stamping the ticking background 


once vertically and the second time horizontally...

the stenciled leaves are from 


if you cut JUST SAY IT apart, 
the stamp can be used 
directly on the page or card
like this...
LIVE EACH DAY...

you can see that I used the dotted line as a hanger for the new mat mini birdhouse...


drumroll...

compliments of TED at Stampers Anonymous...

today's GIVEAWAY is BOTH of these new background stamps...

just leave a comment & it's that easy to have a chance to win 2 backgrounds...

also...
if you follow me on instagram, I'll be doing giveaways there too...
I seem to post there more often, because it's so quick & easy...

and next week, the giveaways will be both here and 
to make sure you don't miss out...
hover over the LIKE button & choose to see posts in your newsfeed...
I guess Facebook settings have changed & I've heard people are not seeing all the postings???

I have had several questions 
about new products & CHA stuff...
so I'll be back soon with a Q & A post...
now is your time to ask & get a quick answer...

ok...
leave your comment or  question...

you might win 2 new stamps to...

make art!
wendy

stop the press...
I just spotted this...


Friday, January 15, 2016

CHA was FABULOUS & FUN!


every year I come back from CHA & think...
WOW...
THAT WAS THE BEST SHOW EVER...

BUT THIS YEAR 
REALLY WAS
super WONDERFUL...

THANK YOU
 FROM THE BOTTOM OF MY HEART 
to everyone who attended and supported 
studio 490 and my Ranger products...
your sweet comments about my new products and my samples/demos made me so happy...

I'll be back with regular blog posts (with tutorials) 
and giveaways
using the new goodies next week, 
but today I thought I would do a quick post 
to share a few tidbits...

this was my Ranger challenge piece...
the base we used is Dina's new media board...
it's a very nice solid surface...
my whole background was sprayed with tim's distress sprays...

I used LOTS of distress sprays and 
the board didn't warp...

the focus was distress & I used distress stains, sprays, paint, the ink pads &
unlike anything I ever seen...

they have some very unique properties & I'll be sharing how I used them...

look for tim's demos on you-tube...
I'm sure there will be lots where he explains them in detail...

I wanted my challenge piece to look like a book, 
sitting on a shelf...
thus, the 

the new "picket fence" stencil was my focal point... 
and I built around that...

I used the picket fence with 
if you don't have this one...
you NEED it...
it's not new, but it's really cool because it has a dull, very textured finish...
that allowed me to use the crayons to dirty up the white fence...
I also have another fun technique using the weathered white embossing powder...


the same picket fence stencil is so fun to use with embossing paste to create texture...
for this sample, I colored my white embossing paste with a 2 drops of potting soil reinker...
when I spread the paste thru the stencil, I intentionally did not make the surface smooth...
I wanted to create a wood effect...
I like it!


I'm guessing that 
the #1 top selling stencil 

there are several ways to use this...

every time I demoed it, people were surprised at how quick & easy a background can be created...
it's NOT hard at all...

it can be used like this...
stenciled just once,
straight, 
to create a square quilt pattern...


or...
like this...

stencil once, turn it 90 degrees and stencil again with a second ink color to create those 
adorable tiny plaids...

below, the quilt looks like diamonds...

there are several ways to line it up...

you can see on the sample below that there is ink in each square...
you can also use it so that the original background color remains uninked...

the nice straight lines also make it super simple to trim a zig zag border on a card or tag...
it can be used to create a banner or a border...
more on that soon...

the plaid on the large flower is
stamped once, turned 90 degrees and stamped a second time...

on the front smaller flower, 
it's stamped vertically only once...


just a little pen stitching and a few glaze pen dots, make the quilt look even more authentic...
a small detail...
took 3 minutes...
but it makes a big impact!

think about "quilt" flowers...
oh yes...
stay tuned for lots more examples...

I flipping LOVE the mat mini hearts and 
the birdhouses are to be used with 


so that's it for today...

I'll be back next week with LOTS more...

have a great weekend &...

make art!
wendy

ps...
WAIT...
I can't say how much I LOVE these products...
the collage mediums are almost instant drying...
GREAT for those of us who are impatient...

they are totally different 
than anything I've used before...

they are matte & FABULOUS...
I REALLY love them with the crayons...

I've had a little play yesterday & 
I'm IN LOVE...

trust me...


I liked lots more new things...
but hubby is waiting patiently to head out on a junking date!
I shall return!