here's how I got started...

here's how I got started...
a 20 minute podcast by Crazy BeYOUtiful

Thursday, January 29, 2015

new CHA video and...


a GIVEAWAY!

Christine and Mark from Scraptime
filmed a video in the Ranger booth at CHA, showing how to use my Stamp-it Stencil-it's...

SiSi's are fun, 
because the stamp & coordinating stencil 
are both included in the package...

I used the new hydrangea SiSi 
for the video...


 there are 2 ways to use the SiSi's...
you can keep the image completely flat,
like I did in the video...
this is great if you're mailing a card...
or if you need to create a quick card...
a really quick card!

OR...
plan B...

you can stamp it & layer it like I did on this tag...
(this is also a good example of 
the oval from the new spotlight frames & masks set)...


to create this tag,
just stamp the hydrangea twice, 
cut out one full image & just the flowers from the second...
and layer the pieces...

this flower is stamped on clearly for art that has been covered with newsprint...
glue n seal is the BEST adhesive for this...

I'm LOVING newsprint over CFA...


here's the GIVEAWAY part...

I'll send this hydrangea SiSi to the lucky winner chosen by Christine from comments left on 
just leave your comment on the post by 10PM EST on Sunday February 1st...


you can find 


and...

also filmed by Scraptime...

check it out to learn about my new archival ink colors, the coordinating embossing powders and how to use the
to DOUBLE 
your embossing powder options...

HUGE THANKS to 
Christine & Mark 
for sharing the awesome videos...

and CONGRATS on your 8th anniversary!


I hope you'll grab some popcorn...
and check out the videos...
then be inspired to...

make art!
wendy
ps...I heard yesterday from several store owners that they had received new stamps...
some got notified 
that their CHA stamp order had shipped...
be watching...
yippee!


Tuesday, January 27, 2015

still playing with...


I had this tag sitting out just waiting for me...
it's a #8 manila tag cut to 5 ½ inches tall...

you can read how it was created 


I love the "plaster" & wanted to add this lace stamp to the tag bottom & have it coordinate with the "plaster"...
so...
I inked the stamp with glacier white 
(same ink as snow cap pigment)
& stamped it toward the bottom of the tag...
then sprinkled on the weathered white embossing powder & heated it to melt the powder...


here's what is looks like after I trimmed along 
the tag is now 5 inches tall...
perfect for the smaller flower I planned to use...

the weathered white embossing powder coordinated perfectly with the "plaster"...
it's a really nice off white (not too stark)...


I defined the tag edges with brushed corduroy and inked right over the lace...
the ink is darker in the open areas of the stamp & that really makes the lace stand out...


I used jet black to stamp the sentiment in the lower right corner & used tree branch archival to stencil some words...


the stamp & stencil are from 2 different releases, but work together, just as planned...


the tag top needed some white, so I inked the plaid background with glacier white, pressed the tag top onto the inked stamp, then sprinkled on 
 & heated it to melt...


after adding more brushed corduroy, it looked like this...


next, I added some stenciling using 


and now it looked like this...
some light stenciling...
some darker...
for interest...


hmmm...
I thought it needed a bit more color, so I added some broken china...
I like that better...

since I had used archival for the background, for the stamping and for the stenciling,
I could add distress right over with no worry that there would be any smearing or bleeding...

archival & distress = a match made in heaven!


the next photo shows the adorable 

to create the flower I added newsprint to clearly for art (CFA), with my fav glue n seal...

I used jet black to stamp it twice & cut out one full flower & one partial...
the marigold was inked with 
the darker yellow is dandelion archival...
they work together very well...

the leaves are leaf green & fern green archival...

I heated the CFA to be able to shape some of the petals...


I didn't want the whole flower raised this time, so...

I used pieces of the adhesive strips under the full flower & used the black foam adhesive under the partial flower...
these adhesives are both really good 
to use with CFA...


oops...
forgot photos for making 

the full smaller black flower pot was inked with cornflower blue archival ink & sprinkled with cornflower blue embossing powder...

the smaller top portion was inked with 
& sprinkled with the sky blue embossing powder...

after melting the embossing powder on both pieces, I added potting soil over the tops to age the color...then used the small spatter stamp with glacier white to add the white dots...

after drying the white ink, I added a remnant rub...
L O T S...

you can see in this photo how well cornflower & sky blue work together...


and here's another reason

after shaking the tarnished brass distress paint, I dispensed some onto the craft sheet...

I tapped the ball end of the tool into the paint...


and added metallic dots to the center of the vintage quilt stencil...
super easy to control...
perfect dots every time!

the dots are a very tiny detail...
but my thought is that every layer & every tiny detail matters in the finished piece...

the dots add a metallic detail, but it's subtle...


the next photo shows how to create a custom embellishment using a stencil...

there's a scrap of CFA that is covered with newsprint...


then, with the stencil still in place, I used watering can to add polka dots...

after cutting it out, I heated it to shape the wings...


here's the finished tag...

it's lightweight, but strong & perfect for tags, cards & mixed media too...

I love the dimension on the marigold...

you'll see that I used the tiny attacher to add the custom butterfly...


here's a shot of the "plaster" & the tarnished brass dots...

there's lots of dimension & detail, but this
could easily be mailed...
it's very lightweight & sturdy...
I love the CFA, because it won't get squished...


thanks so much for all the comments & emails about this new technique...
I hope you can try it...
it's seriously simple & fun...

I'm working on another TWIST to the technique...
keep your fingers crossed that it looks as good as it does in my head...

now it's time for Megan to be sent to a new home...


I had several requests to show how I color her...
I'll get that done & posted as soon as I can...

Rick chose the winner...

CONGRATS to...

Blogger Julia Aston said...

Love this technique Wendy! I'm going to try it out tomorrow!!!
January 23, 2015 at 10:18 PM
 Delete

Julia...please emil me with your address & Rick will get Megan on her way...

I'll be back on Thursday with a special CHA scraptime video & a fun 
G I V E A W A Y...

hope to see you then!

now...
I'm off to

make art!
wendy


Friday, January 23, 2015

splattered plaster technique...

using NO PLASTER!

the studio looked like a scientific experiment was taking place...

I had an idea...
which was based on the properties of the ingredients below...

they are dye inks, which are OIL based...
and
another dye ink, 
but all the distress inks
 are WATER based...

because it's white, 
 keep in mind that the picket fence spray stain
has pigment in the solution which makes it opaque...

so,  just like salad dressing, 
oil & water don't mix...

this was the basis for the idea...
I *hoped* to take advantage of that
 incompatible (when wet ) effect...

I added one last ingredient...
the bottle on the far right is rubbing alcohol...
aka...surgical spirits in the UK...


it went like this...

I swiped the sky blue  & hydrangea archival ink pads onto the craft sheet...


then added plenty of rubbing alcohol... 

& mixed the alcohol into the inks with a palette knife...

then after shaking the picket fence distress spray stain,
I misted the archival ink/alcohol solution with 
ONE blast 
of the picket fence distress spray stain...
one pump is plenty...
I tried 2...it was too much for a small tag...
but I would use more picket fence 
for a larger art journal page or canvas...

***DO NOT MIX this SOLUTION***...


I swiped a manila tag into the inky solution...

the picket fence on top of the archival solution actually looked like curdled sour milk...

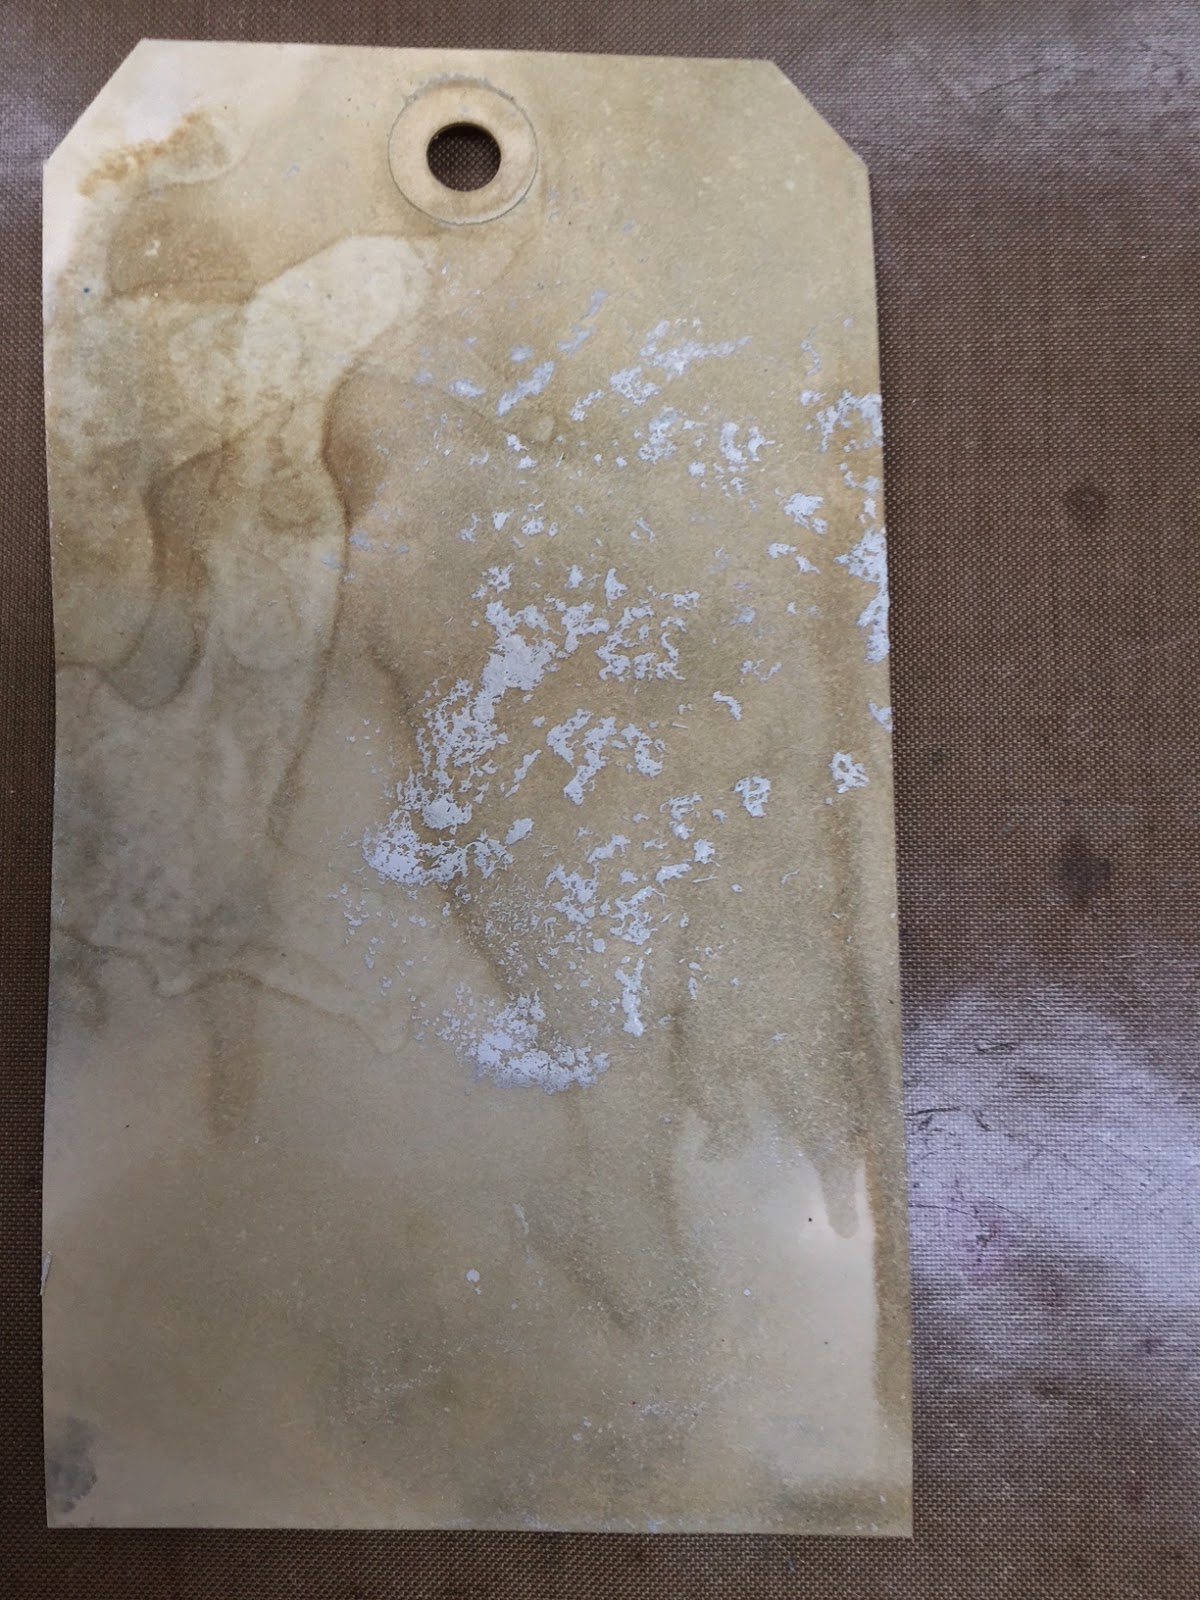
here's a wet not yet dry tag...
see those plaster chunks?
this is using tea rose archival ...


now back to the dry sky blue/hydrangea tag we started with...


the picket fence "curdled chunks" dried & have created awesome texture &
 they now they look like...
 splattered plaster!

you can not get this random cool effect with embossing powders, embossing pastes or texture paste...
it's very random and 
much different in appearance...


now this is cool...

before you dry it, you can actually move the chunks or curdles around...
that's pretty fun...

they aren't stuck to the tag until it's dry...
when dry, the chunks are baked into the tag & permanent...
like this...


 it was fun to work over that cool background...

I used watering can archival with 
the new ruffles border to stamp along the bottom of the tag...


next, I wanted a thin border at the top of the tag...
after inking the ruffles stamp
 again with watering can
I pressed the tag onto the inked ruffles stamp...
I only wanted that small straight trim piece...
you can see that below...


I inked the old wood floor background stamp with tree branch & pressed it over the tag...

then used jet black to stamp the lace border at the top & bottom of the tag...


so far it looked like this...
sort of shabby chic!


I added sky blue, then hydrangea archival to the tag edges...


then gathered twigs to the edges & gathered twigs very lightly over the whole tag...
LOVE LOVE LOVE how this is looking...


now for the cute mat mini pitcher...

I inked the new stripes stamp with 
pressed the pitcher onto the inked stamp, then sprinkled on watering can embossing powder...
and heated the powder to melt it...

you can see the embossed mat mini pitcher 
sitting on the stamp...


to create the flowers
I glued a sheet of newsprint to a sheet of CFA (clearly for art) with glue n seal...
then stamped the hydrangea SiSi
with jet black 2 times and 
cut out one full hydrangea image & 
a partial of just the flowers...

the flowers were inked with sky blue & a bit of hydrangea & the leaves were inked with leaf green over all the leaves, then fern green right under the flower, to create the shadow effect...
the SiSi stencil makes this so easy...
it masks off the flower...

I heated the CFA to soften it so I could shape the flowers...


here's the back of the mat mini pitcher...
after the second layer is added to the back, the hydrangea stem slips right in the slot...


 is the perfect way to add the flower layers...
and I also like to use the foam to add the flower to the tag...
it adds just the perfect dimension & 
the black isn't distracting, 
when viewed from the side...


here's the assembled flower...
I like to offset the layers...
it seems to make the flowers more realistic...


next I stamped the sentiment in jet black archival...
and glued my pitcher in place...


then slipped the flower stem into the pitcher...
the adhesive foam holds the hydrangea securely to the tag...


I wanted to add just a tiny bit of bling...

so after shaking the pewter distress stain, I tapped it onto the craft sheet & used
to add dots...
the ball end of the tool makes PERFECT dots...
you can tap the ball end onto the craft sheet into the stain or onto the wet dabber top & dot away...

and this tool is really great for adding rub ons to surfaces...
a MUST HAVE!


I also used the stain to accent the top & bottom of the tag...

I LOVE the mat mini pitcher, the texture & that hydrangea for sure...
I like to use the black Sakura glaze pen 
to add dots to the flower centers...


and  here's the completed tag...


this was so much fun that I couldn't quit...

I tried several other color combos & now I have some tag bases just waiting for me...
first I tried
tea rose & tree branch with picket fence...


here's the result...

here is the wet tag...


and here's the dry tag...


 I just HAD to make another...
this time I tried
watering can & tree branch archival 
with picket fence...


that combo made this great background...


so this experiment paid off...
I absolutely love this technique & I LOVE that we have another way to use the supplies we already have, in a completely different way...

it's fun to play & try ideas...
sometimes we just need to remember 
that it's only ink & paper...

remember...
it's it's ugly...
it goes in the trash...
and you never tell a soul or blog about it...
haha!

so...
have I inspired you?
are YOU going to try it?

tell me...

what color combo are you thinking about?

***if you've read this far***
how about a giveaway?

I have this stamp set, compliments of Ted...
for a lucky commenter...


just
leave a comment...
& Rick will choose a random winner...

I hope you can take time this weekend to have fun and...

make (splattered plaster) art!
wendy