here's how I got started...

here's how I got started...
a 20 minute podcast by Crazy BeYOUtiful

Friday, November 27, 2015

featured artist, GIVEAWAY & SALE scoop!


today I'm honored to be the featured artist over at

thanks so much for the invite!

I had the pleasure of meeting some of the design team, back in August, when
I taught a workshop in London...
we had a totally fabulous time & it was a thrill for me to finally meet friends I only knew thru the internet...

I hope you'll pop over to see the post and be sure to leave a comment there...
take some time to check out some of their previous posts...
I KNOW you'll be inspired!
they are a talented bunch!

I sent them this prize package to giveaway to a random commenter on their blog...
so your comment just *might* win you this...


it's a good GREAT shopping day!


BLACK Friday
SALE news...
first...
over at STAMPERS ANONYMOUS...

15% off your order & free shipping if the order is over $75.00
no code needed...
the sale ends at midnight Saturday, November 28...
the web site has been completely redesigned & it's really fabulous...
it's a great resource for researching 
older stamps/products too...


NEXT...


Simon Says has 15% off storewide and the sale runs thru Saturday November 28 at 11:59pm...


the code to enter is 


and a reminder that
The Funkie Junkie sale continues 


Linda is offering an extra 15% off the daily discounted prices...

NO code needed...
runs thru Monday evening...

after all that exciting sale scoop...
don't forget to visit
a vintage journey & enter their giveaway...

have a GREAT weekend...
it's a busy time of the year, but remember to

make art!
wendy
ps...
"on the truck for delivery"
I'm pacing...
if it was warmer I'd be out on the drive...

new stamps, new stencils & more arriving today...
I can not wait to get going on CHA samples...
I REALLY love to make art!

back to pacing...


Thursday, November 26, 2015

thankful for you...and SALE scoop...


just a quickie post to let you know how THANKFUL I am 
for all of you...

thanks for inviting me to your store to teach...

thanks to everyone who signed up for my classes...
it was a pleasure to meet YOU...

thanks for your support of my products...

thanks for visiting the blog 
 (extra thanks to those who faithfully leave comments)
& thanks to everyone who comes to see us at conventions...

from the bottom of my heart...

THANK YOU ALL SO MUCH!
let's do it all again in 2016!

I just wanted to pass this info along...


for my friends in the USA...
once the family festivities have ended & you have your nighty on...
it's time to relax & shop!

the SALE starts at 9PM eastern time...
and runs thru Monday evening...

no code is needed...
prices are already adjusted on the site & everything is an EXTRA 15% off 
the normally discounted prices...

there's also a section of HOT DEALS, 
that are  reduced even further...

here's the link...


so, once again...
THANK YOU...
I hope your day has been great...

and that you'll take some time for yourself to...

make art!
wendy


Monday, November 23, 2015

a little holiday art...

let's start the week with a
"little holiday art"...

this is a continuation of what 
inspired me at the home improvement store...
it's the base of this project...

grab your supplies & head over to 


you'll find the supply list, 

follow along, have fun and...

make a little holiday art!
wendy

Thursday, November 19, 2015

still looking...

beyond the obvious... 

one of my favorite new products for the holidays is tim's alpha parts frozen...

these FROZEN have been so much fun...

I used them a more "traditional" way for a Ranger project, that you'll find over on the Ranger blog on Monday, November 23...
it's combined with one of the home improvement store finds you see below,
 to create a little holiday decor...
checkout it out on Monday!


back to the FROZEN...

these are cute acrylic pieces right from the package...

you'll find snowflakes & icicles...
but...I looked beyond the obvious...


I snipped a piece of the icicle to fit my #8 tag...
inked the piece with fern green archival...
sprinkled on the fern green embossing powder & heated it to melt the powder...


turn it upside down
and now the icicle has been transformed into...
GRASS!

look how cute!


but it was a little too straight & perfect, 
so I rewarmed the "grass" with the heat tool until I could bend the pieces to create a more authentic looking GRASS...
here's the result...


I wanted to create a tag, with the "grass"
as my inspiration...

here are some quick details...

I started with my usual #8 manila tag 
cut to 5 ½ inches tall...

I made a quick alcohol/archival background using cornflower blue and leaf green...

the tag is edged with 

there is some stamping in the background using sky blue with

the sun was stenciled with

the top & bottom borders were stenciled
 with this stencil, using fern green...

that's the add a stencil on the left,
 stenciled with sky blue archival...

the flower was stamped twice onto the newsprint side of the clearly for art, with jet black...
I use Glue N Seal to cover the CFA...

the flowers are inked with tiger lily archival...
and layered, using black foam adhesive...
it's THE best adhesive to use with CFA...

you'll see I cut the leaves off of the flower...
I didn't need them with the grass...

the hearts were inked with red geranium, then covered with the custom brick embossing powder  & heated to melt the powder...
incase you missed the brick powder recipe...
 here it is...

2 parts of frosted crystal embossing powder and then stir in ½ part of watering can embossing powder...

this recipe makes a textured/not too shiny authentic brick embossing powder...

I added an old button to the flower center & a few black glaze pen dots...

and here's the finished tag...


here's a closer shot...


and here you can see the bent blades of grass...
it tickles me that this worked and really doesn't look like an icicle now...

the embossing powder stays firmly attached, as long as you use archival ink under the embossing powder...


looking beyond the obvious gives us another totally unique option...

this was seriously fun...

changing icicles to grass...


I really love to...

make art!
wendy


Tuesday, November 17, 2015

look beyond the obvious...

with the latest stamp release, 
I enlarged the original
 "hosta" stamp...

I love it because 
it can be used so many ways...
the leaves are easy to cut out & they
 can be combined with so many flowers 
that we have, 
to create lots of combos...

and if you prefer 


the photo below shows the original size on the right & the new on the left...


I  used the whole image for this sample...


today I'll share another way 
to use the same stamp...


I stamped these 2 flowers onto clearly for art, that is covered with newsprint paper...

both were stamped with jet black archival & cut out...

they were both inked with 
then stamped over with this stamp...

I inked the stamp with orange blossom for a tone on tone effect...


next, I stamped the hosta leaves
 ( I chopped off the flower) 
2 times onto CFA/newsprint...
using jet black...

save the flower!
turn it upside down, ink it with yellow
 & it looks like a BEE!

after the leaves were cut out, 
I inked them with leaf green archival...

the plaid background stamp got inked with watering can archival & I stamped over the leaves...
when in doubt, watering can or tree branch coordinate with just about everything...
both are great for background stamping...

the watering can is much softer than jet black...
save jet black for your main images...
you'll see it makes them pop...


plaid leaves? striped flower?
sure! why not...
there are no rules for art!


the #8 manila tag was cut down to 5 ½ inches...
if you haven't tried this, that ¾ of an inch makes a huge difference in the proportions of the tag...
I am really liking this size...

the background was created with 
the rubbing alcohol/archival ink technique...

I used sky blue & tree branch...


I added shading to the edges of the tag with pumice stone distress ink & then edged the tag with the tarnished brass distress paint dabber...
it's a small detail, but it's a nice easy finishing touch for tags & cards...

hmmm...
what else?

oh...I lightly inked the unmounted
script background with tree branch archival & randomly stamped over the tag...
mostly toward the right side...

those little dots are tarnished brass distress paint applied to the spatter stamp that comes in the 
and...
it's another way to use that stamp!
I'll also be showing some other ways it can be used for holiday projects...
think snow!

the sentiment was stamped with jet black...
and that row of lines at the bottom was stamped with tree branch...
repeating the colors used in the background
 makes it foolproof...


I heated the leaves & flowers to shape them...
clearly for art pieces 
will maintain their shape...

now those "hosta" leaves can be arranged 
to create a swag...


the flowers get layered together 
and the layered flower will cover up
 the intersection of the leaves...
 a single gem accents the flower center...

I added black glaze pen dots to the border, then got carried away adding them to the background...
note to self...
somedays you need to know when to quit...


and now the hosta looks like a 
whole new much larger stamp...

 this works with the smaller hosta too...
for smaller projects, used with smaller flowers...
it's super cute...

by combining 2 different flowers
you get another NEW unique flower...

the flowers are open designs, 
so that they can be stamped or stenciled
 to change them up even more...


the title of this post is
 the moral of the story today...

pick up your stamps...
turn them sideways & upside down...

look beyond the obvious to get more use from your stamps when you...

make art!
wendy
ps...I hope you'll come see us
 in Madison, Wi this weekend!
we'll have the booth LOADED with cool supplies to make art...
tell me that you are a "blog friend"
and I'll have a little gift for you...

I have a fun make & take planned 
for Friday evening...
you'll get to play with my stamps, stencils, inks, mat minis, distress ink & glitter, my embossing powders and embossing paste...
just what you need 
to get in the holiday mood...


Friday, November 13, 2015

art journal page tutorial...

this is one very L O N G post...
I got carried away with the photos...
but I do think they help 
to get the picture across...
ok...that was corny...


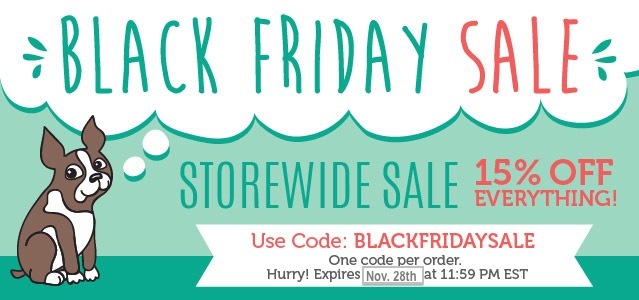
***at the end of the post, 
there is a special SALE code...***


I had no real page plan when I started,
 except to show a new technique...

"stamping with rubbing alcohol"

it starts like this...

here's one of my original stencils...
it comes with both the stencil & the mask...

this is a large art journal page,

cut to 8 ½ x 6 inches...

***IMPORTANT INFO***

specialty stamping paper has a magical coating on it & the coating makes every ink you add to it MUCH slower to dry...

it's VERY important 
to dry each ink layer that you add...

if you don't...
even the smallest amount of ink will smear...

trust me on this!

DRY EACH LAYER!

for this technique, it's important to use 
for really good results...

the other benefit to the specialty stamping paper is that the fluid we add does not penetrate the paper...

I like that because when I work on the back of this page, I don't have to deal with color in the wrong places...you have a nice clean page to work on...

here's my process... 

I laid the stencil on my page & it's a bit to the left...
not exactly centered...


the bottle you see below is filled with rubbing alcohol & I have a CLEAN polka dot background stamp...

a CLEAN stamp is important for this...
if there is residual ink on the stamp, the alcohol will reactivate it & the color will transfer...


I stenciled the heart with tea rose archival & removed the stencil...
for this step,
I DID NOT dry the ink...


I misted some rubbing alcohol onto my craft sheet & moved it around (with my finger) to make a wet area large enough for my background stamp...


then I placed my unmounted stamp into the alcohol...

do this ONLY ONCE...
more than that & you pick up way too much fluid & you loose the stamp pattern...

I stamped randomly over the page...
not pressing it everywhere...

you can see the alcohol is bleaching/lifting the archival ink...
you can also see the wet alcohol dots outside the heart...


the rubbing alcohol does not harm
you'll not see any warping, 
piling or bubbling of the paper...

also, because the stamp was clean, 
there is no ink outside the heart...


now it's dry...


with the mask on, protecting the heart, 
I used sky blue archival with 


stenciled 3 areas...

you can't go wrong with the triangle theory...
3 areas will make the eye move & it makes the art more cohesive...
(I sound like I know what I'm doing...huh?)


next, I stamped my sentiment with jet black archival...


what a surprise...
my next image will be a flower...

I stamped it onto the newsprint side of a piece of clearly for art that is covered 
I only use glue n seal to adhere the newsprint paper to the CFA...
glue n seal is best paper adhesive in the world...


I cut out the flower and inked the polka dot background stamp 
with tree branch archival & 
stamped over the flower...

I used just 1 flower for this page, 
but it's nice to have the others 
ready for another day...

I inked over the flower with sky blue...


I used my custom DIY archival pad to stamp the stem/leaves onto newsprint/clearly for art,
then cut it out...


I find it convenient to label the bottom of the pad with the archival reinker colors,
in the order that I used them, to create the pad...


and here's the color variation on 
the leaves/stem stamp from being inked with
nice subtle transition...
love it!


next, I like to test drive the pieces to see where I want to add more to the background...

(if you like clean & simple...
you could quit right here)


then placed the heart mask over the heart & stamped the text randomly, again in 3 areas...

for random background stamping,
 I like to use the stamps unmounted...


to add the next background layer,
with sky blue...


to create a border along the left side...


to add some shading around the heart, I replaced the mask and inked around the heart 


this time I didn't dry the distress ink...

I misted some water onto my craft sheet, tapped the new splatter brush into the water & spread the bristles over the distress ink
 to create water spots...
distress ink is formulated to react with water...


but...

here's an 
oopsie...

I had used my brush with tumbled glass distress stain a few days ago
 & didn't rinse off the color...


so you'll see I got both water spots & some BONUS color!
unplanned...
but cool...

you'll also see that the archival inked heart does NOT react with the water, because
archival ink is waterproof when dry...


I used a waterproof pen to doodle wiggly lines around the heart...
even this tiny bit of pen ink 
MUST BE DRIED...


now some watering can archival, with the  checkmate stencil
to add another background layer...


again, in 3 areas...


the bow was stamped onto newsprint/clearly for art with jet black and cut out...
I inked it with sky blue and stamped over
that was inked with tree branch...


those stenciled dots needed to be accented, so I found the little tip in our junk drawer & tapped it onto the watering can archival pad & stamped around the dots...


to add dots to the centers, I tapped the ball end of the remnant rub tool onto the leaf green pad...

I LIKE when a tool has multiple uses!


I also used the design  ruler to add some lines to the left side...
and a black glaze pen dot to the ends of the lines...
now I like the border...


I used my white magic mat board
inked them with leaf green, and stamped over them with the polka dot background, 
using fern green...

the flower, stem/leaves, bow and hearts are now glued on...

 I ***thought*** was done...


but...
I decided that the background 
still needed more, so this time I added inky dots with the splatter brush &

just dispense some onto the craft sheet...
tap the splatter brush into the stain...


the heart mask was replaced to protect the heart...
then I spread the bristles over the background


and now the background has another layer...

I added a line on each side of the page & 
a 3 x's  to the right side of the heart & this time it's really done...


here's a better look at those tiny ink dots...
and LOTS of polka dots!


so think about this...

#1...
normally a page (or card) starts with the background & you build upon that...
this time, I had my main image down & added the background layers right where they needed to be...

it's a different way to look at things... 
the process is fun...
try it!

#2...
it's a great new technique,
stamping with rubbing alcohol...

any % of rubbing alcohol you buy 
will work just fine...
70% or 91%...
just buy the cheapest one...

stamping with alcohol works best
because the ink stays wet & sits on the surface...

I bet you're wondering...
does the alcohol damage your red rubber stamp?

NOPE...
I rinsed it off with water...
that's it...

Ted said there are 2 main REALLY
harmful things for red rubber...

one is prolonged exposure to direct sunlight...
so don't leave your stamps sitting outside on your deck, baking in the sun all summer long...

and the other is petroleum products ...
they are not friendly to red rubber...

#3...
mix & match old & new products to create something brand new and get even more use from what you have...
look at what you have & how it can be combined with something else for a new look...

#4...
even after stamping with alcohol, 
the archival ink is still permanent, when dry...
so, I could have added distress ink over the whole heart & it would NOT smear...
distress and archival inks like each other...

#5...
you could use this page as inspiration for a card...
just choose a smaller heart stencil and go from there...

#6...
look around your home 
for things you can stamp with...

today, I used the little tip I found...

all sizes of jar lids make great stamps too...
I bet you'll find fun possible stamps in your home...


so that's an art journal page...
studio 490 style...

I hope you enjoyed it...
I hope you'll try it...

and I hope you'll
have a great weekend and

make art!
wendy

ps...the funkie junkie is offering a
 special SALE CODE 
to celebrate sending out 10,000 orders!
CONGRATS Linda & staff!...

here's the code to enter at checkout for 
an extra 10% off your order...

10000