

there's NO fooling here...
today I have a fun distress paint tutorial to share...
you'll notice that there are 2 step out photos missing...
once again...
I was having so much fun
that I simply lost my mind...
hey...
it happens...
and the MORE fun I have...
the more it happens...
***note to self...PAY ATTENTION!***
to create the background,
I applied these distress paints onto my craft sheet...
and a tiny bit of salty ocean...
then misted them with water...
I swiped my specialty stamping paper thru the paints until the paper was covered...
then misted on more water & dried it...
the project base is the art parts rectangle
from the rectangle frame set...
save the other pieces for another project...
I used Glue N Seal to adhere the
specialty stamping paper to the art part base...
& used the sanding grip to sand & distress the edges,
then added a bit of walnut stain distress ink,
with the blending tool to cover the white paper edges...
it looks like this...
with beautiful blending of the colors,
in true distress style...

next I inked my script background stamp with
stamped over the base & dried it...
***by choosing a lighter archival color,
I'll be able to add more layers
without creating a jumbled mess...***

I painted my
with wild honey distress paint & dried it...
***I like to dab the paint on...
then tap it with my fingers to spread it around***
when the first paint layer was dry,
I added a second layer of wild honey...
but this time I let it partially dry...
and then press the UNINKED stamp
onto the flower to remove some of the paint...
this created a REALLY cool tone on tone effect...
***clean the paint off your stamp before it dries***
here's the flower...

I darkened the photo a bit to better show the detail...
I WILL be doing this again...
it's subtle...but very cool...

now some stenciling with the paints...
I like to use Cut & Dry foam to stencil...
I cut some pieces about 1 inch x 2 inches...
this is a good size to work with...
it's small enough that you can work in small areas...
you can also use both ends for a color...
***this is cool...the paint does not dry stiff or crunchy...
I've been using the same Cut & Dry pieces since we got the paints...***
I stenciled the first set of leaves
with peeled paint distress paint & dried it...
then added more leaves,
again with the peeled paint distress paint & dried it...
***I used stencil tape to block off part of the leaves, since I only wanted to stencil over the bottom 5 leaves...
***I like the Cut & Dry to be fairly dry...
after I pick up the paint, I like to dab some off,
so it's not super saturated***

***clean your stencil before the paint dries...***
I placed the stencil back over the leaves...
inked my text stamp with jet black archival &
pressed the tiny text stamp over the stencil...
I did this over all the leaves...
***to remove the archival ink from the stencil,
I use cheap Dollar Store rubbing alcohol...
it's quick & easy...
I got a quart size bottle for under $2.00***
***another tip...
when stenciling, make sure not to go over the edge of the stencil***
***and another tip...
I find it easiest to use an UNMOUNTED stamp, when stamping over a stencil...it makes it easier to press in the chosen areas***

you can see below,
that the stencil also acts as a mask
to protect the background from the text stamp...
now only the leaves have text on them...
***you'll also see that because the paint is OPAQUE...
the stenciled leaves cover up the script stamping from the first step...
this really puts the script in the background &
the leaves out in front***

I used french ultramarine archival on my UNMOUNTED honeycomb background
& pressed it on to random areas of the background...
and then stamped my saying in jet black archival...

one on my MOST FAVORITE uses
is for creating tiny dots with any of the distress stains...
***the distress stains work especially well, because they are very fluid...***
to create the gold dots you see below,
I applied some tarnished brass distress stain to my craft sheet...
picked it up with the detail water brush & tapped the brush
sharply against my index finger...
this creates AWESOME tiny dots every time...
that tiny bit of shimmer really adds another nice layer to the background...
***I also use the metallic stains to add an edge to my art...
you'll notice that in the last photo***

next I wanted to jazz up the art parts base,
so I used black soot paint
to paint 2 art parts tag toppers...
I like to tap some paint onto the tag toppers,
then spread the paint with my fingers,
when painting art parts...
the result is a beautiful MATTE ...
LOVE IT!

now here's where I lost it...& forgot a photo...
I painted an art parts flower with wild honey distress paint,
I did 2 layers...
when the paint was dry, I stamped my herringbone background over the flower with rusty hinge distress ink & dried it...
below is the assembled flower...
with the art parts flower as the base...
I heated the clicker cutts flower to soften the CFA material
& shaped the flower...
then glued it to the coordinating art parts flower...
to create the center, I glued this
to this Blossom Bucket...
OOPS...can't find that link...
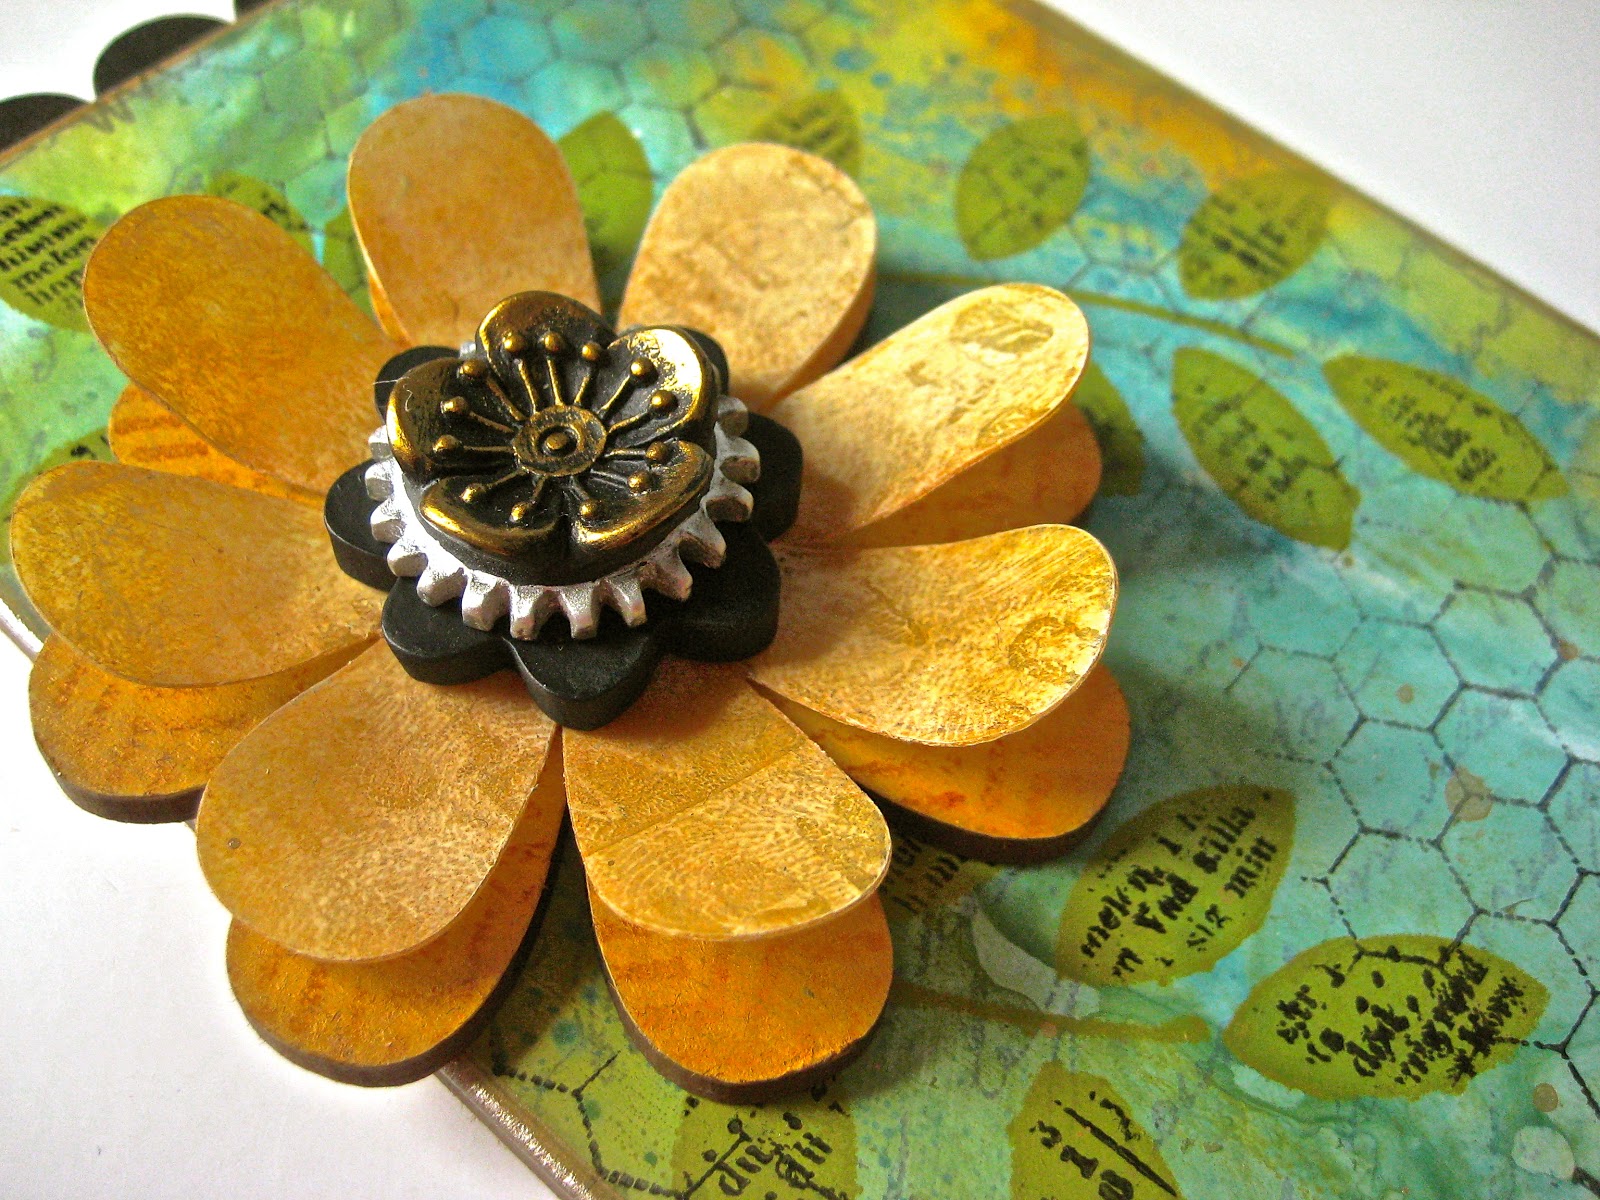
the next photo shows all the layers in the background...
it looks very dimensional, but it's completely flat...
so...
this would be a GREAT background technique
for art journal pages...

and here's the finished piece...
with the tag toppers glued to the back of the art parts base...

if you haven't played with these paints yet...
prepare to be amazed...
they are totally UNLIKE any other paints I have used...
a bit of business before I go...
I had several questions/comments about the last post & where to find the stamp I used...
if you click on the blue links in each post,
you'll be magically transported right to the highlighted product...
that stamp is from the heirloom art set...
I hope this tutorial has inspired YOU to...
grab your distress paints to
make art!
wendy
33 comments:
Awesome project & tutorial - I so need to get some distress paints
Love it! Gotta run. My distress paints are calling...
Ohhh I love everything about this! I can't wait for my distress paints to get here so I can try this out!!!
thanks for the tips!
always have fun things to share with us!
Sandra ltb
LOVE the tutorial! Thank you... Must try this myself!
Awesome. Love the tutorial, thank you so much! I'm going to try this myself.
Beautiful background! Can't wait to get the metallic paints.
I have not tried the distress paints at all, but with the addition of the metallics, I just might have to try some. Great tutorial today, Wendy. Your use of colors is gorgeous! Tim has a tag tutorial today using the Distress Paints also, and he uses your Clearly for Art in a very cool way! For those who want more inspiration today, check it out!
That is gorgeous! I can see that I will need to order some of these paints soon. Maybe tonight.
Great piece! Thanks for all the tips & pics!
Totally beautiful! I don't have any distress paints (yet...) but love this. The stamping through the stencil looks fabulous.
I Love this one!! The paints are amazing, aren't they? I have only used them once but they sure did lots of fun stuff...and once dry? They weren't going anywhere!!!!
I just love this! The way you continued to build was background was amazing.
I so *need* those paints NOW! lol Love the look you created on your art piece. Now to get back into my room and play...but without the paints...for now.
Seriously, where do I start with explaining how wonderful this is?! Amazing use of DP's, adore the flower and the stencilling, and you have finished it all off beautifully. Thank you so much for sharing, hugs Jenny x
Coolio! I love how this came out..I keep forgetting about stamping thru the stencil...duh. lol. I love those colors you used! I used wild honey, mustard seed paints, and brass STAIN on a tag yesterday, it came out pretty cool. The metallic stain with the paints works great too. Note to self..paint clicker cutts. lol.
SO GORGEOUS!!! I love the stamped script through the leaf stencil!!! Most awesome you are!!!
This is amazing Wendy. I love all the details, and stamping through the stencil was a perfect idea.
I am totally Inspired, pictures or no pictures!!
Very cool art!
Wow, this is absolutely gorgeous!! I love the design!! The new Distress Paints are on my must-have list!! Thanks so much for the awesome tutorial!! Have a great evening :)
You are so right about the paints Wendy and love this great make today, the colours are amazing and so is the CFA flower. Your tutorial is excellent too. Hugs, Anne x
What a great tutorial, even with the missing photos. :))
thanks for all the useful tips....can't wait to start making tiny gold dots!
xoxo
Stunning piece! The colors make me happy. Note to self: get French Ultramarine Archival ink; love the subtle background effects it makes. Thanks for sharing.
Love the tag! I've got to get some distress paints - quickly!!
So enjoyed the tutorial, love that subtle tone on tone effect on your flowers xx
I don't have everything you used-but going to try this with products I do have. I love the whole look. AWESOME!
This is just gorgeous! Thanks so much for the tutorial and the pics!
Just so pretty Wendy, gorgeous! Kim
gorgeous! love that you showed the steps and how to! Thank you so much!
Simply stunning. Love that background. No worries a out missing photos as busy as you are im sure we are happy with every bit you share with us.
Your products and art pieces are awesome.
Gorgeous!!!!!!!!!!!!!
I just got a few paints for my stash. Your tutorial is just phenomenal with all the details and pics and funny side notes. Thank you soooooooooooo very much for the time and effort you have put into these amazing tutorials that make me feel like even I can do this!
Post a Comment