

grab a really comfy chair for this one…
it's LONG…
let's start with a few tips…
the magic coating on the specialty stamping paper slows down the drying of all products used on it, since the coating keeps them from being absorbed…
so, make sure to dry between each addition of ink…
I won't repeat this for each step…but it is very important!
even the waterproof pen I used, needs to be dried to prevent smearing…
when stamping thru stencils, an unmounted stamp is easier to use…no gridblock needed...
post-it notes or masking tape work well to block off areas of the stencils…
plain cheap rubbing alcohol (surgical spirits for my UK friends) will remove the archival inks from your stencils & craft sheet…
I like to use my archival colors for background stamping/stenciling & save jet black archival for my main images...
for this art journal, I cut my page from specialty stamping paper…
these large pages I've been using are 8 ½ x 6…
this background is the second generation (aka leftovers), which creates a lighter background…
this base is left over hydrangea & tree branch archival inks…
if you enlarge the photo, you'll see some texture from a paper towel (kitchen roll) that I used to blot off some of the alcohol...

I decided to use the "in full bloom" SiSi…
stamp the image with jet black archival...

now place the coordinating SiSi stencil over the DRY stamped image & add leaf green archival to the leaves, using a blending tool…
the new mini blending tool is soooo cute!
you can also add the inks with pieces of cut n dry foam...

this next photo shows that the stencil protects the flower, making it super simple & FAST to ink the leaves…
just ink right over the flower too...

here you'll see the inked leaves…with some shading…
the new mini blending tool makes this easy…
and you can see that the stencil protected the flower…
only the leaves got inked...

now position the flower portion of the stencil over the stamped image & ink the flower with dandelion archival…
again…so easy, because the leaves are masked off by the stencil...

with the stencil still in place, add some shading with orange blossom archival…
I kept the right side lighter...

with the stencil in place, it's now possible to add stamping to just the flower…
the leaves & the background are protected by the stencil…
this is where the SiSi idea same from…
the stencil makes it simple to add stamping to the open areas, without getting any stamping on the background…
LOVE IT!
this will be especially useful for card makers who choose to send a flat card...
use tree branch with the unmounted polka dot border stamp to add dots to just the flower...

I designed the large collage background stamp to add stamping to small stencil areas…
this stamp has 9 mini patterns to choose from…
I might cut mine into small squares…still thinking on that...
this is plan B…you could add stamping to the leaves…
for this sample I decided not to…
but keep this in mind as another option when you are using stencils...

next, use a waterproof pen to add a circle…
trace anything you have in your home…
a square or rectangle would work just fine too…
it acts as a spotlight…
I like to add the spotlight after I stamp the main image…
that way the spotlight appears to be under the stamped image...

stamp the saying in jet black archival...


use the "checkmate stencil" with tree branch, outside the circle...

here's another reason I'm LOVING stencils…
you can combine them!
use just a portion of the "vintage floral" stencil to add these little dots/leaves in 3 areas…
this is why I enlarged this stencil…
more options for us!
I used leaf green & orange blossom archival...

just those 3 little stenciled add ons, change the look of "in full bloom"…
and it's simple to position stencils wherever you want...

now use watering can archival to stencil dots along the left side of the page, outside the circle...

and now it looks like this...

use the "dots & dashes" background stamp (unmounted) with tree branch archival, to add random stamping in 3 areas outside the circle...

the page now looks like this...
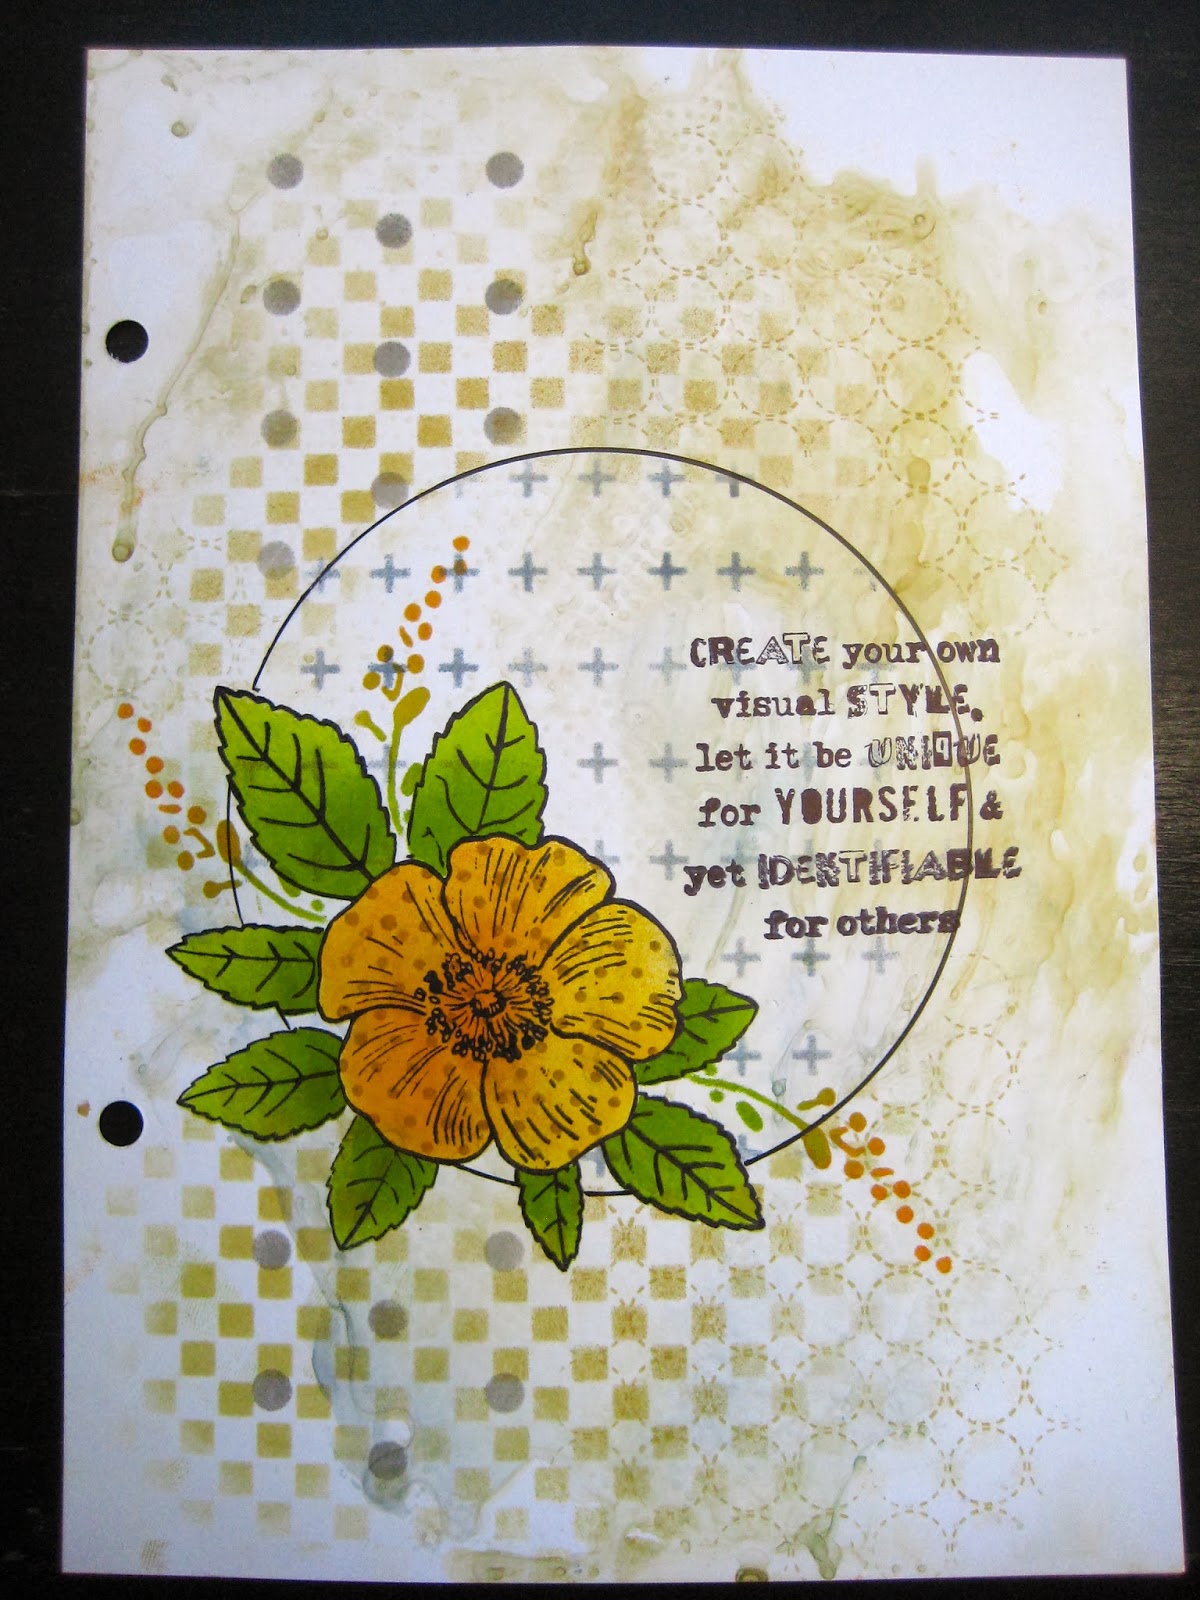
you'll see several things added in the photo below…
the 2 sentiments (remember this & BE TRUE) are stamped in jet black archival…
the mini bird was stamped with carnation red archival & I added a bit of the same red to accent the flower center…
I also filled in more of the right side with polka dots, using watering can archival...

use the waterproof pen to add a frame around the edge of the page...

use hydrangea to stencil the numbers in 3 areas...

now to add the finishing fill-ins...
use jet black archival to stencil the star...
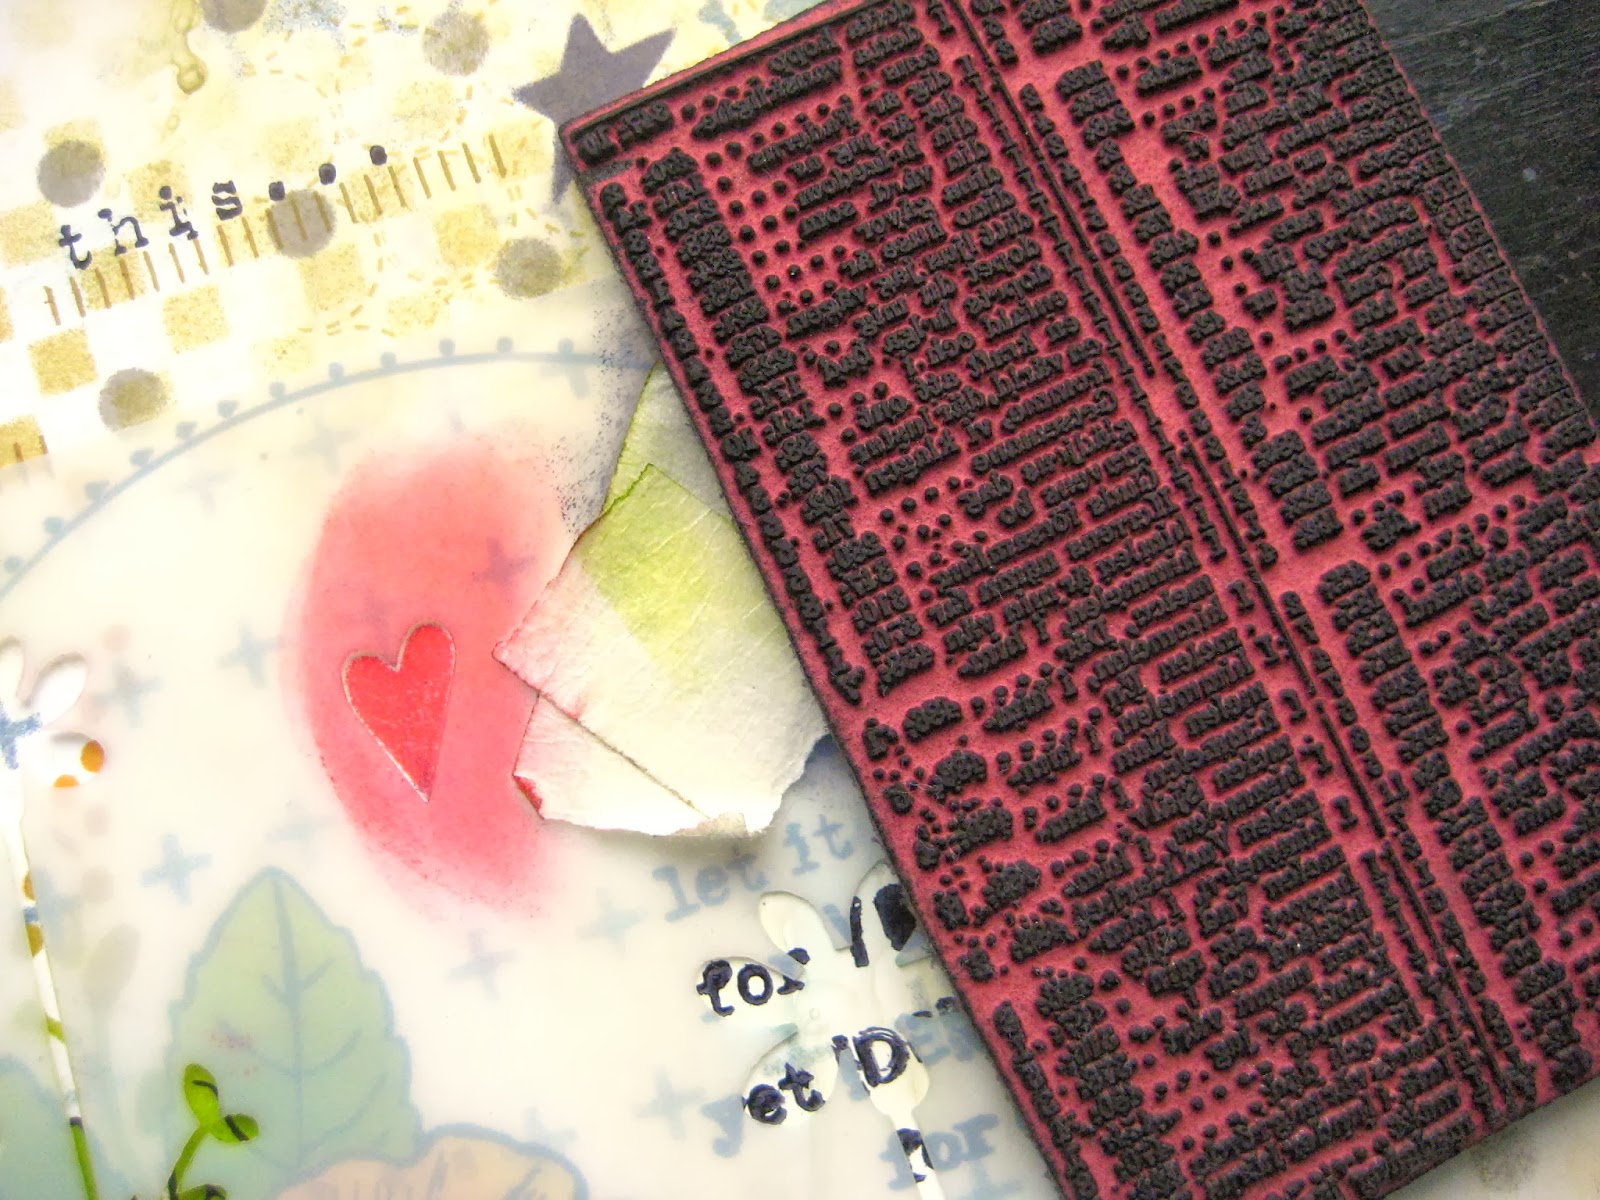
stencil the heart from the "little bits" stencil with carnation red & use jet black to stamp the tiny text inside the heart…
a small detail…that makes a BIG difference...
I pressed the lid from a mister onto the hydrangea pad & added 3 circles…
the photo below shows the same lid, but I used antique linen distress paint…
it looks good in person…but doesn't show up well in my photo…
oops...

and below is the finished page?…
or I still might play a bit more & add a little something to the top left?
it's completely flat, but still has interest, due to the stencil/stamping layering...

this art journal page is an example of ONE WAY to use SiSis…
and I have several more ideas for another day...
SiSis work great for cards…
because it keeps them flat for mailing...
if your butt isn't completely numb by now…
or if you're staying in due to this weather…
in Illinois we're calling it CHI-BERIA...
check this out...
THANKS CHRISTINE & HUBBY MARK!
I hope you'll leave a comment there & tell her THANKS for doing such a nice job!
time for me to hit the studio…
I hope I've inspired YOU to…
make art (with SiSi)
wendy
ps..I heard from 2 people yesterday that their stores have received their Stamper Anonymous CHA orders…be watching! YIPPEE!
oh and one more thing…
Ted is in Plano Texas this weekend…pop in to see him demo, give him a kiss from me & see our booth that will be LOADED with stuff…
here's the info for the convention…
42 comments:
Gorgeous piece of art Wendy , I love the little heart and bird and the spotlight. Everything works beautifully and the stencils and stamps are fabulous. Tracy x
Wow Wendy, it is amazing how you have created a layered look without adding 'real' layers. The circle to create the focal point looks fantastic, so easy but so very effective. Thanks for the step by step too. Anne x
Love the tutorial Wendy! That circle idea is really awesome, and I love the SiSi's! Fantastic!
I love this Wendy!!! It looks so easy...for you!!!
Hey there Wendy, thankss for another fabulousssssss tutorial, fabulous idea and the background is amazing Thanks so sweet of you to share a tutorial with your wonderfull archivall inks xxxx Terry
Really, really lovely! It looks so rich yet it is still flat... As I tend to make cards instead of journaling, this is great. Thanks for the step by step and I have two orders in already with my fav online shops!
Wonderful tutorial!!!!!!! Love all the step outs and detailed info!!! It's a wonderful page!!!!
Fabulous page! Thanks for sharing all the details.
LOve this tutorial! Wonderful thanks for sharing with us! I love your stencils , all your stencils! BArbarayaya
That's really pretty - and awesome how the stencil works.
it all becomes clear now - great tutorial, Wendy, thanks for taking the time to share.
Love this tutorial! I have that Sisi on order so I cannot wait to get that to play. It is awful outside. The winds are picking up and it is cold!!! I hate this winter.
This is one amazing journal page! I love all of the layers you did with the stencils and then adding the stamps, too. Gotta' get some of those pretty Archival inks.
Excellent tutorial & the finished page looks amazing & so beautiful.
Well rub me with alcohol and don't bug me! I will be in my studio forever when I get these play toys!
I love how to make the backgrounds! Seriously in love!
I need,want,have to have,need,need,did I say need? All of the above!
My husband will not thank you!
Now I understand! Thank you for inventing SiSis! Great page. Your step by step is very clearly explained.
So beautifully and clearly explained. Thank you for this Wendy. You've answered questions and made me need these even more with your stunning journal page... Jenny x
Wendy... You ROCK! What a great tutorial. So glad you took the time to explain and photograph the step by step using your SiSi to create this beautiful art journal page. Love the whole idea behind those stencils!! Your finished page is awesome!
Love, love this one. I can't wait to get the new colors or your ink and the small new applicator for the distress inks and other new stuff from CHA
Beautiful Wendy! I've missed seeing your work !
This is beautiful Wendy! It's made me want the SiSi flowers even more now! I am super excited as I finally got three of your Archival inkpads today and I can't wait to try them out. Most of all I must thank you for translating "rubbing alcohol" into Surgical spirits for me. I have often wondered what it was and where I could get some - but it turns out that I have it in my cupboard all along!
OH MY HEAVENS!!! This is sooo wondefully delicious!! AND a tutorial! We are so lucky that you love us!! I'm always so inspired to try new things after viewing your beautiful, happy art work! Thanks for making my day! ~Seahag
Wendy, as I have said many times before, I love your ART. Loving the background and the circle!
Gail in Oklahoma
Gorgeous page Wendy! Love how you've framed the page and of course the stencils are fabulous! I have a very long wish list ! Sue C x
Thank you so much for the tutorial. Now I know how to start!! Beautiful piece of art you made.
Wow, this is absolutely gorgeous!! I love, love the look!! I so can not wait to get the SiSi's!! They look so amazing!! Thanks for the inspiration!! Have a great day :)
Lisa
A Mermaid's Crafts
SISI , are amazing! Are they packaged together?
The new colors are fabulous, and I can't wait to get them, and that new Crackle Paste!
So fun to see your products and creations up front and personal! Drooled and loaded up on goodies at the booth, but I did NOT give Ted a kiss.. :P Home and playing with your fabulous crackle texture paste!
Thank you it is lovely and I hope to have some time to make art soon. Trying to catch up on things is always tough!
Thanks for sharing the tutorial Wendy such a gorgeous piece of work!
Hugs...Patti
Wendy! I absolutely love what you have created! Very cool! I have ordered a few of your SiSi's...can't wait until they come! Can't wait to Make Art!
Thank you Wendy! a lovely step by step tutorial with so much detail, it just makes me want to get started! unfortunately it's midnight and I've got to get to bed! Manyana ! x
Thanks for the tutorial. Love your work!
Awesome tutorial. I will be having a go during half term. Loving all the new stamps and stencils.
Love it love it love it!!! What an inspiring project!
Thanks so much for the very easy to follow tutorial. I have some new stencils so may try this.
Also thanks for being so generous with your give-aways!
Sharon
do you want a laugh!! i so loved your technique and tried it and well.... it didn't work out.. you can check it out on my blog at missusgmoments dot com and click on the link to the video... too funny!!! i will attempt this again with the RIGHT paper next time!!! thanks for always being an inspiration
Stencil it, stamp it, love it!
WOWOWOWOW!! SO LOVING this and it makes me want that stencil even MORE than I already did!! =) LOL!!THANKS so mcu for sharing and have a FABULOUS WEEKEND!! =)
WOW... 1000 blog........ When i first started with you, you did not have a blog........ I met you when i took a whole weekend workshop that you did at Scraptales which is sadly no longer with us....... You only had your first set of stamps out and I just fell in love with your techniques, you as a wonderful person that became a good friend of mine......... You have such a great group of people in your corner and a very supportive husband ........... Congrats on your 1000 blog............ Hope to see you at the Mega Meet, Ted i hope you are reading this.........!!!!!!! Big hugs to ya........
Great tutorial. Pics really support your text. Thanks for sharing
Post a Comment