

but first some public service announcements...
I have updated my teaching convention demo schedule for 2014...
you'll find it on the right sidebar...
this will be a fun year...I get to visit some new stores & hook meet some new art friends...
teaching is what I LOVE to do...
there will be more visits added, but at least I have listed the first few months...
I hope you'll check it out & come spend a day or weekend with me...
making art!
next...
paste...I'll have another embossing/crackled texture paste later this week...
and answer questions...
I wanted you to know that I didn't forget...
next...
NEWS FLASH!!!
the new art parts stencil storage binder, large stamp binder & art journal cover (also fits the small stamp sets) have ARRIVED!
you can also add blank white pages to the large & small binders...
you can store stamps on both sides of the blank sheets...
the small size pages are so convenient for storing your SiSi stamps & the large pages will store 4 background stamps on each page, so a package of 3 sheets will hold all 12 of my large backgrounds...
if you collect clear stamps, these storage pages work well for storing them too...
the binders make it so convenient to find the stamp you need...just flip thru the pages...
next...
archival reinker backgrounds...
I've had several requests for a "chart" with reinker combos that work together...
YIKES...there must be 1000 possible combos...
I think it's best to just play & see what you like...
I've tried some that I thought might not be good, but they are really cool...
I'll always tell you what I used, when I post something...
next...
the title of this post...
if you've been following me, you know that I HATE to waste & I'm always digging something out of the trash...
it makes Rick laugh & he'll comment..."what? we can't afford another piece of 10 cent paper?"...
which leads to this...
what happens if you create an archival reinker background & hate it?
here's what I did...
I made a background & it didn't speak to me...
not even a little whisper...
nothing...
so I added some translucent embossing paste thru the checkmate stencil, hoping that would work...
still...nothing...
so I decided to chop it up & see what developed...
the background you see below was created on a 8 ½ x 6 inch piece of specialty stamping paper, with rubbing alcohol, cornflower blue & potting soil archival reinkers mixed with the gold metallic mixative...
I turned the paper over & on the back, I traced the heart stencil & a flower from the create a flower stencil...
I inked over the heart with forget-me-not archival...

next I used tim's new sizzix garden greens die to cut these a section of leaves from clearly for art (CFA), that was covered with a vintage dictionary page...
I used fern green & leaf green archival with a blending tool to add color...
see that single leaf...
you got it...left over from another project...
I dug it right out of the trash too...

next, I heated the leaves to soften the CFA so I could shape them...
for tiny things, a hemostat works well, so fingers don't get burned...it has a very secure hold...

in the photo below, you'll see a small piece of manila cardstock...
it's 3 ½ x 3 ¾ inches...
this was also in the trash...I tried the archival reinker/alcohol technique on manila cardstock...but it soaked thru immediately & I didn't like it...
BUT...I noticed that it might look good with the heart, so I dug that out too, to see if it could be resurrected...
I used MY FAV...tree branch archival with the herringbone background stamp...
and stamped it randomly over the background...

then used watering can archival, with the new mini blending tool, to stencil the words...
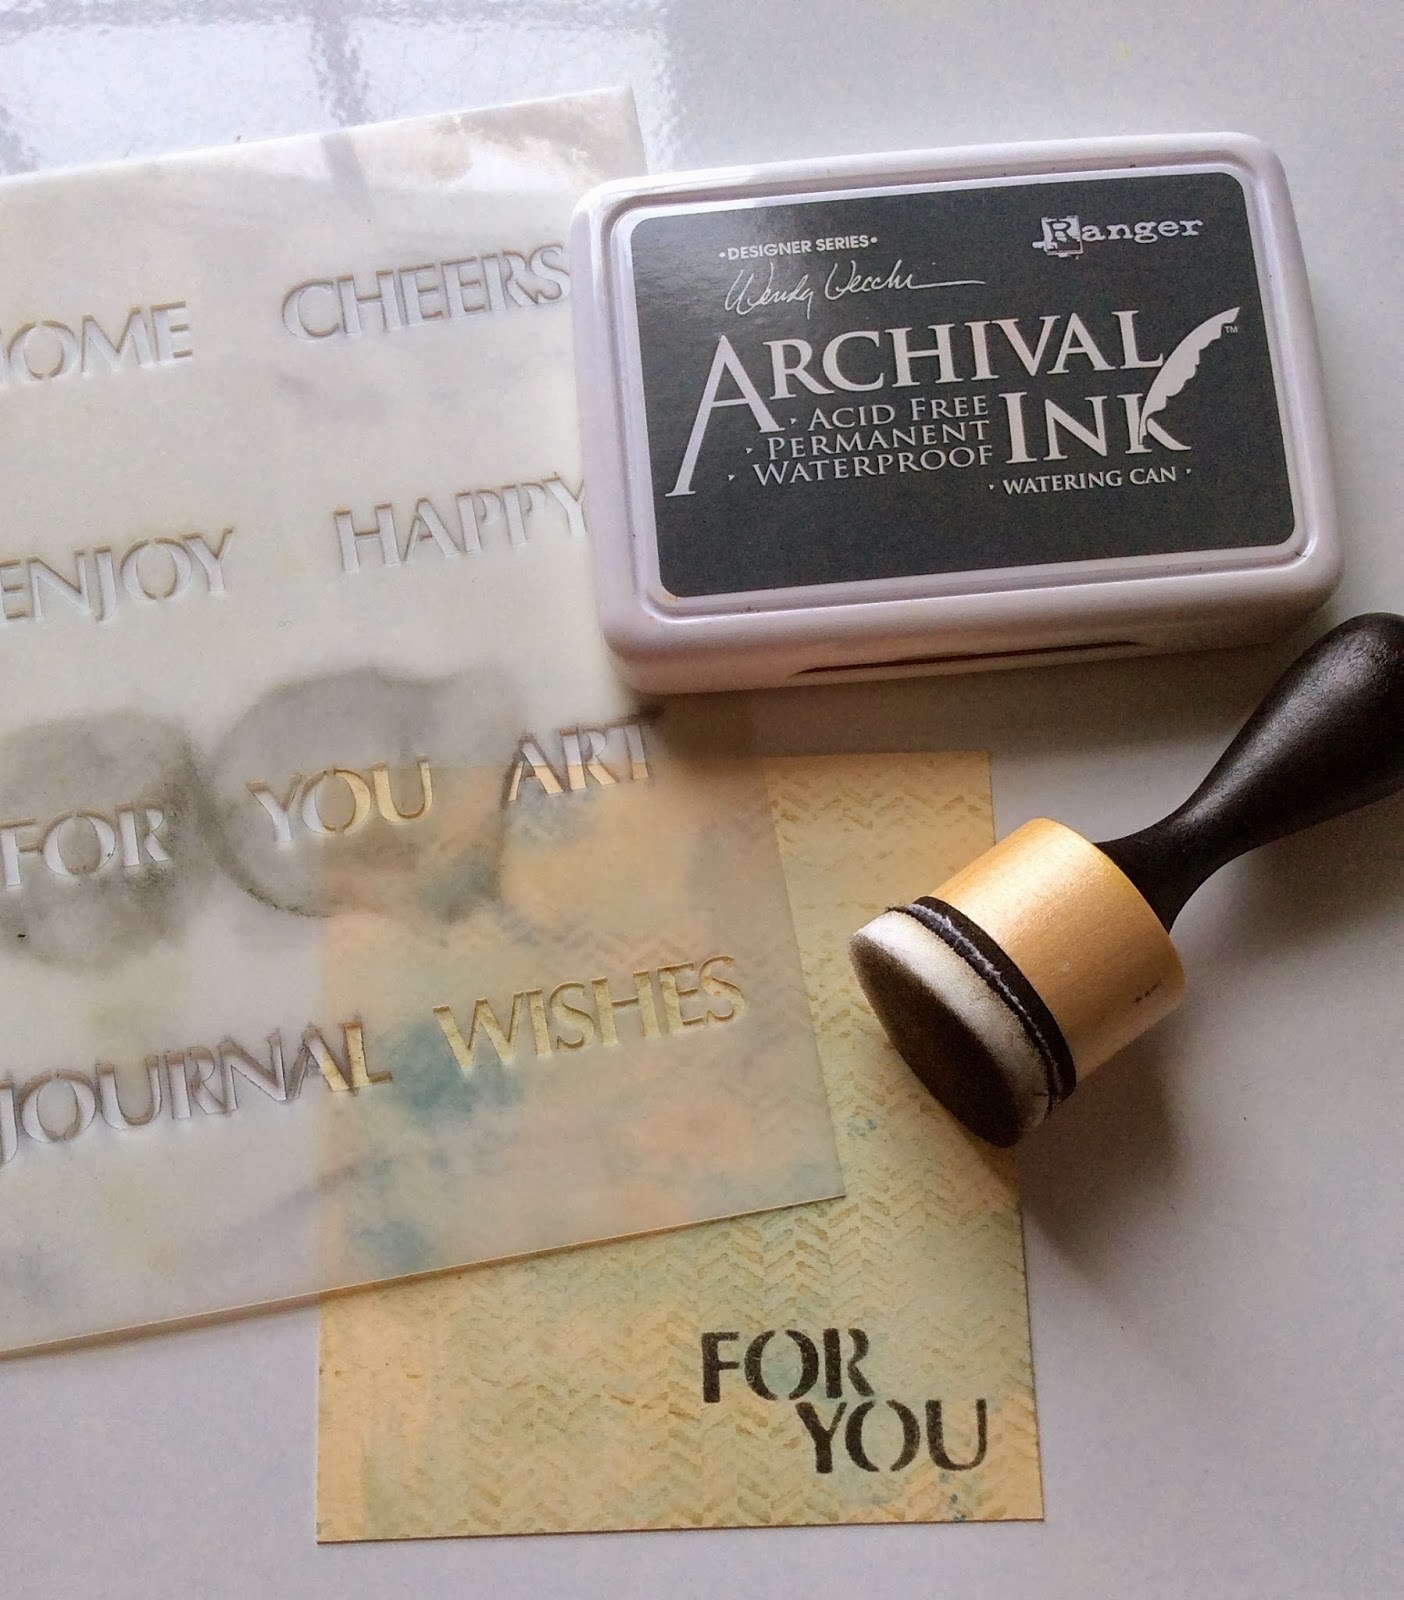
then darkened the edges with gathered twigs...
that little bit of ink on the edge makes a big impact...
look at the photo above...then the photo below...

next...after shaking the tarnished brass distress paint, I used my finger to randomly paint the industrious border sticker...

now remember I worked in surgery in my other life, so I did a little surgery on my poinsettia stamp & cut off the little scroll/flourish thing & stamped it 3 times...
I knew where the heart would fit, so the junction of the stamps would be covered...
I used tree branch archival to stamp the index border on the left...
the border is from LCS038, live & make art set...

and glued it onto a kraft cardstock card...
the flower center is a mini Blossom Bucket star...
I took the photo from an angle, so you could see the translucent embossing paste...
great texture...
the whole card measures 3 ¾ x 4 ¼...
when I make a card, it's rarely a standard size...
when you dig stuff out of the trash...
you work with what's there...
it's small, but I like it...

so I still have lots of that left over background...
I traced another small heart, 3 mini hearts & 2 more flowers...
and cut them out...

and now, instead of being in the trash...
I have these fun pieces to play with...
it's amazing how different they look...

so the moral of the story...
if it doesn't speak to you...chop it up into smaller pieces so you can use them to...
make art!
wendy
ps...here's a peek at how I customized my art parts storage binders...
hope they inspire YOU...


34 comments:
O yes, this post is full of inspiration! Love love love it all. Thank you so much Wendy.
I am forever digging in my trash for some bit or bob of something! You never know what treasures you will find there! Love your trash to treasure creation.
Hoping Whim So Doodle in St Pete FL gets added to your list of stores to teach at!
My trash is virtually non-existent. I have baggies all around me of stuff I didn't care for but just may work for another project. Trash? What's that? lol Really cool to have this for inspiration on this super yukky wintry day!
Love the card made from scraps! I have a whole box of stuff the family say I'm too mean to throwaway... Next time they mention it, I'll say you do it too!
I loved this trash talk!
As far as your trashy card goes....it is trash to treasure! Thanks for sharing your trash with us!
Fantastic projects Wendy. I'm always using up bits and pieces, like you I hate wasting anything! Sue C x
Trash is good!!!
That's gorgeous trash ! I dig stuff out of my trash can too - I was furious one day when the hubster , thinking he was helping me, EMPTIED my craft trash can ! Land sakes man ! That was not a good day !
I'm completely addicted to cutting stuff up and using "trash" for art... the ugliest of brayer clean up papers make *stunning* collage papers... you just never know!
Lots of inspiring creations!
Well I better fish my efforts out of the bin now and try your ideas out! The first heart is lovely and the second one is gorgeous. Your stencil holders look amazing with the Art Parts, great idea, one for the old memory bank. Anne x
I have tons of cut up "failures" to use up but none look quite as good as yours Fabulous Wendy
Oh so very creative. I love those stencils.
Gorgeous stuff as always Wendy! So inspiring!
Love what you did to arrive at the card! I love all of your covers too! Thanks for the inspiration!
very fun - thank you for sharing your tips!
Sandra ltb
What a wonderful result from garbage! LOL....really great use of scraps...I love it!
So much wonderful texture and dimension on these projects, love it!!!
love the hearts , epsecially with the paste and your finished piece is fab! the crackle paste looks great too...need to open mine and play x
I keep scraps and discarded bits too, you never know when they'll come in handy. Fabulous makes here, Wendy, thanks for sharing.
It is amazing how the look of a background totally changes when you cut it up and add to it!!! During play times with friends I've taken something they thought was totally ugly and showed them by cutting and inking and adding just how not ugly it can be. Fun!!!! Your card is beautiful!!!!
Your card is GORGEOUS! I love the colors and the way it turned out. Now I want the dotted flourish - what set is it from? I should be good to go on trash - I NEVER throw anything away, guess that's why my studio looks like a trash heap! Thanks for inspiring me to use some of it.
Adorable ! I hate to waste too, I can't throw anything away without thinking first if I can repurpose it into something else :) Have a great day Wendy
I'm a bit of a hoarder of 'things I can use for something later' myself. ;) Great post!
Wendy - you never cease to inspire us - such amazing work!!
Love your art! Quick question on your re-inker + alcohol technique: does it work the same on canvas & art board?
Love the card. Good ideas for using scraps, I have a hard time even putting them in the trash! Also love the covers you did for stamps and stencils, beautiful!
So many inspiration in this post! Love it all. Janny
Amazing, so satisfying using leftovers and bits that didn't work in their first incarnation xx
Ooooh, I thought the heart card was stunning, which it is of course & then I saw the binder pages - WOW!!! Visiting your blog is always a thrill, I just wish Feedblitz would sort itself out & send me email notifications when you post. Tells me I'm subscribed, but I get no email. Grrr.
Definitely a blog post to take heart from. Even you have projects which don't speak to you, though yours turn into something beautiful despite this! Love the heart and those covers are on the list... Jenny x
AWESOME!! LOVED your Creations from the Trash to a treasure!! HAHAHA!! THANKS so much for sharing and I agree I'd rather have Inks over candy too, although candy is probably a close second!! ;) THANKS for sharing and have a Fabulous Week!! ;)
So excited! I've really been waiting for these binders, and I'm so happy that you included a binder size for the stencils too! Your binder covers are FABULOUS! Can't wait to get mine & play! Oh, and I agree with you ... you can do so much with the things you thought were trash, but (I'm sorry), I agree with Rick too... saving too much stuff just clogs up the works here, and when there's too much stuff, I don't have room to play (or buy new stuff! haha) *guess i had a LOT to say!
as usual, love all the samples. also, love all the new products that were introduced at CHA. thanks much for your inspiration. wondered what pointsettia stamp you were referring to when you said you cut it apart for the flourishes? thanks, Jo Anne
Post a Comment