

welcome to the first stop
on the eclecticPaperie blog hop...
I was honored to be invited to join the fun...
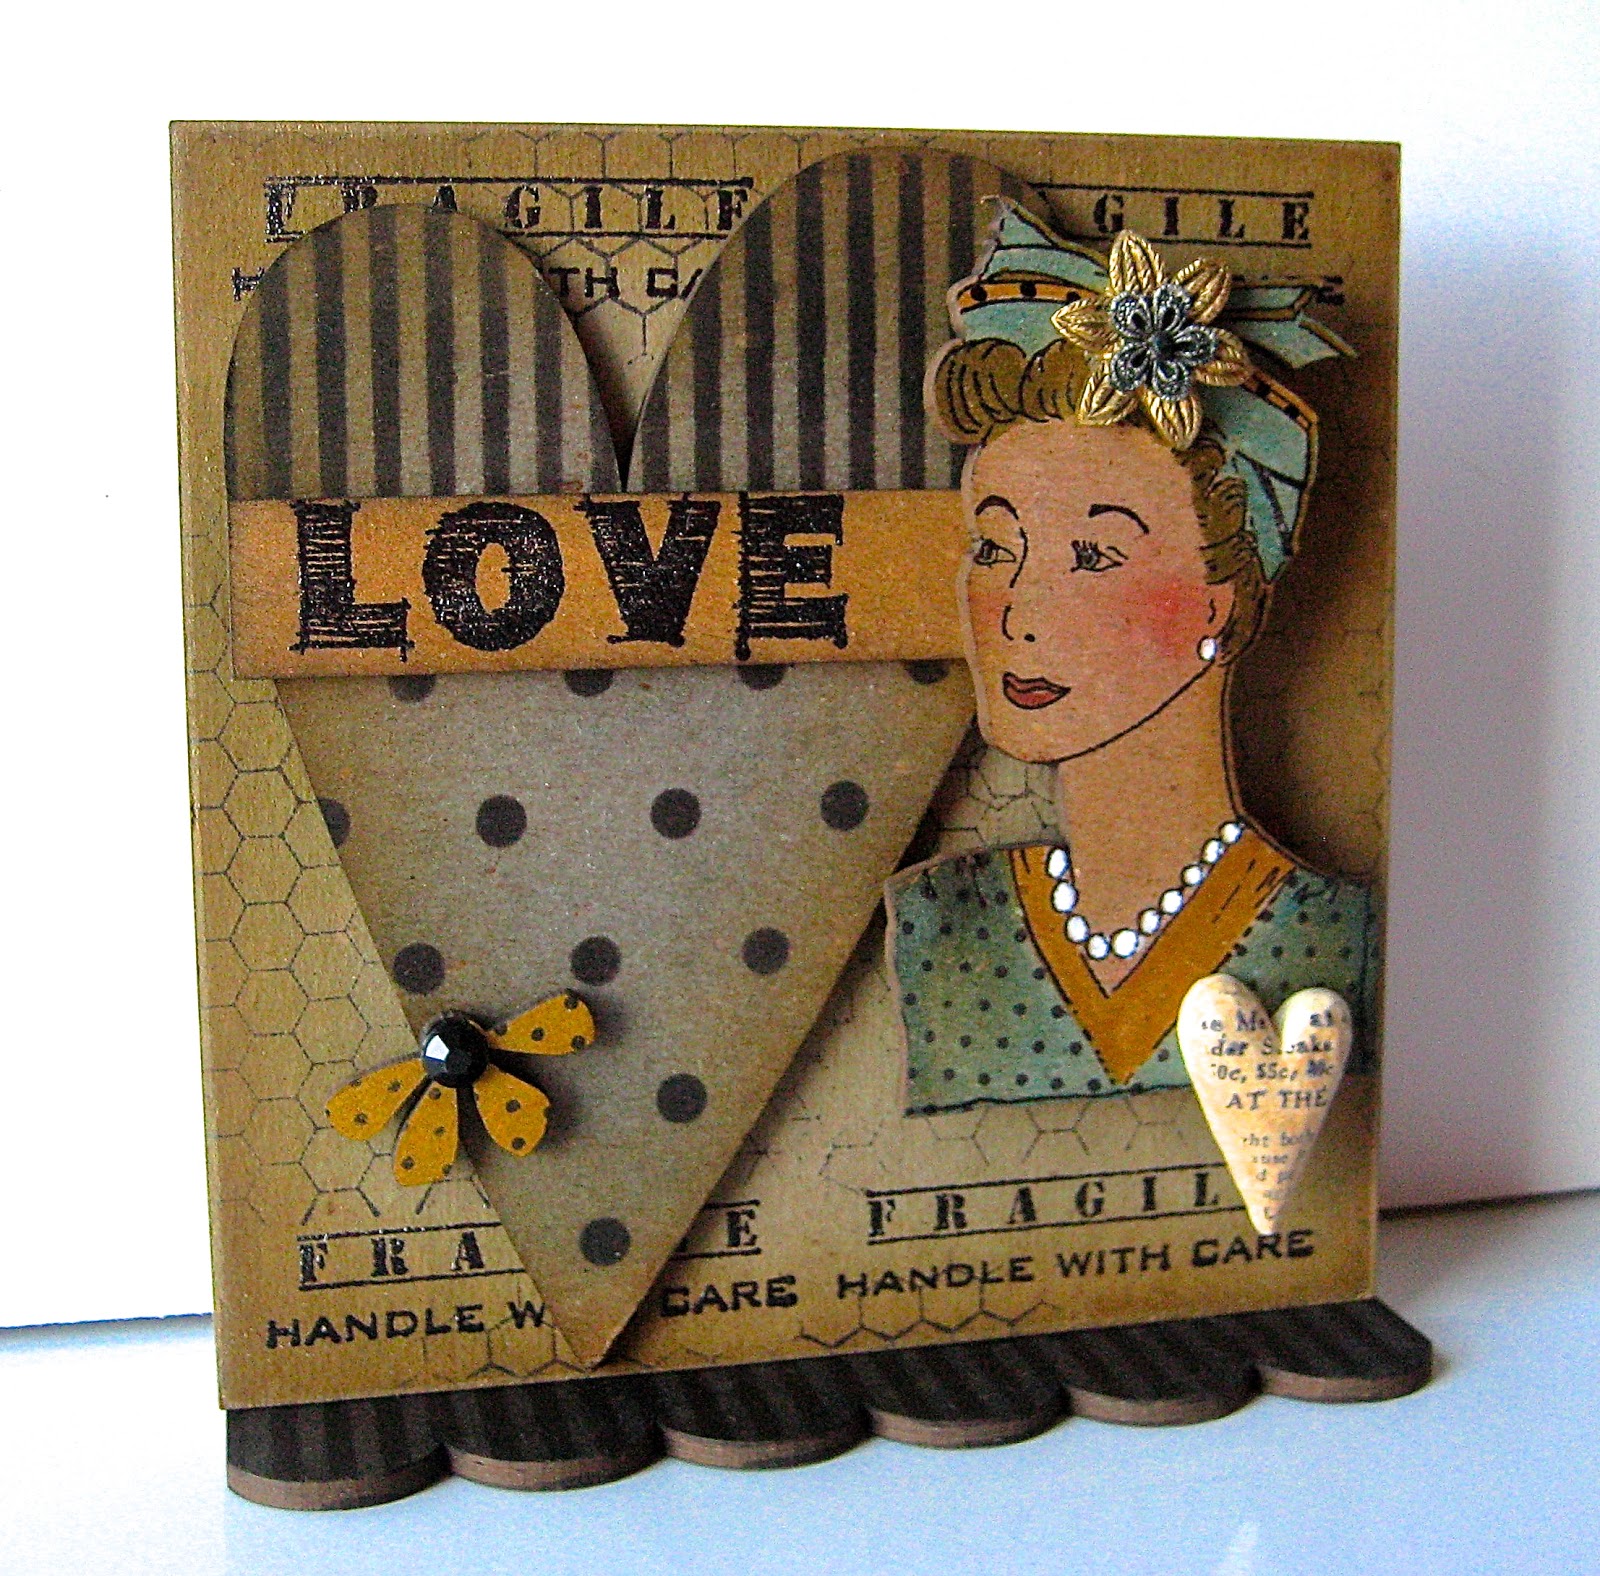
below is the project I created...
it's Lucy with a reminder that
love is fragile...
handle with care!
grab your supplies so you can play along...
the base is the base from the art parts large square frame...
it's 5 1/2 inches square...
a 5 1/2 inch art parts scallop...
a small 4 petal art parts flower...
these stamps...
polka dot border
and these Blossom Bucket goodies...
a short black metal corner
the brand new Blossom Bucket gold/silver flower
I used these distress stains...
and these distress markers...
picket fence, brushed corduroy, wild honey,
barn door & tumbled glass
these distress ink pads...
from Ranger...
jet black & coffee archival
clear embossing powder
gold paint dabber
heat tool & craft sheet
Claudine's multi medium (matte) to hold it all together
the misc. extras are...
a black rhinestone
something to make Lucy dimensional
(grunge scraps or black pop dots)
ready... set... go...
use jet black archival to stamp the saying twice at the bottom of the base. while wet, sprinkle with clear embossing powder & heat to emboss. repeat at the top of the base
use bundled sage stain to ink the base & dry.
use jet black archival to randomly stamp the honeycomb background over the base
***don't worry about overlapping in the center...
that gets covered up!***
add shading to the edges with brushed corduroy, using the blending tool, then use the gold paint dabber to accent the edges

use jet black to stamp LOVE toward the left side of the sentiment spot, sprinkle with embossing powder & heat to emboss.
use brushed corduroy stain to ink over the sentiment spot & dry

use black soot stain to ink the art part scallop & dry, then stencil thru the stripes stencil with black soot, using the blending tool.
glue the Blossom Bucket metal corner to the scallop as shown. this creates a shelf & a solid base, which allows the art to stand alone.
ink over the heart with tumbled glass stain & dry. use black soot on the blending tool to add dots to the lower heart & stripes to the upper portion of the heart, using the stencil
***tip***
you can make the stripes any length by sliding the stencil & stenciling a larger area
use brushed corduroy on the blending tool to add shading to the heart edges

ink the Lucy face stamp with jet black & press the Lucy art part onto the inked stamp, sprinkle with embossing powder & heat to emboss
***tip***
this is the best way to stamp art parts that have a coordinating stamp. ink the stamp & press the art part ONTO the inked stamp. that makes it easy to get perfect placement
LIGHTLY ink her face with spun sugar & add a bit of blush with barn door on the corner of the blending tool
use the distress markers to color her eyes, lips, hair, hat & clothing
I stamped over the clothing with my polka dots border & jet black archival
***tip***
you can also stamp her clothing onto patterned paper, cut it out & glue it in place for a fun look!
use the picket fence distress marker to make her pearls really stand out
***tip***
you don't see the white (from the marker) immediately...
TRUST that it worked...
it will magically POP in about 15 seconds...
it's...PURE (picket fence) MAGIC!
add accent dots to her hat with the glaze pen
ink the 4 petal flower with wild honey stain, dry & use jet black to stamp the polka dots over the flower,
then accent with a rhinestone
add a bit of coffee archival to the Blossom Bucket heart & dry...
***tip***
I just lightly tap the heart onto the pad, then remove the excess ink with a paper towel.
this is an easy way to add a vintage effect to the Blossom Bucket pieces
ink a text stamp with jet black archival & press the Blossom Bucket heart onto the inked stamp & dry
to assemble...
glue the large base to the Blossom Bucket metal corner...
add the heart to the left side as shown...
add the sentiment spot over the heart...
add some dimension under Lucy to make her stable & glue her in place as shown...
embellish her hat with the BlossomBucket flower and add the cream heart
glue the 4 petal flower to the left side of the heart
here's a better look at how the metal corner holds it together
and makes the solid base

and again...
my favorite
girl...
LUCY...

I hoped you enjoyed my little tutorial...
and that you see art parts are meant to mix & match...
and that they are a really great surface for inks, stains, stamping & stenciling
now back to the hop...
here's the scoop from Kim...
in a addition to viewing the awesome DT projects, eclectic Paperie is also offering a few specials during the hop.
This week only save 25% on all Studio 490 products, this includes Wendy's stamps, stencils, Art Parts, Book, and Blossom Bucket embellishments. Use codeWENDY25 when checking out.
During the hop, comment on each blog and you'll be entered into a drawing for a prize package worth $50! Your package will include a collection of Studio 490 products as well as paper and embellishments from the store.
Wait...there's more!
We want to hear about what inspires you!Share your thoughts about why you create, what styles you're drawn to, even share a favorite project on the eP Facebook page. Next week Kim will randomly select a winner from those who have commented on the Make Art Facebook posts and give away a $25 gift certificate to eP!
now it's time to start hopping...
it all starts on the eclecticPaperie blog...
here's the blogs you'll hop to...
you are here...thanks for stopping!
Barbara Anders
Broni Holcomb
Julie Masse
Kim Schofield
Kim Teasdale
Mary-Ann Maldonado
Michelle Hill
Micki Harper
Sherry Cheever...huge congrats Sherry, on being a NEW grandmother!
edited 10/31...added 3 more!!
Tammy Hersberger
Tenia Nelson
Starla Nelson
after visiting all those blogs...
I KNOW you'll be inspired to...
make art!
wendy
43 comments:
This is so fabulous, Wendy! I just LOVE LUCY!!! And thanks so much for the step by step tutorial on your process. Awesome! I'm honored to be a part of this hop!
Gorgeous. Always love your detailed instructions and love Lucy (who doesn't?). And just so you know, I absolutely was over the top about your stencils. LOVE 'em! You need to come back to KC to the Scrapbook Page and do some more classes, pretty please :-).
Great tutorial!!!!
That's a great depiction of Lucy! Her pearls really stand out!
Noreen
http://craftyjournal.com
What a great tutorial! I will try and get round all the hop now.
What an amazing step-by-step insight into your creative process... thank you so much for sharing it with us. What an amazing start to the hop!!
Alison x
Very cool!! Love the step by step tutorial too!! Great way to learn more ways to you your fun products!! Thanks so much for hopping with us today! :)
I love Lucy :) No really, this piece is amazing. It makes me smile and I'm delighted with your step by step tutorial. It really shows your process and how to use the various products and combine art parts. I always learn so much and feel so inspired by your posts. Thank you. And for once Lucy has no 'splainin' to do. You did it beautifully.
Oh my....those stencils......HOLY SMOKES! I'm in love! I so enjoyed creating with your products. Thanks for joining the eP Team on the hop but most of all your inspiration.
Hmm, I think I need to add stencils to my supply stash. Your tutorial inspired me for sure!
I think I need to get Lucy ... she really does have lots of possibilities! Thanks for my shout out which has made me grin from ear to ear . . . just love that precious new little one like nothing else!
I loved the step by step process with the tips! It always intriques me how others create!
Being a HUGE fan of you and your fabulous products (looove modeling film!)I was beyond excited to be invited to hop along with you today!!
Wow! That is an amazing art piece. Have to go to work so have to come back later and see all of the art!
Love all of these elements and the layering is just fantastic!
Great piece!
I love Lucy! Wonder if I can work on my hair so it looks like hers for Halloween? Just maybe! Fab tut...of course!
I love Lucy too! You rocked my world this morning!
Wendy, your project is truly a work of art. It is a WOW. Love Lucy, also. Thanks for all the details on how you made this amazing project and thanks for the chance to win.
This is fabulous!! Lucy is so fantastic!
love your style of the card
Love this piece! I need the metal edges to put my pieces together!! I hope someone has them soon!
Love your blog. Read it at least once a week for your fabulous ideas. Also I adore your products, especially the Art Parts and the new embellishments.
This is just a delightful piece Wendy! So fun!
LOVE the look of this! the big heart, the cool Lucy! and the background stamping - waht a great piece of art!!
Wendy - I love your piece, I love your tutorial, and I love your creative spirit!! Truly amazing piece and the name of your art is perfect. Thank you so much for everything!! XXOO
Wendy - I love your piece, I love your tutorial, and I love your creative spirit!! Truly amazing piece and the name of your art is perfect. Thank you so much for everything!! XXOO
Love Lucy,she is so cute.
where can we get the metal corners? I need some ASAP!!! Can't finish several projects that are gifts? Or do you have suggestions for a substitute?
I was not familiar with your products. Now that i have seen them and some projects using them, can't wait to get some. Thanks for the chance to win.
Love your project, as usual. :) Thanks for all of the tips too.
Wonderful--I like the honeycomb background, the colors and I Love Lucy!
I LOVE LUCY, who doesn't?
Thanks for the project tutorial. And, my favorite style is ... yours! What do we call that?
Wendy....love the TIPS! What fun to have you part of this hop! I just bought the Fragile set at the stamp show this weekend!
I love Lucy! Would love to win some of your Studio490! If I don't I will be saving up!
Appreciate the detailed tutorial - would love to make my own Lucy in the sky... with diamonds, of course!
Awesome tutorial !!!! I LOVE LUCY!!!!
Fun art piece! We all Love Lucy!
Your project is so cute. Thanks for all the great tips in your explanation. Visit your blog often.
Totally gorgeous piece thank you for the tutorial. Now off a hoppin
So so very cool!!!!
Simply gorgeous, Wendy!
love the details - it is so inspiring!
Thanks!
Sandra ltb
Post a Comment