

it's a balmy... 61 bloody degrees here today...in JULY?
seriously MOTHER NATURE?
what gives?
anyway...the cool temp gave me an idea for a Christmas card & another REALLY cool way to change up the Christmas tree stencils...
and I just realized that Christmas is just 5 months from today!
YIKES...so it's NOT too early to start creating cards...
this post showed using the tree stencil as a fern...
this time...well...
you'll see...
this is my archival reinker/rubbing alcohol technique on manila cardstock...
I dispensed a drop of cornflower blue reinker, a drop of tree branch reinker & a drop of gold metallic mixative on my craft sheet...
then mixed the rubbing alcohol into the reinkers to dilute them & picked up the color with the cardstock & dried it...

next I grabbed fern green & leaf green archival inks & the cute mini blending tool...it's the BEST for stenciling!

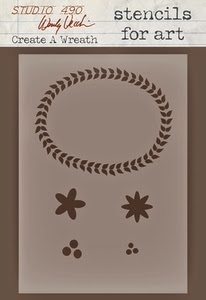
I worked with this NEW happy holidays stencil...
to turn the trees into...
keep reading!

I used some painters tape to mask off the trunk portion of the small Christmas tree...
and I used it upside down...

first stenciling 5 of the small trees, using leaf green archival...
can you see where this is going?

next, I stenciled more trees to start filling in the areas between the trees...
just as I HOPED...
it's starting to look like a WREATHE!

next I stenciled more trees to fill in the open areas...
this time I switched to fern green archival...
it's KEY to have several shades of green...
it adds depth...

then I stenciled a few more spots to make it a nice full wreathe...

I used jet black archival to stamp the bow onto a manila scrap...
the bow stamp is included with the NEW for the holidays SiSi...


I inked over it with cornflower blue, then stamped the dots border (seriously art LCS034) with carnation red archival...
and cut the bow out...
once it was cut, I added a bit more cornflower blue to the inside parts of the bow to make it more dimensional...

next...I added the new flourish & used jet black to stamp it 3 times over the wreathe...
I added flourishes to both of these new stamp sets...
there's 1 here...


and this is where I lost my mind & forgot to snap photos...
oopsie!
in the finished card you'll see that I added some stenciling with the checkmate stencil on the left, using cornflower blue...

and then stenciled some bricks on the right with tree branch archival & the new basically bricks stencil...

then I did a test drive with the bow to see what was next...
I added shading to the edges with brushed corduroy distress ink...

this might be my most favorite way to use the new marker spritzer...
see those tiny specks?
adorable...right?

I wanted a black card base, with a little something...
so I used tarnished brass distress paint on my lace border stamp & stamped the image at the bottom of the card...
the lace border stamp is hiding vertically on the far left on this set...


below is the finished card...
you'll see the stenciled background, pen stitching, black glaze pen dots, and the sentiment stenciled with jet black at the bottom of the card...
oops...
I added some berries too...I used red geranium archival with the berries from this wreathe stencil...
is it a tree?
is it a fern?
nope...it's a wreathe this time!

and here's a better look at those tiny metallic dots...

they were the perfect thing to unify the background & to add a bit of shimmer...
ahhhhhh...that was a BLAST to create!
new products start shipping on
MONDAY the 28th!
here's the front cover of the new flyer...

I've had multiple requests to purchase this flyer...
BREAKING NEWS...
thank you Mr. Stampers Anonymous!
just click the link above & you'll be magically transported to see all the pages & new products...
you can view it on-line or print it out to enjoy later while sitting in your favorite comfy chair!
there's more samples on the pages to inspire too...
one more thing...
I have recently had multiple questions about the pricing of my embossing paste...
check out the last page of the flyer...
you'll see that all 6 flavors are priced at $9.99...
there's a whole LOT of fun in that bottle!
you'll also see our new mix & store jars at the bottom of the same page...
they are...SUPER CONVENIENT...
there's no clean up...
and best of all...
there's NO WASTE!
I'm happy to report that our chemist just gave us the final analysis on the mix & store jars last week & he reported that custom colored paste will last 1 to 2 years in the jars...
he also performed his yearly review & confirmed that all 6 flavors of embossing paste will last a minimum of 5 years in their original containers...
just a little reminder...
when you use the contents of the jar... wash it out...
it's perfect for storing custom colored paste...
just change the label...
don't toss it out!

I hope you have a wonderful weekend and that YOU can take time to...
make art!
wendy
ps...what ideas do YOU have for using the new products in different unique ways? let's share!
do you have a favorite product? I'd LOVE to hear!
25 comments:
This is so tun and inventive Wendy, what a great way to use that tree stencil!!
That tree stencil is so useful for holiday decor pieces and cards and I love it used as a wreath . You could even make a pair of,Christmas earrings from shrink plastic to wear on the day or even add the tree to napkin rings for place settings. Endless opportunities to be inspired. Looking forward to,the goodies being dispatched in the UK. Gorgeous samples Wendy. Tracy x
You are awesome.
What a n eyeopener to use the stencils like you did. Love love love the Christmas card. You are surprising me everytime with your beautiful art!
wow, I love how you see something other than the main use of the stencil... it makes a perfect wreath!
Love how you made the wreathe! I like to know different ways of using the same thing.
Thank you so much for the flyer. I will be using it to inspire me this weekend to make some art. Thanks! :)
Love this card! I have a question-being new to your blog-do you have a tutorial on the stenciling? I was wondering how you stencil after you do the wreath and not have it cover the wreath or be on top of what you already stenciled? Thanks!
OMGOSH!!!! Love it Wendy! You take stenciling to the next level!!!
Looks like I'd better get my shopping list in order! Very cool, my friend, very cool!
Love the idea of the wreath and of course anything that could include ferns it would work with (including dinosaurs!!!) As you did yesterday with the flower, the trees/ferns will work with your existing floral stencils too... I'm thinking chrysanthemum! Jenny x
Such a creative soul!!
This is so pretty Wendy! I love the wreath and the background!
Love your card. My favorite new item of yours. That pretty pansy.
Love your card. My favorite new item of yours. That pretty pansy.
More creative thinking outside of the box-love it :)
I will have to take a look at my stencils and try to see them anew.
Thanks again for the inspiration.
Beautiful Wendy! Sue C x
I thought the fern idea was great but the wreath one tops even that! I think I need to have a play first but I definitely want to make some napkin rings by stamping the gorgeous big lace stamp and fussy cutting but now I need to decide what I can do with that gorgeous bow.... Anne x
Amazing! I think this one might be my favorite. Until you do the next one, of course!
That is a gorgeous Christmas card!! I love how you used the tree stencil!!! Thanks for sharing!!
That is a gorgeous Christmas card!! I love how you used the tree stencil!!! Thanks for sharing!!
Wow, what a gorgeous card!! The tree wreath looks beautiful!! How creative!! I just looked at the brochure and I want everything!! As always, thanks for the amazing inspiration!! Have a great day :)
Lisa
A Mermaid's Crafts
Gorgeous card! Can't wait to get some of the new products! Are you going to teach again in Arlington Heights? Want to make it to a class this year. Miss you!
Thanks Wendy! just printed it out - and now I have to go sit on the deck and look at it over and over!! What great new sets and super inspiration!!
Post a Comment