

I'm happy to once again to be sharing a tutorial
or actually 2...
this time my pieces were designed for
Ranger's Melt Art Mania event...
be sure to check out the Ranger blog,
for LOTS of inspiration...
the event continues daily thru May 31st...

here's the first project...
my focus for this first piece,
was to create a
textured UTEE embellishment...
it's E A S Y & fun...
with LOTS of options...

here's the supply list...
Tim Holtz Distress Ink Pads
Tim Holtz Distress Paint
Tim Holtz Idea-ology
Stampers Anonymous Wendy Vecchi studio 490 stamps
Stampers Anonymous Wendy Vecchi studio 490 art parts
Misc:
waterproof pen
vintage dictionary paper
and here's the step by step instructions...
- apply a layer of Glue N Seal to the art part small creative cover (project base), then add vintage dictionary paper, brayer & dry.
- sand the edges with the sanding grip
- ink over the base with broken china, wild honey, scattered straw & peeled paint, using the blending tool
- add shading to the edges with rusty hinge on a blending tool
- use jet black archival to stamp the flourishes (My Kind of Art LCS092) in the top left corner and the sentiment (British Art LCS107) in the bottom right corner as shown
- use jet black archival to stamp the pen (British Art LCS107) 5 times, to create a border
- shake the tarnished brass distress stain, then dispense a small amount onto the craft sheet. pick up the stain with the water brush, then sharply tap the water brush onto your finger over the base, to add tiny metallic dots. dry
- add pen stitching detail around the base edge
- shake the tarnished brass metallic stain and with a fairly dry dabber top, edge the base & dry
- paint the art parts daisy with broken china distress paint & dry
- ink the coordinating stamp (Daisy Art LCS101) with jet black archival & press the art part flower onto the inked stamp and dry
- tap the Emboss-It Dabber over the flower to cover & sprinkle with UTEE. use the Heat-It tool to melt the UTEE. while the UTEE is still hot, sprinkle with another layer of UTEE...
- ***have the polka dot background stamp (All About Art LCS011) inked with french ultramarine archival***
- melt the second layer of UTEE & while the UTEE is hot, press the polka dot background into the molten UTEE. allow to sit about 30 seconds. the UTEE will cool & the stamp will release easily, creating a very cool textured flower
- add a scrap of grungeboard under the flower before gluing in place, to raise the flower off the base & create more dimension
- accent the flower center with a Blossom Bucket black & gold flower
here's a close up of my textured UTEE flower...

since I was having so much fun...
I decided to play a little more...
this time the technique is
distress UTEE art parts...
I discovered that tim's new distress paints are so cool with UTEE, and together, they create a vintage enamel effect...
I cut a #12 kraft tag to 6 inches tall...
that's my base...
(save the cut off for another project)
I stamped the flourishes
(yes... again...I LOVE them!)
with black soot distress ink &
sprinkled on the UTEE, then heated to melt it...
I inked the kraft tag with faded jeans & mustard seed distress inks...
to create the random bleached honeycomb background,
I misted water onto my craft sheet,
then pressed my honeycomb background stamp (LCS093) into the water & then stamped over the tag...
this lightens the distress ink & creates a pattern at the same time...
I used jet black archival for stamping my sentiment...
and added some stenciled numbers
using black soot, on the blending tool...
to create the vintage enamel flowers,
I lightly painted them with distress paint,
using my finger to spread the paint...
***a thin layer of distress paint allows the art parts color (kraft) to show thru, creating a worn look***
is painted with barn door distress paint...
dried, then stamped with the coordinating daisy stamp,
using jet black archival...
and dried again...
I used the Emboss It Dabber to cover the flower, then sprinkled it with UTEE...
I heated the UTEE to melt it, then sprinkled on a second layer while the UTEE was HOT & melted the second layer...
2 layers of UTEE create a glass like dimensional surface...
the 3 smaller art parts flowers were painted with broken china distress paint & black soot distress paint for the centers, dried,
then I used the Emboss It Dabber over them
before sprinkling them with UTEE & heating...
since the flowers are small,
I only used one layer of UTEE on them...
this Blossom Bucket flower accents the large flower...

here's a better look...
the thin layer of distress paint,
covered with UTEE makes the flowers look faded & very vintage...
I like that this is so quick & that the UTEE can be easily melted with the Heat-It tool...

I like to include helpful tips with my tutorials...
here goes...
***TIPS***
- you’ll notice that Glue N Seal is an excellent paper adhesive and that it does not bubble vintage paper
- the metallic stains add great details, like the base edge & the tiny metallic dots
- when using the stains to add an edge to the base, make sure the dabber top is not saturated. a fairly dry dabber top is best
- to easily paint art parts, apply a small amount of distress paint onto the craft sheet & spread the paint over the art part with your finger
- UTEE is very forgiving. if the UTEE cools before you stamp into it, just heat it again with the Heat-It tool & stamp away!
- red rubber stamps are best for stamping into hot UTEE. the melted UTEE will not damage the red rubber stamp
- when stamping with water, press the stamp into the water once only...if there is too much water on the stamp, the stamped image is blurry...
- Multi Medium is a great adhesive for adding embellishments over glossy UTEE...
- oh my...totally LOVE LOVE the Emboss It dabber...so convenient...
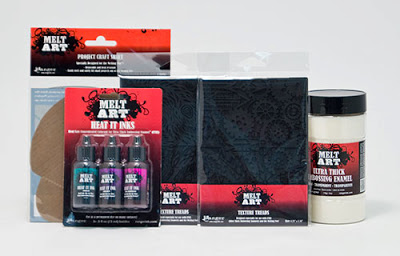
Ranger has donated a GREAT GIVEAWAY prize, for me to share with my blog friends...
just leave a comment on this post &
you'll be entered to win these
H O T
goodies...
(get it? HOT...melt art?)
I see a giant 8 ounce UTEE jar, 2 texture treads, some heat- it inks, and a melt art project sheet...
the winner will receive
lots of FUN melt art supplies to...
make art!
wendy
108 comments:
Thats lovely! I have never tried melt art before .. something to try maybe x
Just gorgeous! Those UTEEd flowers make your project. Lovely backgrounds. I can't wait to try this. Thank you for the tutorial.
Kate
Thanks for the step by step how to's. I can't wait to get the time to try this at home. The end products are just gorgeous! TFS
Elizabeth
way cool This melt art stuff really looks like fun!!!
Melting pot play is one my favorites. I love experimenting and using ute to cast embellishments with a mold.thank you Ranger and keep all this fun coming!
I don't use my melt pot anywhere near enough. I love these two projects and the step by step instructions. Thanks!!
Great project, Great give-a-way!
Thank you!
Lori
Thank you Wendy for those step by steps, I appreciate instructions!!! Beautiful results on your blog. Thanks also for the giveaway.
Thanks for sharing how you did your very cool projects Wendy.
(you have unintentionally tickled my funny bone as well and sent me into reams of laughter at myself!)
It was only 5 am when I happened upon your post and I am in obvious need of some coffee. So even though you didn't mean to you have started my day off with a good ole belly ache laugh. Gotta love it!
Great Project. You've inspired me (once again) to try a new technique. Thank you.
Val in Michigan
I have been wanting to try this, but wasn't really sure how to go about it. I think you outlined it perfectly ! Thanks Wendy .. you ROCKS !! Have a great day
Very cool.... I' be been wanting to try melt art.. Thanks for the giveaway.
Looks like alot of fun. I can't wait to try it! Thank you Wendy and Ranger for the awesome give away! Got my fingers crossed!
I love this. I'm so ready to get my utee out and play
Thank you
Thank you! Beautiful results!!!
These are amazing! Thanks for the step by step!
Both of these are gorgeous Wendy!!! I love that you used the Distress Paint with the UTEE. So COOL!!! Love those ArT Parts!!!!
Fantastic projects thank you for sharing.
Lovely projects and some great tips! Thanks to you and Ranger for the chance to win some great goodies!
So cool Wendy girl! Have my unused Utee melting pot. Looks like I'll be using it in the next few days. Checking out the Melting Event as well. Would love to win those goodies!
Mary
Thanks so much for the lesson I have never done melt art before. Not sure I am safe around hot things!! But it looks like great fun and you make it seem so easy!
Thanks for sharing the technique. Now to drag out the melt pot and set it up and give this a try.
Thank you for the wonderful ideas! Need to play more! Thanks too for the chance to win!
These are absolutely gorgeous!! I love, love the designs!! What an awesome use of the melt art supplies!! Thanks for the inspiration!! Have a great day :)
Lisa
A Mermaid's Crafts
Two more fabulous makes Wendy and your tips are so useful. I agree with you about the embossing dabber, it is invaluable! As ever, thank you for giving us so much inspiration.
These techniques are just begging me to want to have a go at them. Just need some of the missing stash from my supplies. Going to have a go though so thanks for sharing your talent.
This looks really hot! Fingers crossed :D
Gorgeous, Wendy, just love all your tutorials and now just need some of these goodies to make them. Thank you for a chance to win.
Awesomer! Love UTEE, just never think to get it out as I have a hoard of regular embossing powder to use. LOL. Coolio projects! Thanks for sharing!
Thank you so much for sharing these fantastic tips. LOVE your style and color combos. What a fabulous technique you used on the flower...have got to try this now.
You make the coolest stuff!! Good tips at the end. Off to do some crafting!
Love your art! I have some UTEE, but forget to use it.I need to drag it all out and melt up some arty goodness. The kids bought me the melting pot and some tools and a huge container of the powder.I think it is in a closet in the bag it came in...shame on me!
I love the Distress Paint vintage look! I just got mine, so I can give it a try. TFS all the great tips.
I love the way you explain everything in detail. It helps so much. and your Tips!!!! That's even better.
Thank you for the detailed project recipes, they look really good and doable! And thanks to Ranger for a chance at such a fab prize!
I just love the techniques you did with UTEE. I can't wait to try them.
I love how you explain how to do these techniques step by step. They are so cute. Love them all. WOW...what an awesome giveaway! Thanks. :o)
Great techniques as per usual! I'm getting out my UTEE right now . . .
Fab techniques! I will have to give this a try.
Wow stunning creations, thanks for the wonderful ideas :-) Kezzy xxx
Oh my, I love melt art, I have these things, but I did'nt know how to use so thanks!
I am so excited that I have to go down to my studio and try these 2 projects. You are the BOMB! Really cool projects!!!!
Your flowers are gorgeous! Looks like you had a lot of fun making them too!
Fabulous tutorial Wendy. I love utee.
I haven't done much melting, so this will be a fun place to start!
Love 'your way' with the melt art, Wendy! You've easily convinced me to get my melt art pan out from the cabinet! Thanks!
Bev / Tex
Love your projects!!! I have always wanted to try the UTEE, after seeing how easy you make it look, I am going to have to give it a go!
I've been a little afraid of my melting pot - your post, however, makes me rethink my hesitation......I'm going to go play!
My poor melting pot is being neglected....but this post makes me want to pull it out and play!! I love the texture you created!
Love the flowers! Something else for me to try. :)
Oh my...love the distress paint & UTEE flowers. Guess I better get the chocolate cleaned out of my Melt Art tray (yes, I use it to melt chocolate for candy)!
Love both of your projects! This has been a fun week at Ranger.
What creatively fun ways to use UTEE with other great mediums. Love the details in your beautiful art and excellent instructions. Thanks for sharing both!
Love the projects and the tips are an added bonus! Thanks!
Great projects and tips! This Melty Mania is getting me to think UTEE!
love, love, love these Wendy! Gorgeous projects. Time to dust off the melt pot again!
I've seen lots of interesting ideas for using UTEE, but I haven't actually tried it. Thanks for the chance to win some.
Noreen
http://craftyjournal.com
Wendy, this is so lovely! TFS!, I'll sure try the techniques!
love the vintage flowers!
Great instructions. Looks like a lot of fun.
Always wanted to try this...the effect is very neat!
Shine on!
Kelley
Fantastic creations!
Love your projects!
Your project is beautiful and I can't wait to use your techniques in my next project! Thank you!!
Lovely work and thanks a lot for your detailed tutorial, especially the tips at the bottom.
best wishes, serafeena
Thanks for the tutorials. I had forgotten how much I love to play with UTEE. Will have get mine out but would love to win the generous gift Ranger is offering.
So awesome, have got to try it!
So awesome, have got to try it!
Amazing!!! I have recently purchased a Melt Pot but am yet to use it! The has certainly given me a load of inspiration. Thank you
Gorgeous work MUST try this x
Love these UTEE flowers, so lovely and fun! I am getting so inspired to actually heat up my neglected melt pan! Enjoy the weekend!
Love your creations and tutorials for them! I would love to win the goodies you and Ranger are giving away, and I thank you for the opportunity.
fabulous tips and techniques ! Thanks for sharing !
Thanks for the tips. I have just gotten into playing with my melting pot and the treads. What fun!
I would like to try UTEE. Ranger has some great demos it is making me want to join in the fun.
I would like to try UTEE. Ranger has some great demos it is making me want to join in the fun.
Looks like fun :) Great job!
I love my melt pot and UTEE and feel I'm learning new skills all the time.
Fabulous inspirational projects - thank you
Once again you've inspired me...as you always do! Love how you've put both projects together...they are marvelous! Thank you for the tutorials!
Hot times! Love UTEE!
Love both of your projects!!!!!!!!! I haven't played with UTEE in a long time... oh for more hours to play!!!!
Thank you so much for sharing all your techniques with us. You are so inspiring and creative and I just want to craft all day now...thanks xx
I love your flowers. Thanks for all the tips. They really help. It helps your projects become more fun not frustration! I own 2 melting pots and 5 pans. You can say I love to melt. Paula
After all the verification my comment disappeared! I have not played with UTEE in over a year and have never played with Art Parts. I would say it is about time I got with the program! Looks like lots of fun.
Love the project Thanks for sharing!
Really cool! Love the second project with the UTEE on the flowers, love the raised petals. Would love to try your techniques!! Thanks for sharing.
Katie B.
Thanks for sharing your amazing creativity and inspiring us about making art! Love these fun techniques!!
Always love your work, very inspiring!
Thanks for introducing me to the Emboss it Dabber-what a great useful tool!
Fabulous!!! Thanks for the detailed how-to also!!
Beautiful flowers, would love to try some of this stuff. cricutrookie at aol dot com
thanks so much for the chance to win.
Lovely projects your blog hop came along just as I received my melt pot in the post!! Can't wait to try it out!! xhugsx Nikki
Well, as usual Wendy, you blew me away with your style, and the creativeness art! I am going to try this with my new flower stamp from your art stuff! thanks! Oh and I just got the big bee in the mail so think I will try it with that one too!!!!
Great ideas! Thanks for all the tips.
Love It! Jus got a melt pot & some UTEE. Time to play and definitely going to try out your "vintage" flower:-)
Great project Wendy! Thanks for sharing and the chance to win :-)
beautiful idea can't wait to try.
thanks!
Melt art is something I have ALWAYS wanted to play with. Thanks for the chance to win some stuff!!
AWESOME!! I always LOVE your ideas and this one is NO different!! THANKS for the GREAT tutorial and for the chance to win!! Have a FABULOUS WEEK!! =)
I bought a melting pot and your post has inspired me to get it out and give it a try. Thanks.
I definitely want to get a melting pot and some UTEE now and revitalize all those stamps that I have with some new projects. thank you for sharing your tips and ideas with us.
Just brilliant Wendy thank you for taking the time to take part in Melt Art Mania.
Love the faded look of the art part flowers. And the textured flower is fab. Thanks for the tips too!
Thanks for the great inspiration, fab projects and thanks for the opportunity. Debbie
Gorgeous! Love all that texture!
Absolutely beautiful! Thank you for sharing your talent!
Thats lovely! I have never tried melt art before.thanks
Post a Comment